Your team pours their hearts into creating killer content for your org, from snappy blogs to captivating videos. But nearly as important as writing and producing? Reviewing.
Content reviews are like a quality check-up that ensures your content is top-notch, error-free, and ready to rock the digital world. It’s a collaborative effort among team members, like content creators, editors, and SEO managers that helps ensure those blogs and ebooks are up to snuff.
> How to manage SEO in Airtable
When your content is accurate, consistent, and aligned with your brand, it can build trust with your audience. But content riddled with mistakes, inconsistencies, or inaccuracies can tarnish your brand's reputation and erode trust–not something any content marketer wants to deal with.
The content review process is also critical for collecting multifaceted feedback. Different teams bring unique perspectives and insights to a piece. And if you start the process early off, it’s a chance for brainstorming, refining, and making sure your content is hitting all of the right notes.
Why use Airtable to manage content reviews?
Pinging emails back and forth just doesn’t cut it these days. With Airtable, you can keep track of statuses and communicate deadlines in one place.
With Airtable, your team can collaborate in real time and leave comments. Plus, you can connect your other tools and streamline data. No more hunting down feedback or losing track of comments–everything is organized, accessible, and up-to-date in Airtable.
You also have the power to customize just about every part of your workflow. Create custom fields, views, and interfaces that fit your team's unique content review process. With all your content-related tasks in one base or interface, you'll save time, reduce errors, and keep your content marketing machine running smoothly.
Getting started in Airtable
Before you get started in Airtable, consider what data you want to track. This will help you choose which fields to add to your base.
For content reviews, you’ll likely want to know things like who’s editing what, and what the publish date is. We recommend starting with these field types:
- Single select field to track progress: Keep reviews flowing smoothly by tracking the status of each piece of content, whether it’s “in writing,” “ready for review,” or “ready to publish.” You’ll always know where work stands and can catch blockers earlier.
- User field to assign approvers/reviewers: Assign reviewers to each piece of content so everyone knows who’s responsible for what.
- Attachment/URL field to link out to content: Connect your work directly to Airtable by attaching your doc or dropping in the Google Doc URL. This way, reviewers can easily and quickly access the content they need to check.
- Date field to track due dates: In addition to a date field denoting your content’s publish date, you’ll also want a date field that tracks review deadlines (and more if your content review process involves several rounds of reviews).
Automatically notify reviewers
Chasing down colleagues for content reviews can be exhausting. But Airtable’s powerful automations let you automatically notify reviewers when a piece of content is ready.
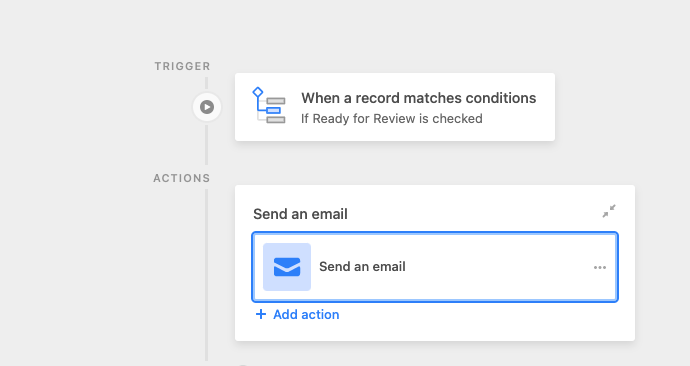
To get started, make sure your content review base includes a "Ready for Review" column. This column can be either a checkbox or a select field that you can toggle when a piece of content is ready for stakeholder review. Once a content piece is marked as "Ready for Review” (the automation trigger), a notification will automatically send to the assigned reviewers (the automation action).
Next, customize the notifications to suit your team's preferences. For example, send an email notification to the assigned reviewer(s) with the relevant details, such as the content title, due date, and any additional instructions. Then, set up reminders or follow-ups to ensure that reviewers don't miss their deadlines. It's a hands-off way to keep your content review process on track.
You can also set up conditional notifications based on various criteria, like the type of content, reviewer availability, or priority level. Then, you’ll be able to customize the content of the notifications, personalizing the experience for your reviewers.
Automating notifications in Airtable saves time and effort. No more manually sending reminders or tracking down reviewers–Airtable does the heavy lifting for you.
Add a Kanban View
There are a variety of views you can use for content reviews, but the Airtable content team likes one in particular: Kanban.
Airtable’s Kanban View gives you a visual overview of your content review process. Think of it like sticky notes on a board, but more powerful and organized.
One of the best parts of the Kanban View for content reviews is its simplicity. You can quickly create custom columns for each stage of your content review process, like "To Review," "In Review," "Approved," and "Published." Then, you can move your content pieces from one column to another as they progress through the review process. It's a visual snapshot of where each piece of content stands, making it super easy to see the big picture at a glance.
“I love Kanban boards,” says Airtable content strategist Nic Vargus. “It’s a really impactful way to visualize your responsibilities and deadlines. And moving a card from your stack always feels like a real accomplishment.”
Kanban view is also incredibly flexible and customizable. It’s a cinch to add due dates, assign tasks to team members, or set up custom workflows. And with the drag-and-drop interface, updating your view is a breeze.
Create a review interface
Our final tip streamlining your content review process? Create an interface.
Airtable’s Interface Designer lets you create custom apps for each of your team’s use cases, including content reviews. With Interface Designer’s simple drag-and-drop functionality, you can add explanatory text elements, buttons, charts, toggles, and more to help reviewers provide feedback quickly.
> Learn more about setting up a record review layout
There’s an array of interface layouts for you to choose from before you start designing. For content review purposes, you can’t go wrong with Kanban (see our section on Kanban Views above) or the record review layout, which lets users view and sort through multiple records with ease.
I love Kanban boards. It’s a really impactful way to visualize your responsibilities and deadlines. And moving a card from your stack always feels like a real accomplishment.
Once you’ve settled on a layout, we recommend adding:
- Text elements: Add one or two at the top of your interface to help explain exactly what the interface is and how stakeholders should interact with it.
- User filters: This filter ensures that each viewer only sees the assets assigned to them, simplifying the review process.
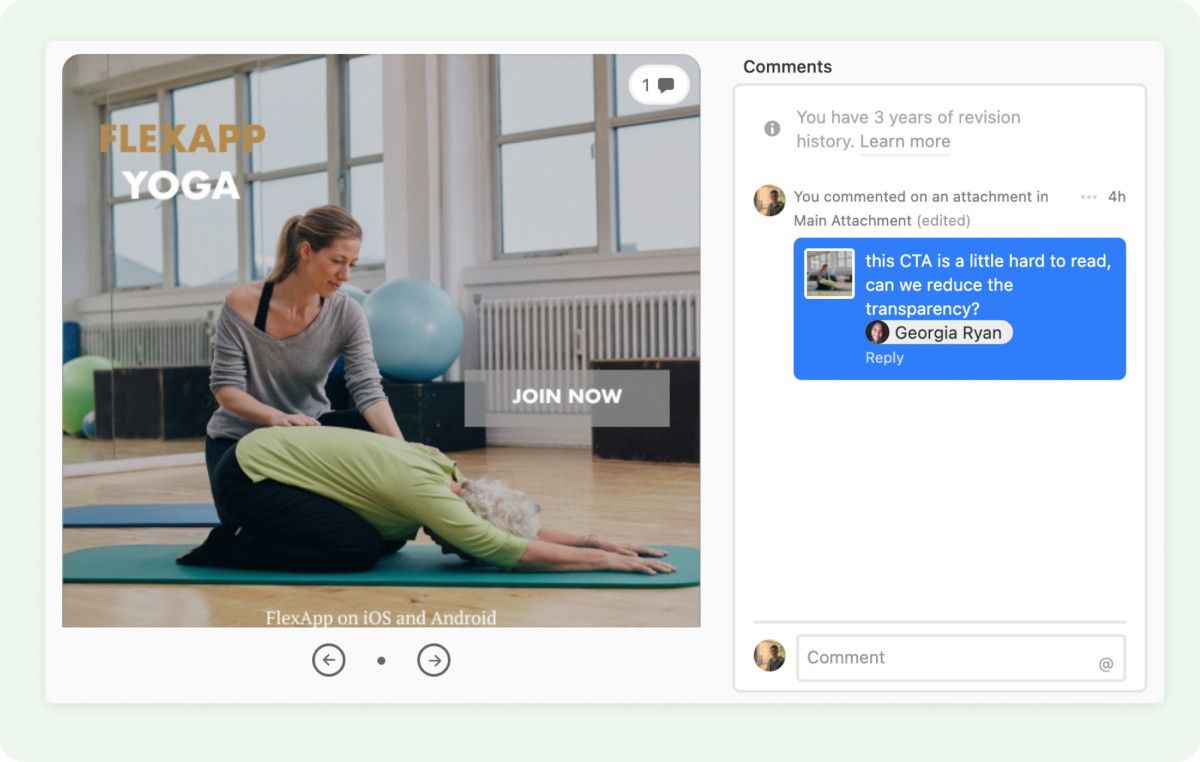
- Comment element: It’s helpful to make space in your interface for feedback. Adding comments to this element will help spark discussion and then add them to the record.
- Buttons: Buttons can trigger a variety of actions in an interface. For content reviews, it can be helpful to configure a button that changes the status of a piece of content (ex. Once the reviewer is ready to sign off, they can click a button that changes the status from “In Review” to “Ready to Publish”).
Ready to step up your content reviews? Then give Airtable a spin. With these tips in mind, you can keep reviews organized and efficient, letting you focus on creating the kind of content that wows your audience.
Uplevel your SEO tracking next! Check out our content marketing blog on how to run SEO in Airtable.