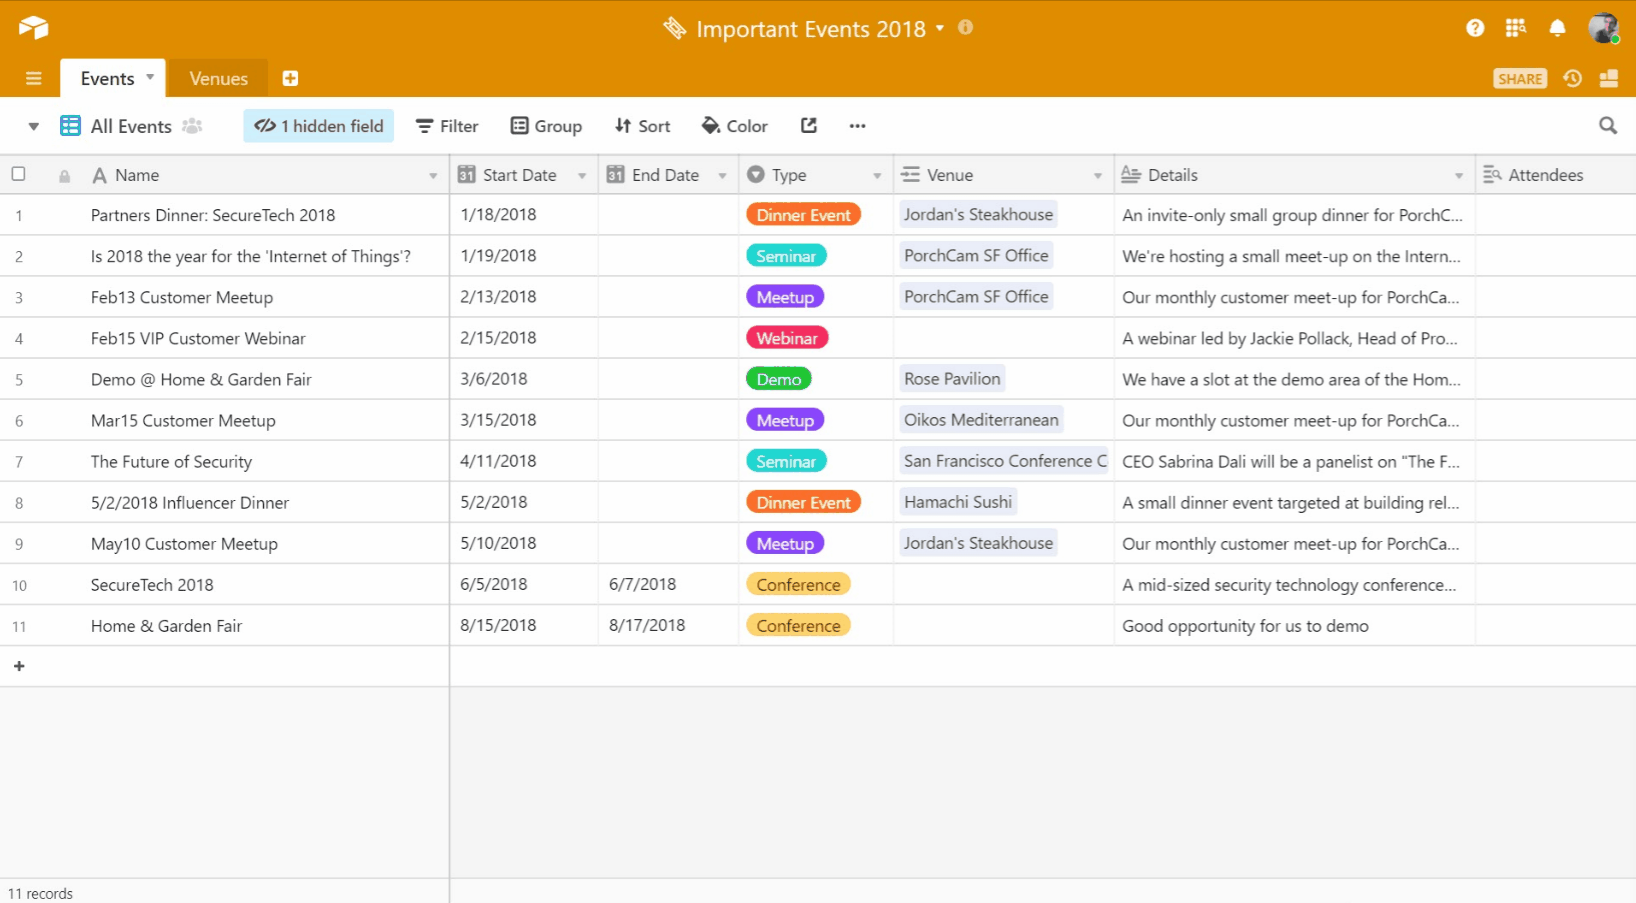
Event marketing’s versatility is a gift and a curse. There’s no denying the efficacy and long-term value of a well-executed event, but the journey from planning to reality when responsible for a diverse slate of events means a logistical juggling act and a fine line between success and disappointment—one missed detail or forgotten update can mean an unhappy client or a vendor without a booth. The importance of having all the information you need to do your job in one place can’t be understated—and it is equally important to eliminate click-a-thons through endless tabs, where vital details may fall through the cracks.
Fortunately, adding a CRM to your Airtable workflow is a simple way to consolidate the material you need to throw the events of the year. We’ll show you how to add a list of contacts and an interactions table to your existing Airtable base, so you can say goodbye to lost information and unhappy customers and spend more time basking in the glow of throwing the Best. Event. Ever. (Until the next one, of course!)
Create a connected contacts table
Let’s start by creating a contacts table (in this case, a list of our VIPs) and linking it to the rest of our tables. A linked contacts table makes it easy to organize, store, and access information about individual people throughout your entire base—a crucial foundation of any CRM. You can also save yourself some time and import an existing spreadsheet directly as a new table.
The better-organized your contacts table, the easier it will be to eventually link this information to other tables as you develop your base, and to access information throughout the base with minimal clicks.
Create an interactions table
A fully-functional contacts table is a great place to store vital information about the people in your workflow, but sometimes a different type of table is needed to mirror these dynamic relationships. These are called interactions tables, which are useful for recording information about specific instances and (you guessed it!) interactions. In this case, it makes sense to build an interactions table to keep track of attendance for various events. We will start by creating a new table, then connect a table of contacts to a table of events.
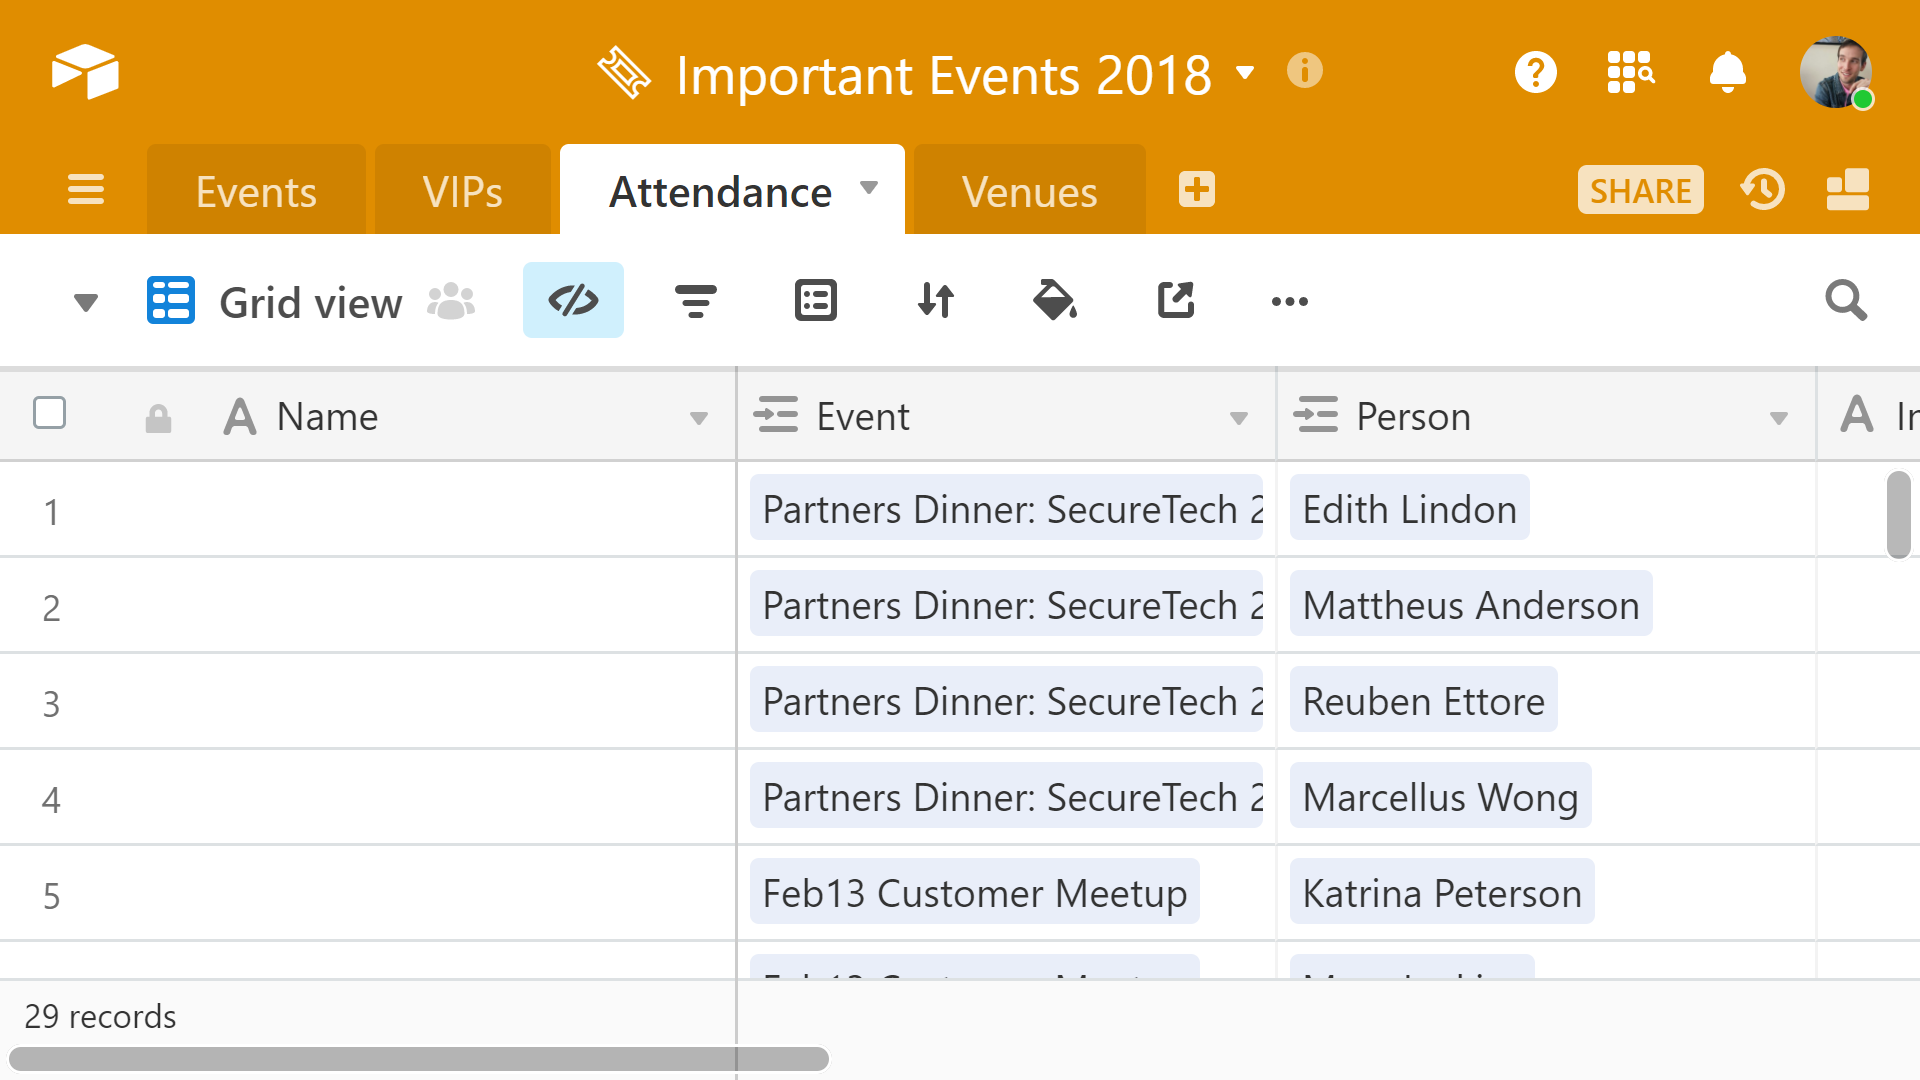
To make this table, create a new table, then connect the contacts table and events table to this new table with linked record fields. These linked record fields contain the two most vital pieces of information for each record in the Attendance table—the guest’s name, and which event they were invited to. We can use this foundation to link additional information from different tables and fields. We can also create new fields (not visible in the above screenshot) to track whether a guest was invited, RSVPed, and attended the event in question. Hang tight—we will come back to those.
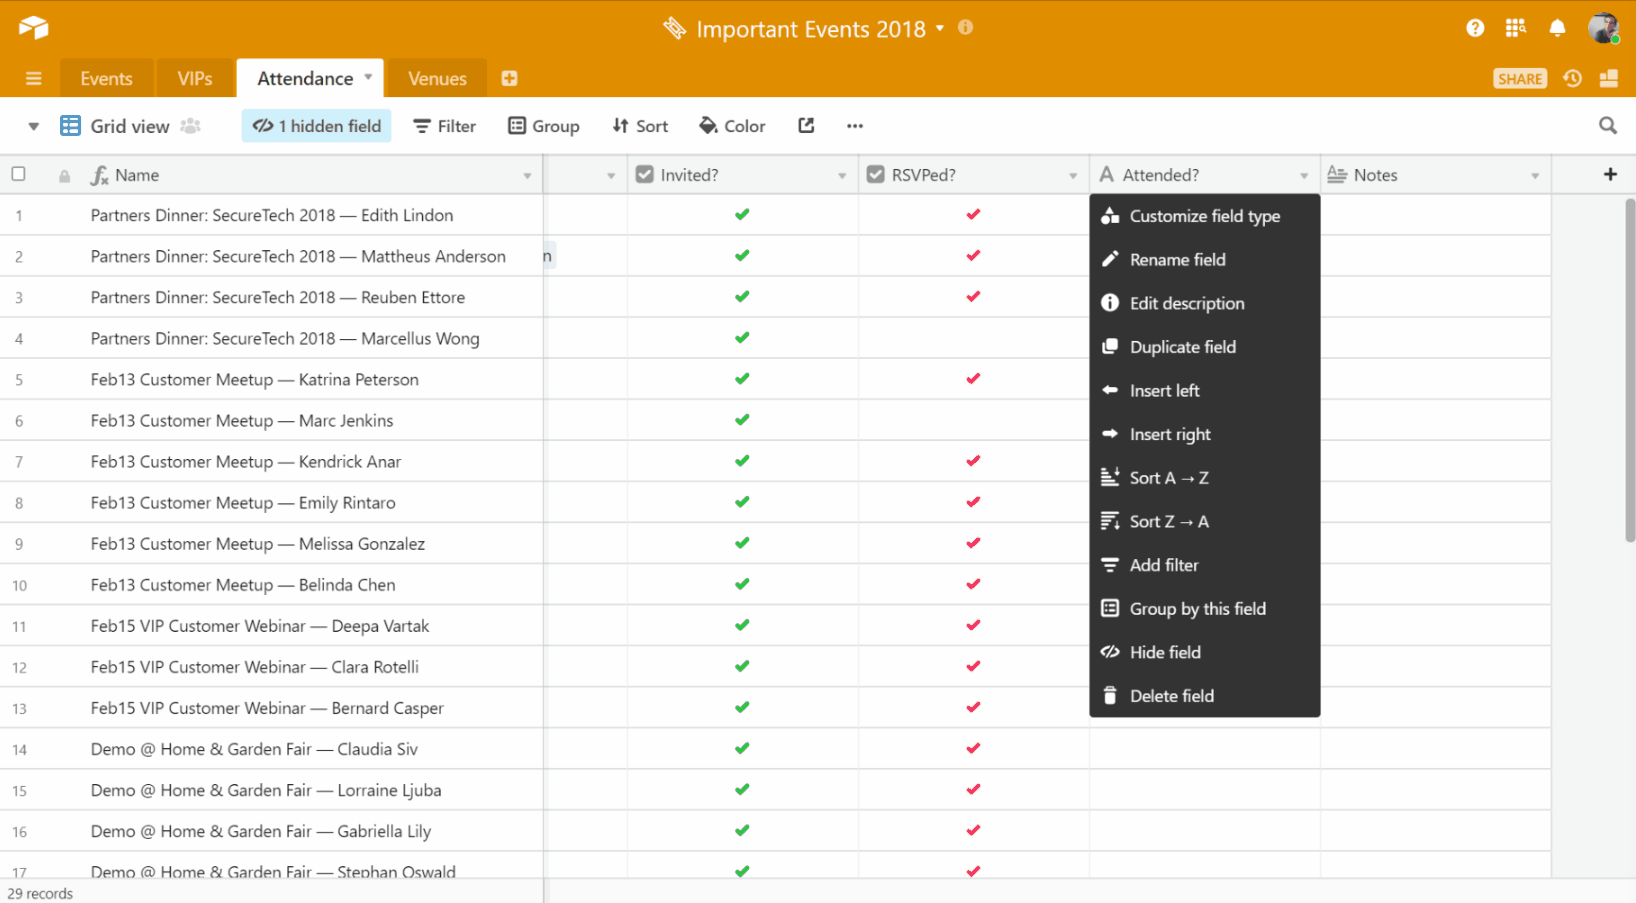
No matter how organized our tables are, keeping track of multiple events and guests in lockstep can be complicated. Sometimes the information we need exists in separate places and would be more useful viewed in tandem. Using the formulas function is a great way to make specific information, or combinations of information, available to us at a glance. In this case, let’s combine the Event and Person fields in the Name field.
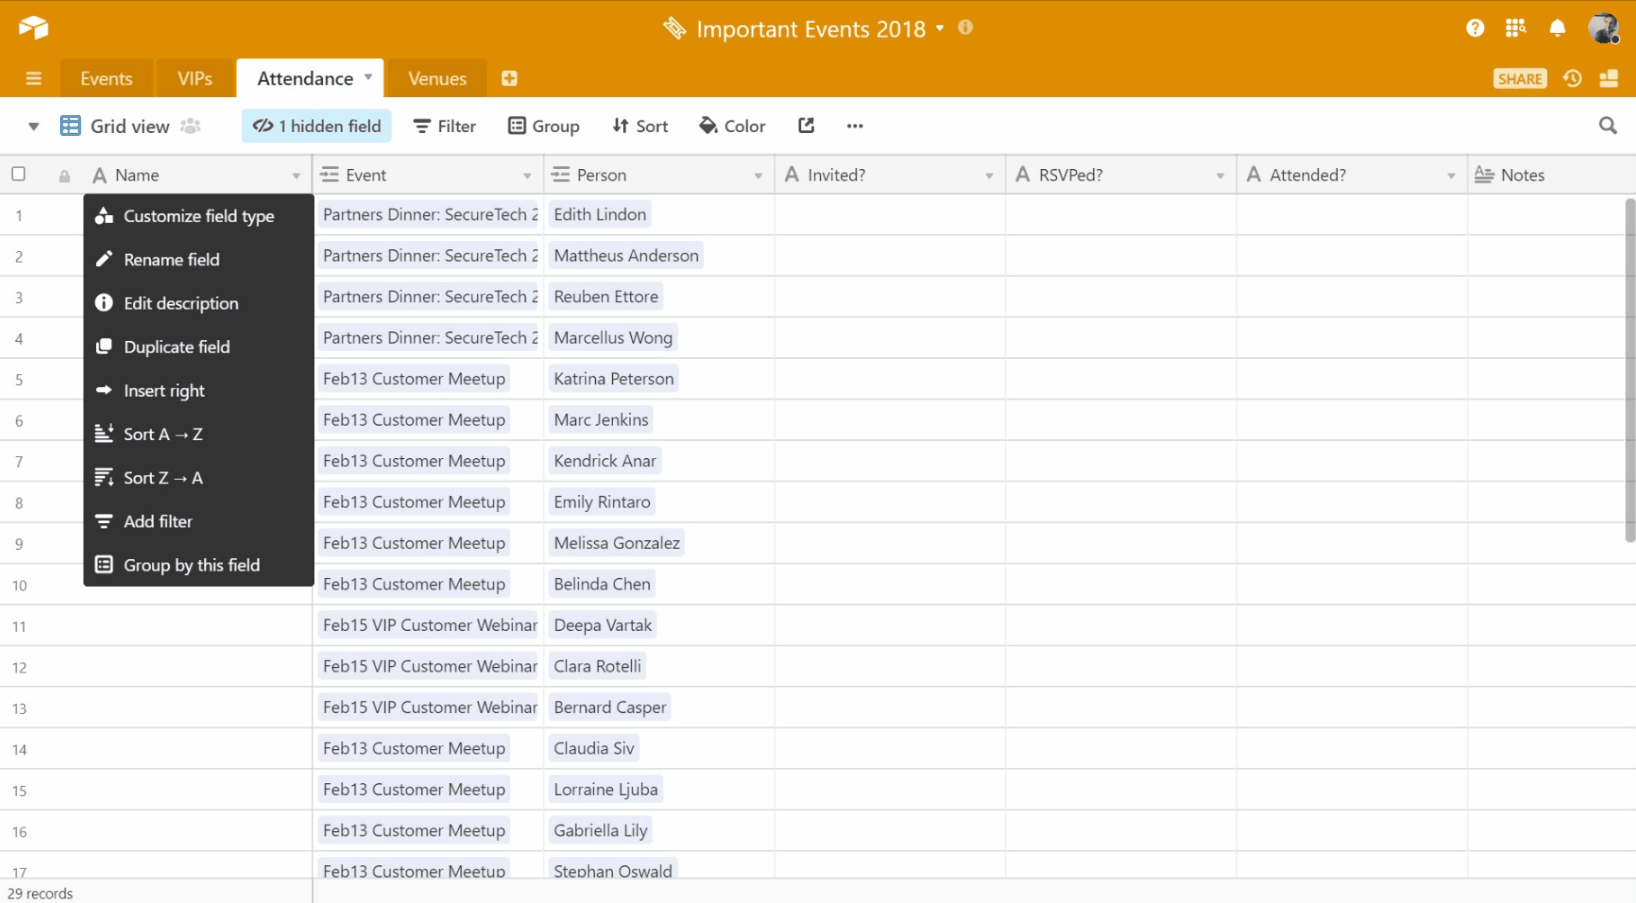
The Invited?, RSVPed?, and Attended? fields we mentioned earlier are tailor-made for checkbox fields. The checkbox field is useful for visually representing the answers to the Yes/No questions posed by the field names—in the affirmative (with a check) or negative (by leaving the cell blank).
Gain additional insights
Our VIPs and Attendance tables now contain a great deal of interconnected information—we can augment that data using supplementary features (like rollups) to further customize these fields and glean additional insights. Rollups allow us to summarize data from records we have linked to a table—in our case, this feature would be especially useful for tracking the number of attendees and invites to a specific event.

With both fields rolled up, we can easily compare the number of attendees to the number of total invites for a specific event; the headcount will automatically adjust as we update the respective fields, ensuring the information is always accurate and up-to-date.
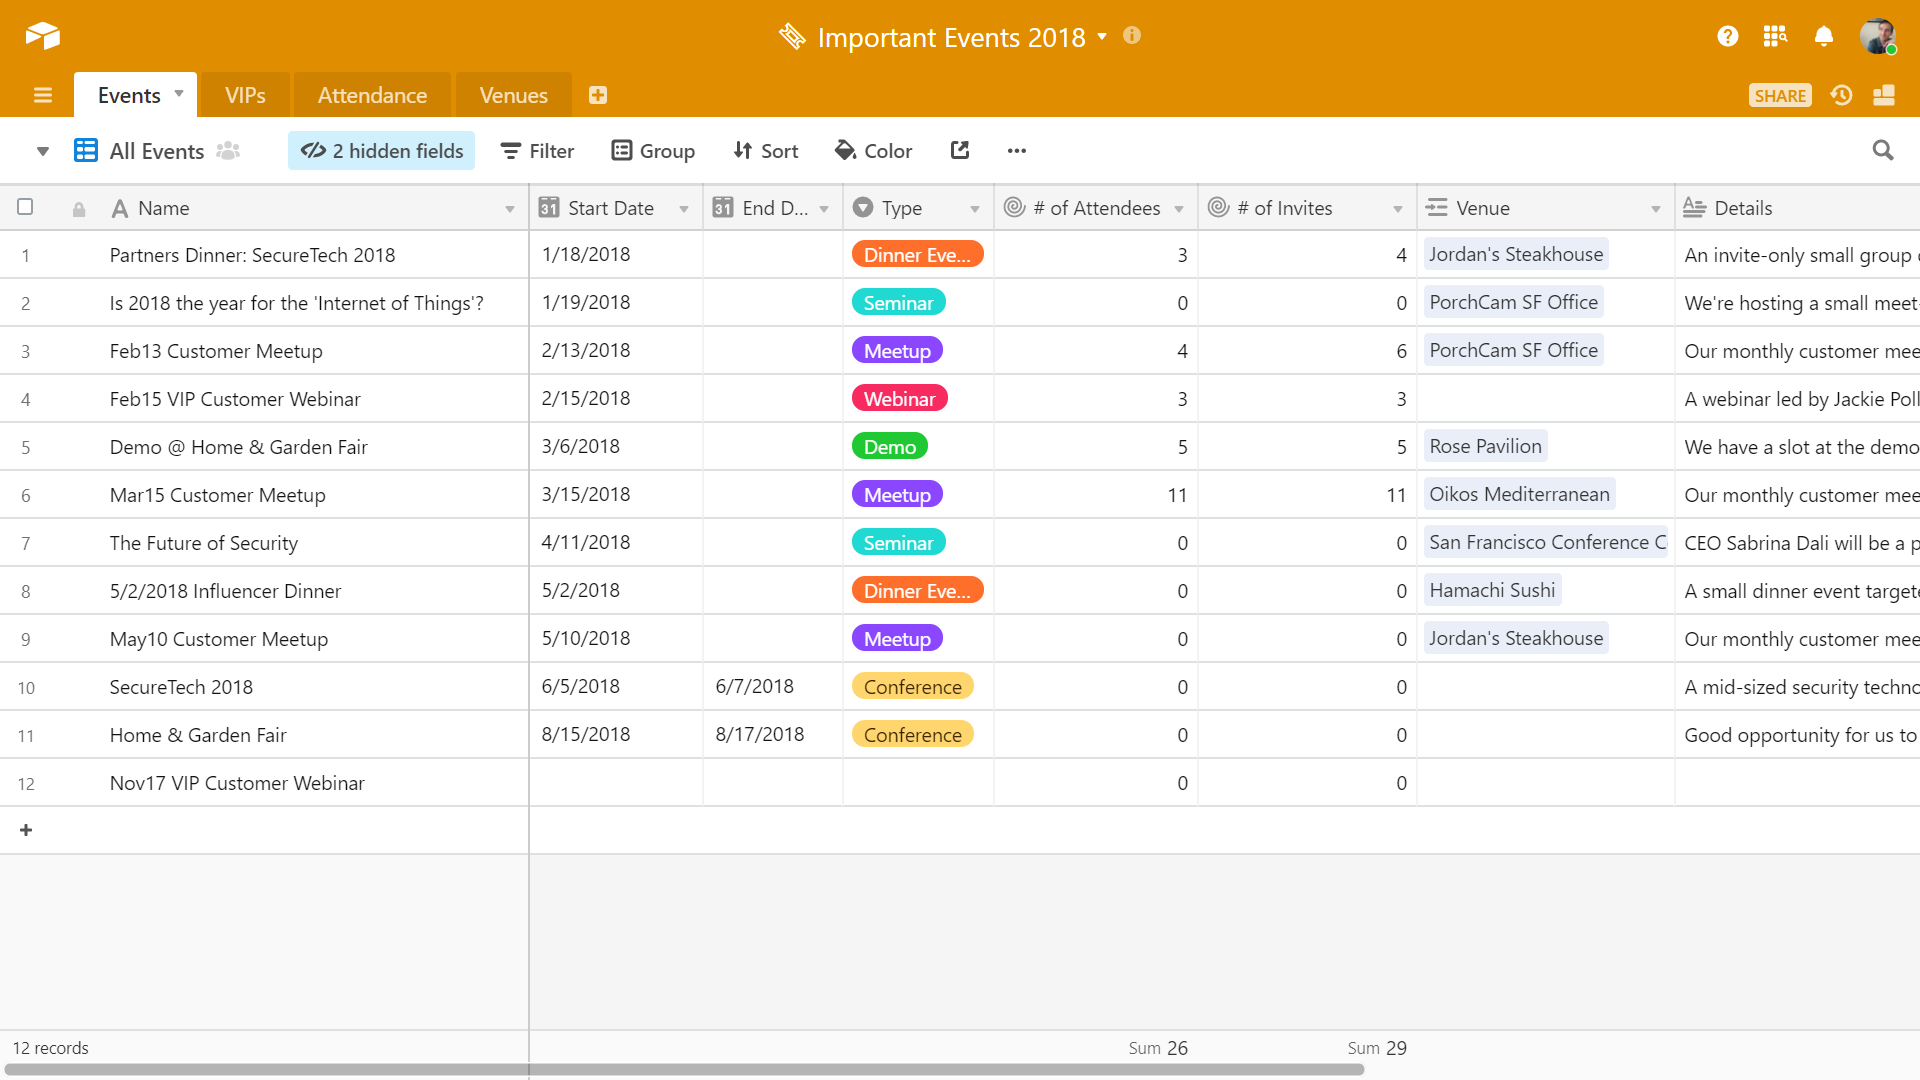
At a glance, we can see that most events for which we sent invitations have a 100 percent attendance rate. We can just as easily see the events with less than 100 percent attendance by comparing the two side-by-side. This data is useful for multiple reasons—it can help us identify which VIPs to reach out to, allow us to stay on top of attendance numbers as we receive RSVPs, and more. If we notice an especially important VIP is or is not attending, we can review the Notes field on the Attendance table for additional information, helping maintain a personal touch in our interactions.
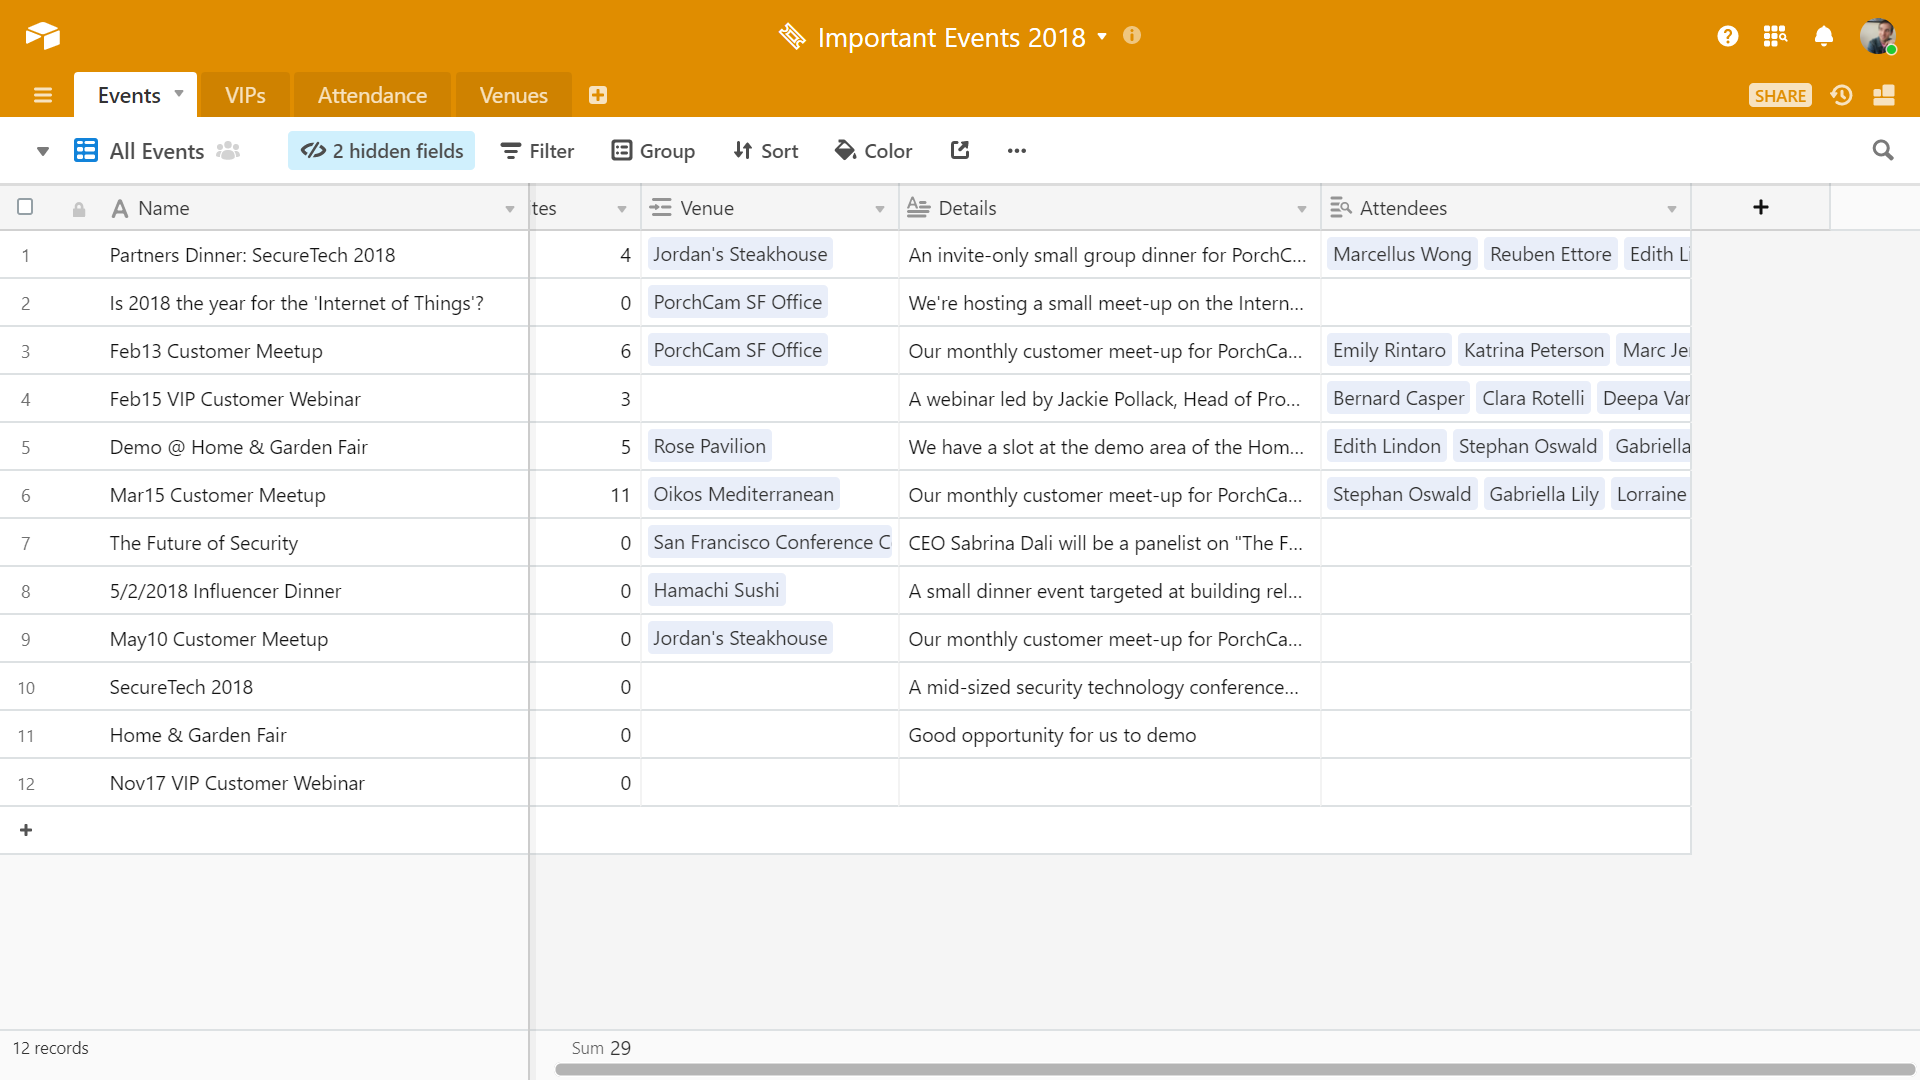
Some information, like attendees, is significant enough that we will want to see it in multiple tables throughout the base. A lookup field is a great way to pull information from one table to another, and it utilizes the links we have already created between tables. As a bonus, these fields will adjust themselves when information is changed in the looked-up field—no more wasted time identifying and reconciling discrepancies between countless tables.
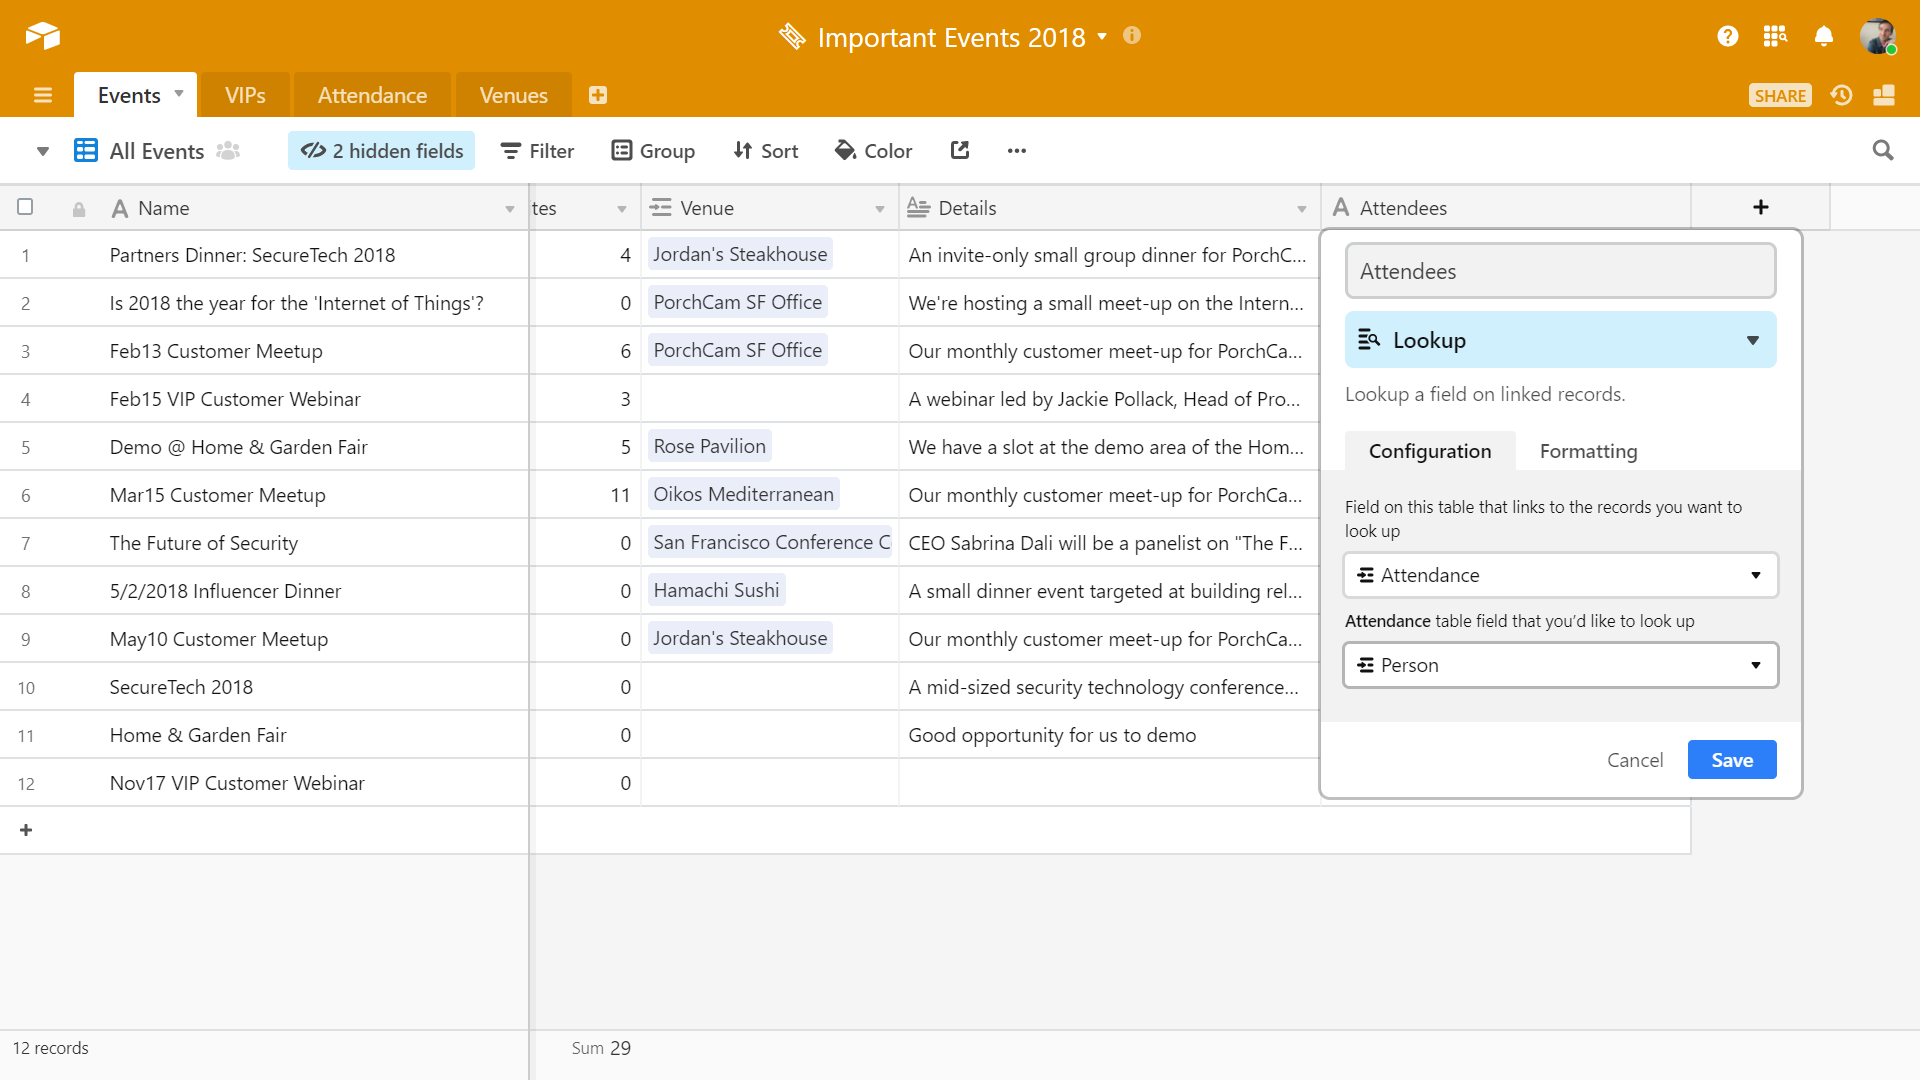
We now have a more complete picture of our events available in a single table, with the lookup field providing us precise, timely information.
These are just some of the ways that contacts and interactions tables can assist with your event planning workflow. No more spreadsheet nightmares, no more "I should remember to…" moments—instead, you can enjoy the benefits of a single resource that keeps up with your planning needs.