A button is a clear call to action: it’s obvious, in your face, and just begs to be clicked.
Airtable’s “button field” simplifies and automates all manner of tasks, just from a single click. It can launch a web page, integrate with apps, email a customer, or open a project slide. Here are some tips on how to go about adding buttons to your base—and how to get people to click them.
How to use a button to launch a URL
One of the most straightforward things a button can do is open a URL, leading you to a new website. And with Airtable’s formulas, you can not only fire up a single link, but also pull information from another field, so that each button automatically links to the right place.
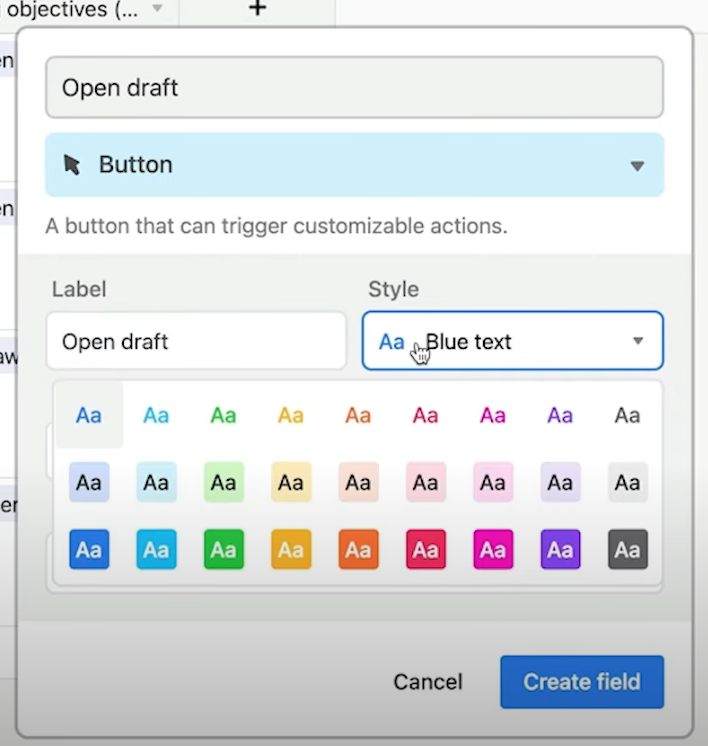
To open a URL to a linked piece of content, like a draft document, start by adding a new field. Then, choose the “button” type and give it a name. You can customize the button’s label and color before choosing the button’s action.
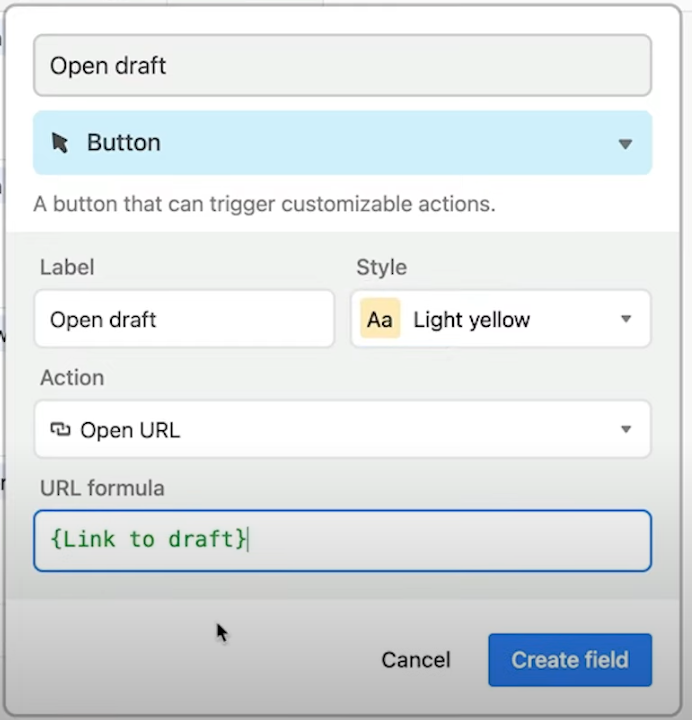
Selecting “open a URL” will display a formula field, allowing you to set up equations and calculations. In this example, we want to bring in a link from another field called “Link to draft.”
A formula can return the value/entry of a field just by using the field’s name, surrounded by curly brackets. So we connect the “Link to draft” field by entering the formula {Link to draft}. When you okay this, the button it creates will automatically pull the URL that’s entered from that record, and launch it.
How to use a button to launch an app or trigger a script
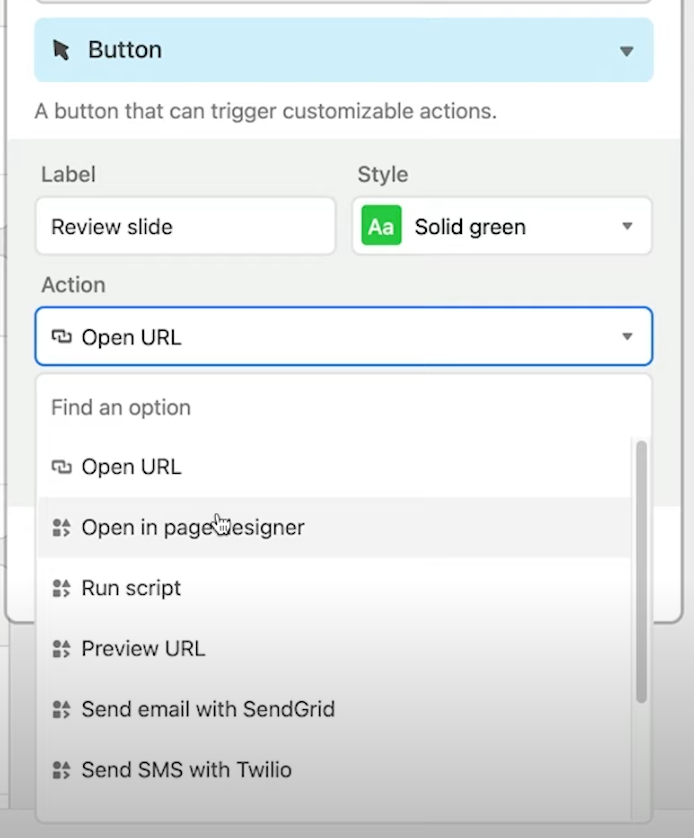
Buttons can also be connected to apps to trigger an email, attach a photo, run a script, or automatically generate a new and beautiful page with page designer.
Here’s an example of how a button linked to a page designer layout can simplify a regular process, like adding weekly slide decks. Like before, we start by creating a button field and giving it a name, label, and color—then it’s time to pick an action.
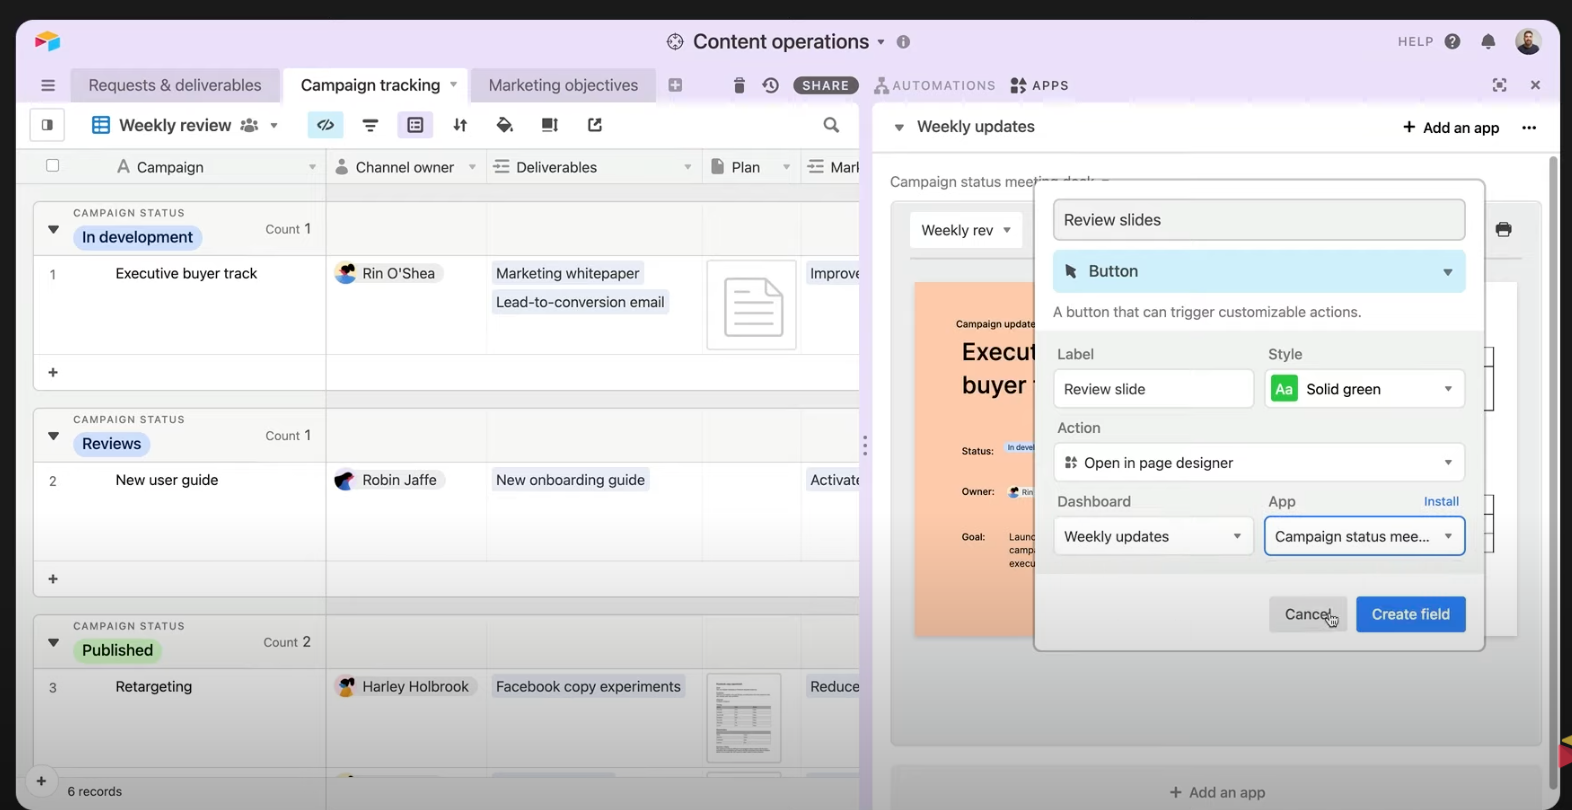
In the above example, we connected the button to a page designer layout we made for creating slide decks, and then selected the meeting deck. Now, clicking the button opens the meeting deck, and most importantly, opens the specific record the button targets. It sounds complicated, but it’s quite simple—this makes it easy to transition from a record to the relevant slide.
How to make a button selectively active
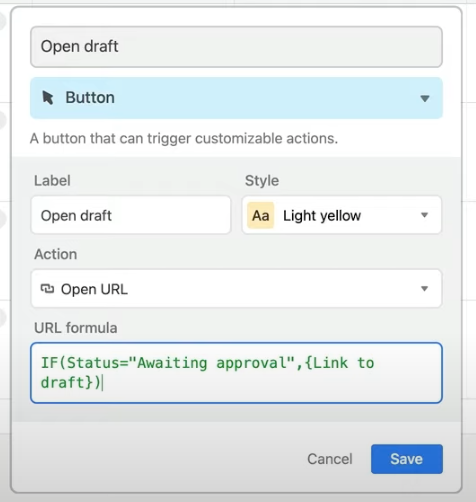
You can add an “IF” statement to the URL formula to make a button only clickable in certain circumstances.
Say you only want drafts to be accessed when they’re finished and waiting for approvals. You can create a button that links out to the draft, but with a formula condition (see above) that only makes the button active when the record’s status is “awaiting approval.”
How to make sure people click on the buttons
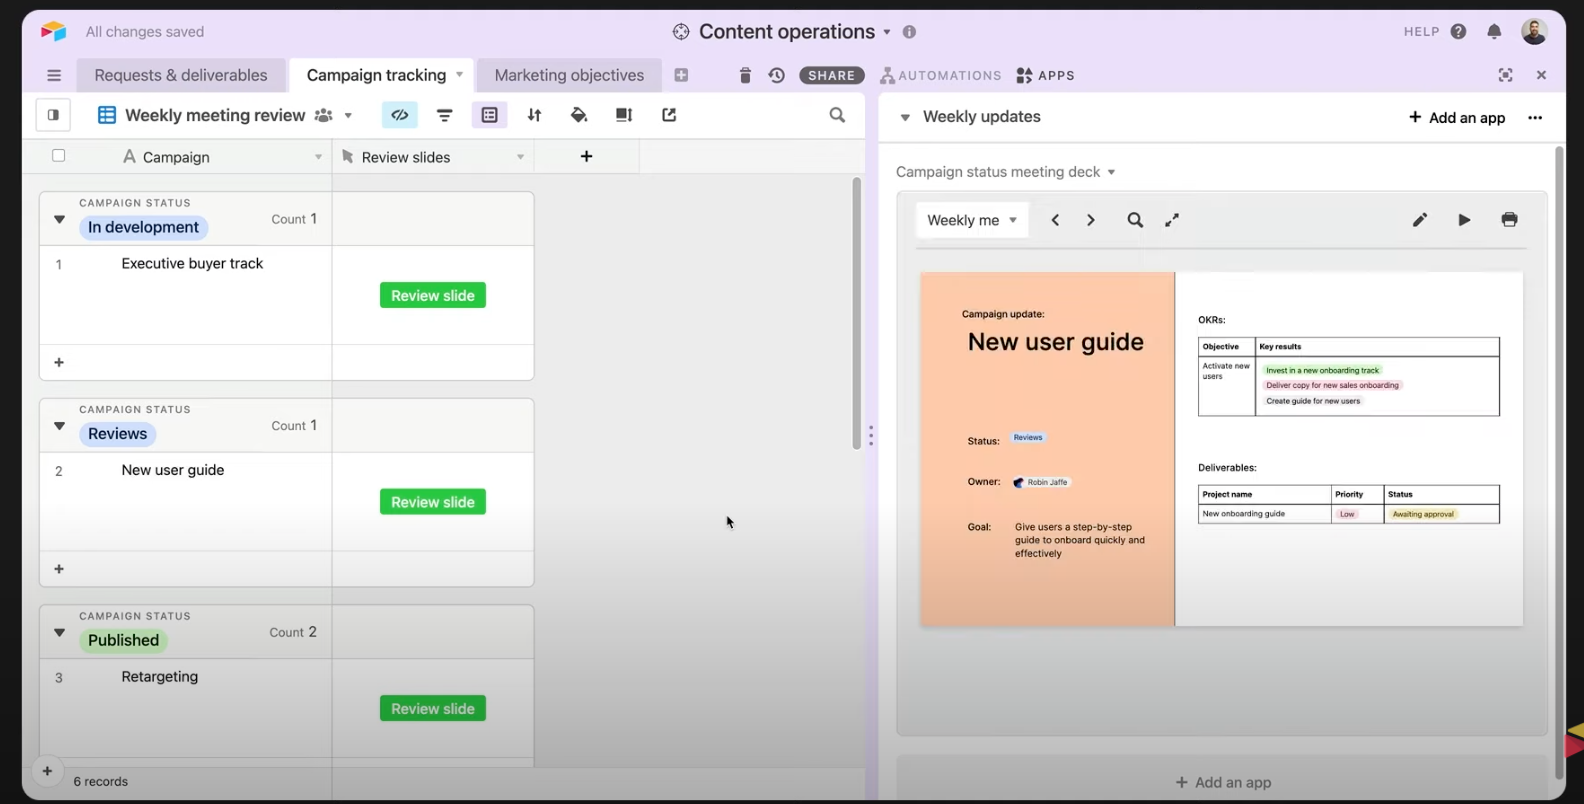
But how do you get people to actually click on the button? One option is to make them prominent in certain views to draw attention, giving collaborators a clear call to action.
For example, we’ve created a weekly campaign meeting view above, with all the extraneous information stripped away and the button placed prominently. In this shared view, it’s clear for the team that the content needs reviewing–all they have to do is press the button to gain access.
Buttons are useful tools to simplify interacting with your base. They’re visually distinctive and straightforward to use: you click them, and they launch.