Public relations may be about cultivating and maintaining an image, but that cultivation doesn’t happen in a vacuum. Relationships are the key to opening PR doors, and their inherent dynamism can just as easily lead to nightmares. Keeping track of which media outlets to court, while simultaneously sustaining relationships with the right writers and editors means staying organized—and having the tools to leverage appropriate information in intelligent, targeted ways.
Airtable Apps help you achieve your PR goals by consolidating ever-changing information in a single, dynamic database that delivers the at-a-glance insights you need to remain on track. Chart your pitches, keep up with your contacts, quickly find the right person for a job, map the location of your next meeting, prioritize publications, and more, so you can spend less time tracking details and more time placing the perfect story.
Here’s your step-by-step plan to get it done:
Chart your pitches by status
Print a comprehensive contact sheet
Find the right contact, fast
Locate your meetings
Prioritize the best pitch
Chart your pitches by status
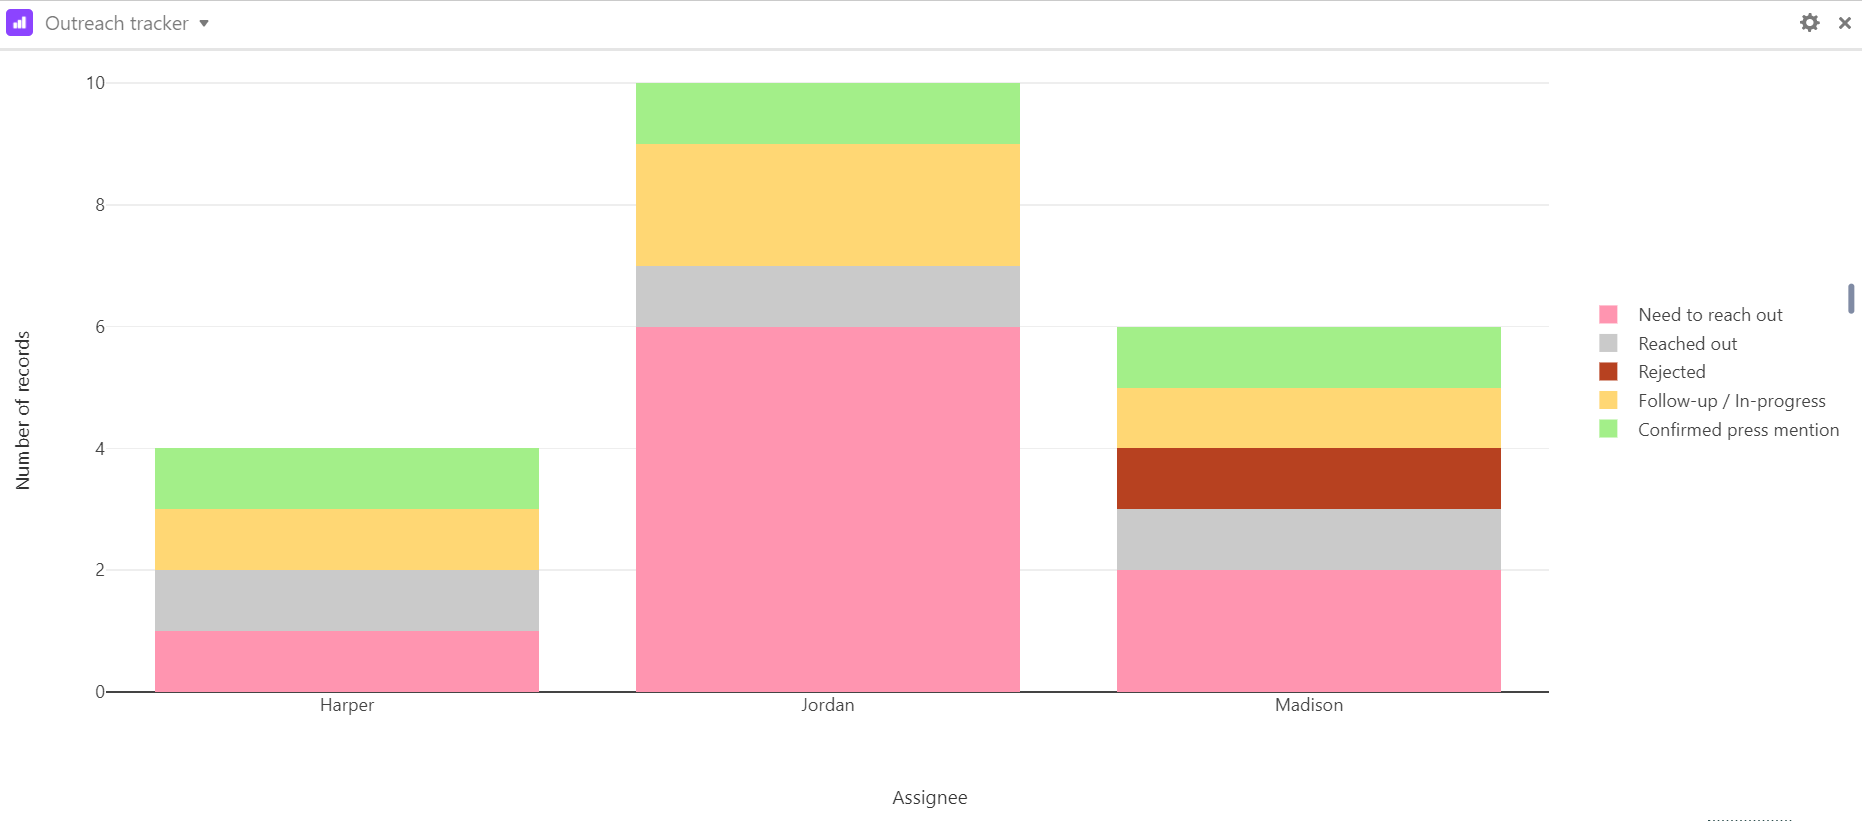
The chart app makes it easy to track outreach, giving you an overhead view of each piece’s status and who is responsible for what.
Step 1: Enter the pitch details.
Make sure that your base has a table listing pitches in various stages, along with single-select fields indicating each pitch’s respective assignee.
Step 2: Add a chart app to your base.
Open the apps menu, click the add an app option, and add a new chart app to your base. You have the option of creating three different charts—a bar chart, a line graph, or a scatter plot.
Step 3: Adjust the chart app to fit your needs.
Chart apps are flexible, easily customizable tools that fit a variety of needs. A bar chart is especially useful for comparing specific X-axis values, which makes it a good choice for counting the number of pitches assigned to specific employees. We recommend that the X-axis be the name of the assignee, while the Y-axis displays the number of records.
Print a comprehensive contact sheet
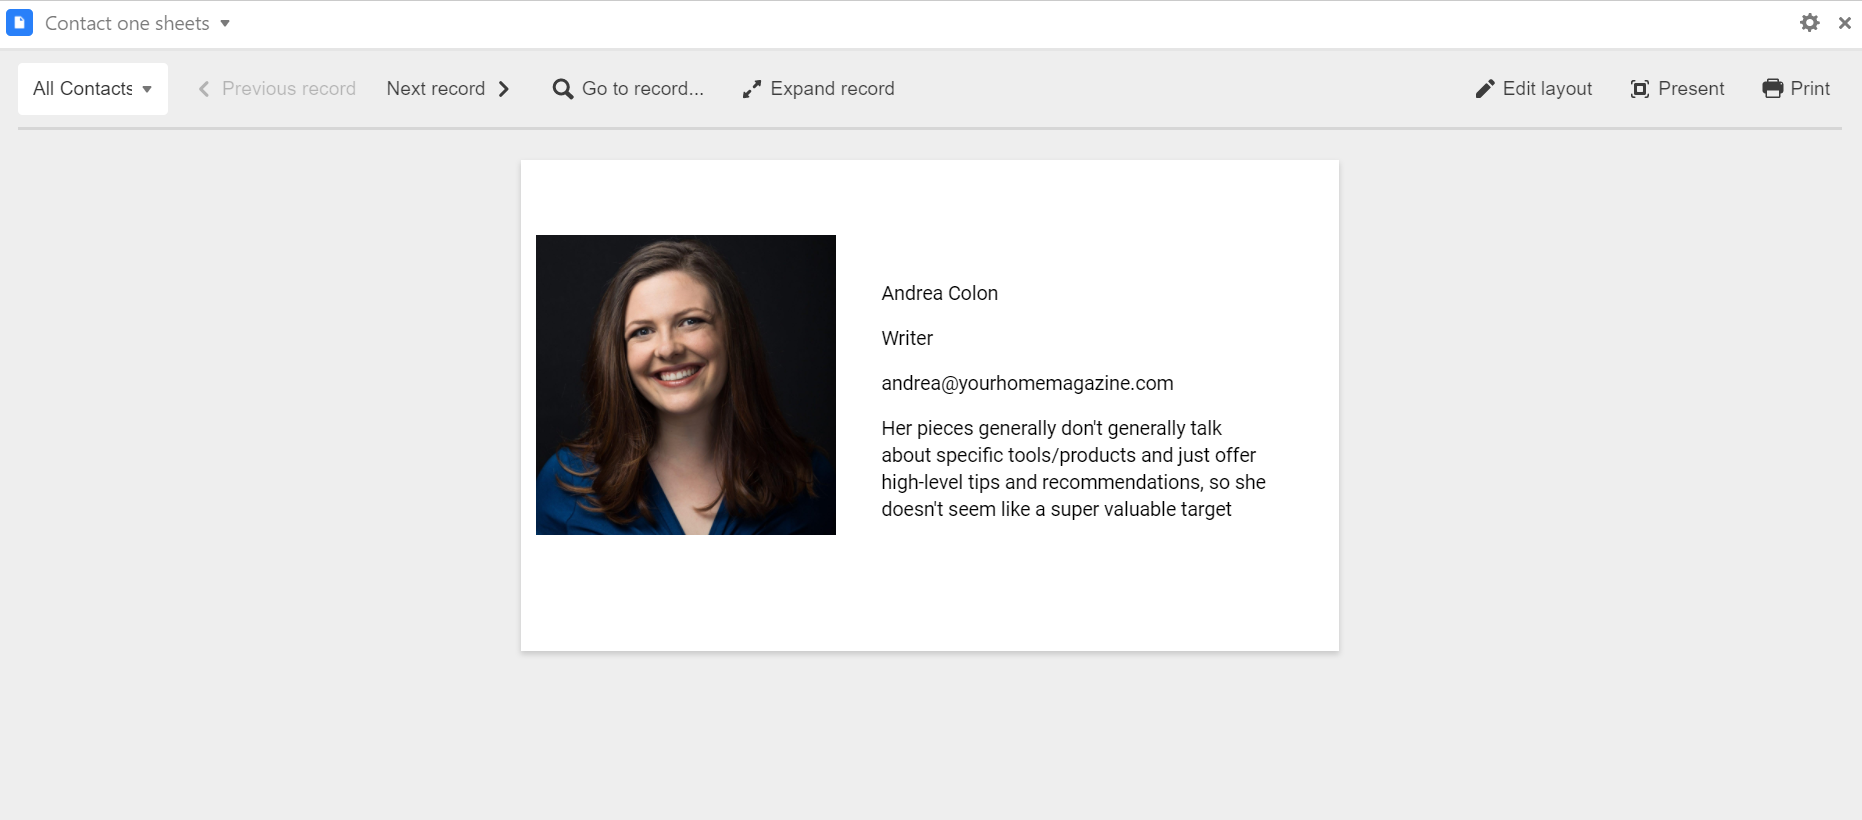
The page designer app uses your base’s existing data to create custom reference sheets, all using data directly from your records. You can even turn them into PDFs or print out physical copies. Use them to build a handy visual reference for putting names to faces and keeping your contacts’ roles straight while prepping for events.
Step 1: Add a page designer app.
Select the "add an app" option in the apps menu and add a new page designer app to your base. Make sure to pick the correct table and view and select your preferred page size.
Step 2: Design your template.
Choose what information you want to include on each page. You can drag and drop elements from your base onto the page, tweak fonts and colors, and more to create the perfect contacts sheet.
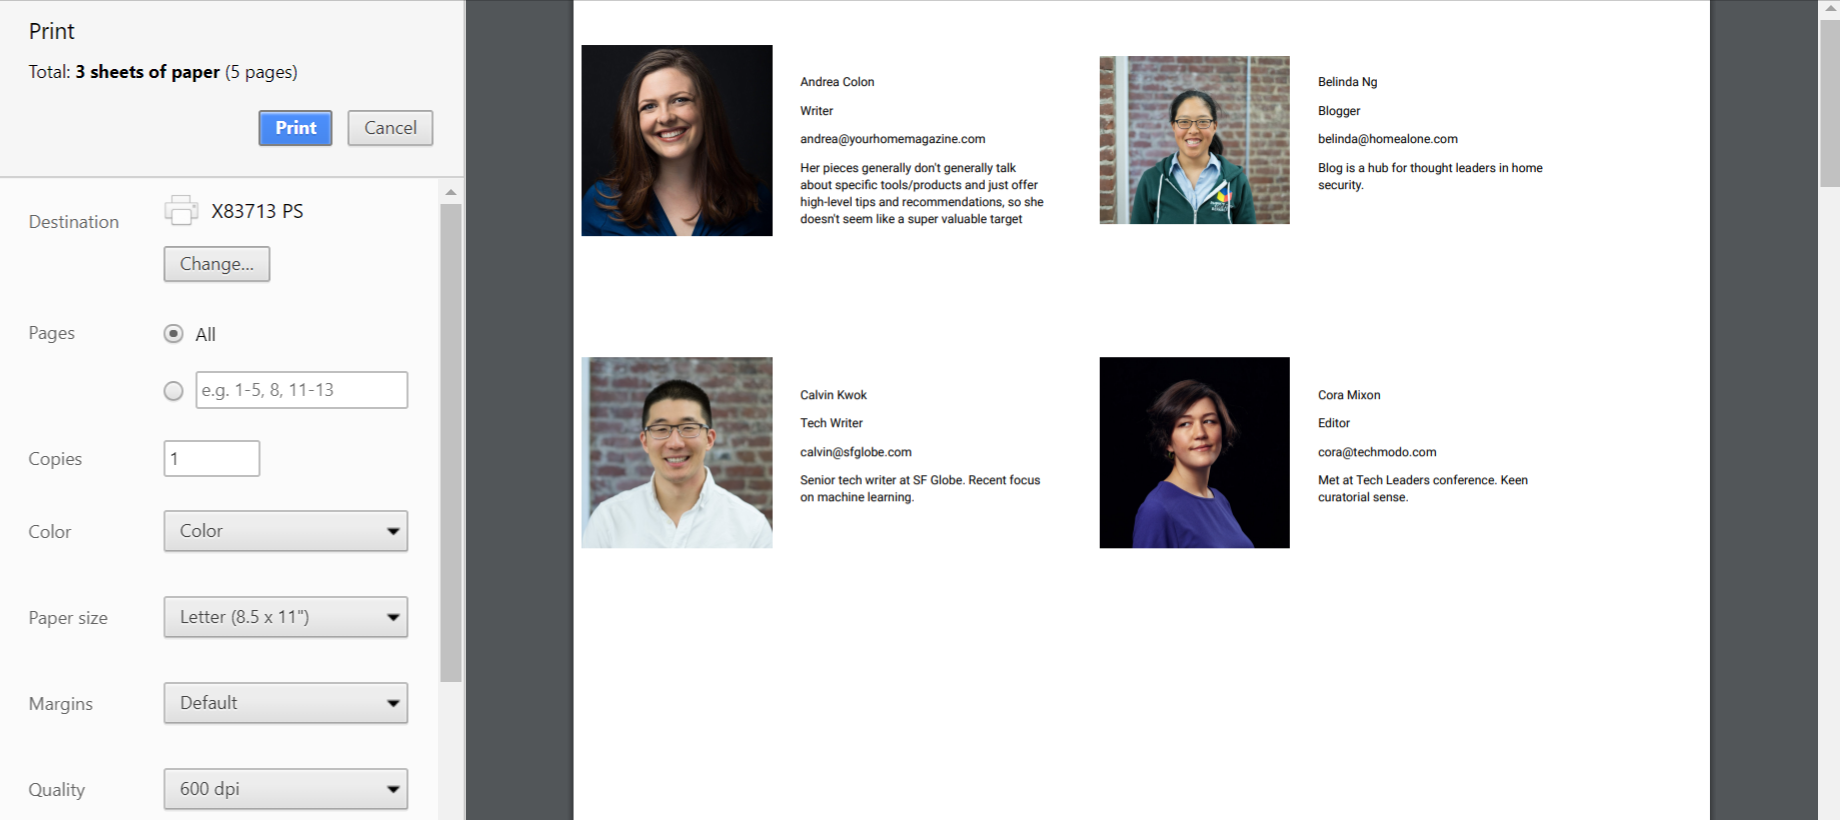
Step 3: Print your lists or export them into a shareable PDF.
When it's time for your next event, you can quickly print the sheets or create PDFs from the relevant records. Tip: to print multiple contact records on one page, select the option in your computer’s print dialog to display multiple pages per sheet.
Find the right contact, fast
The search app allows you to enter a search term and receive a filtered set of relevant records from either a table within a base or an entire base.

Step 1: Add a search app.
Choose the add an app option from the apps menu and add a search app to your base.
Step 2: Configure the search app.
Use the settings to select which table to search. You can choose to search all fields (which will look through every field in the table you’ve selected) or specific fields (which will bring up an additional dropdown menu of field options). Use the dropdown menu to search via a language other than English.
Note: you can also choose to search your entire base, though this can take some time to run and potentially impact your browser’s speed while processing within large bases.
Locate your meetings
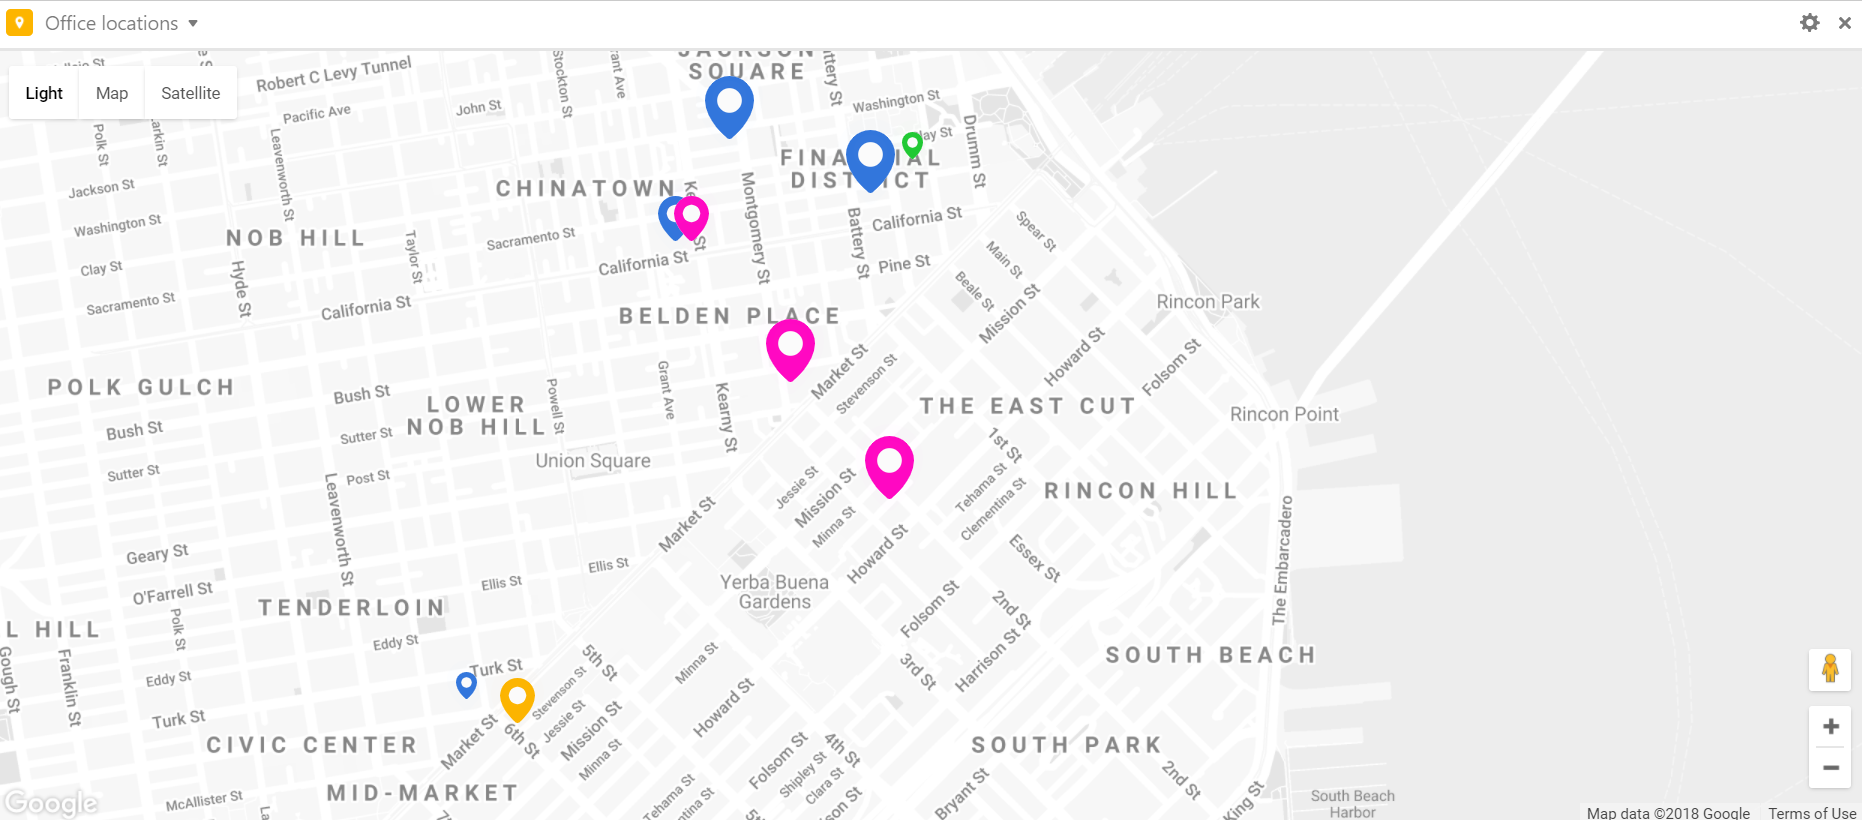
Pitching clients means taking meetings—lots and lots of meetings. The map app makes plotting office locations for each publication a snap, and lets you visually distinguish between priority contacts.
Step 1: Set up a location field (with addresses or coordinates) and a cache field in your table.
Make sure that your table includes a single line text field or a long text field with the relevant addresses. You can also use latitude-longitude coordinates instead.
You'll need to create a new, empty text field to serve as your geocode cache field. The app will use this empty field to save some additional information for each address, allowing it to display markers on the map.
Step 2: Get a Google Maps API key.
The Airtable map app requires you to have a Google Maps API key. Make sure you have a Google account—if not, you will need to create one. Next, visit this Getting Started guide and click the button that says “Get a key.” Keep this key handy for the next step.
Step 3: Add a map app to your base.
Now you are ready to add a map app to your base. Open the apps menu, click the add a app option, and add a new map app to your base. Go through the setup process to pick the appropriate table and view, making sure to select the same location field and geocache field from step 1. You can specify the color and shape of the map markers for differentiation—we assigned a numeric value to each publication’s relevance (3 being most relevant, 1 being least) that is reflected in the size of each pin. Lastly, you’ll paste in your Google Maps API key from step 2.
Now that your map is set up, you can view it in one of three styles (Light, Map, or Satellite), and even look at your locations using Street View.
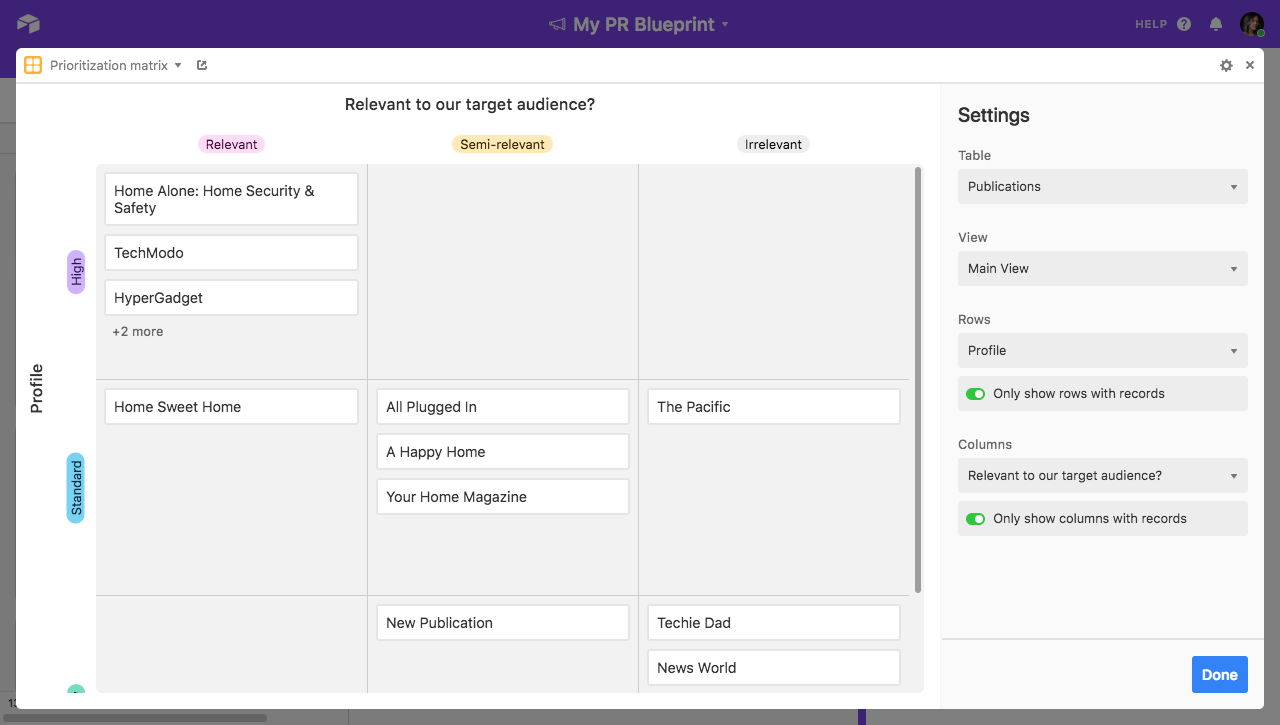
Prioritize the best pitch
Depending on a piece’s topic, some publications make a better home than others. The matrix app gives you a way to prioritize pieces via visual reference, taking into account customizable parameters like relevance, or each publication’s overall profile.
Step 1: Add some fields to categorize publications.
Make sure your publications table has at least two fields across any of the following types: single select, checkbox, single collaborator, rating, and single linked record.
Step 2: Add a matrix app.
Choose the add an app option from the apps menu and add a matrix app to your base.
Step 3: Configure the rows and columns.
Set the app to point to the table and view containing the records you want to map onto the matrix. Next, pick the field you want to use to define your rows and the field you want to use to define your columns. In this case, we'll set the publication profile field to define the rows and the relevance field to define the columns. Depending on your preference, you can also choose to only show rows/columns containing records.
Once the matrix app is set up, you can also move the record cards between different cells in the matrix to redefine their values.