Masterful people operations is one of those things that looks easy—from the outside. But it takes plenty of acrobatics to balance promising applicants and top-notch team members, and give each the attention they deserve.
From recruiting superstar candidates to maximizing happiness for your existing team, you're responsible for keeping tabs on many processes at once.
Airtable apps can help sift through oodles of applicant records, send interviewees text reminders, automate your org chart and onboarding checklists, and keep your next teambuilding event top of mind.
That way you can direct your energy toward supporting your teammates, from first phone screen to tenth workaversary.
Here's your step-by-step plan for getting it done:
Keep upcoming interviews in sight
Monitor candidate scores in real time
Text applicants an interview reminder
Print onboarding checklists in a snap
Visualize your team structure
Count down to teambuilding events
More questions on this blueprint, or other ways that you can use apps for operations? Sign up for our webinar on using Airtable apps to power up your applicant tracking system, taking place Friday, April 6th, at 10 a.m. PDT! Reserve your spot now.
Keep upcoming interviews in sight
For hiring managers with no time to thumb through the full applicant pipeline, a quick way to surface the next batch of interviewees is key. Use the record list app to create an always-up-to-date list of the next candidate interviews on the books.
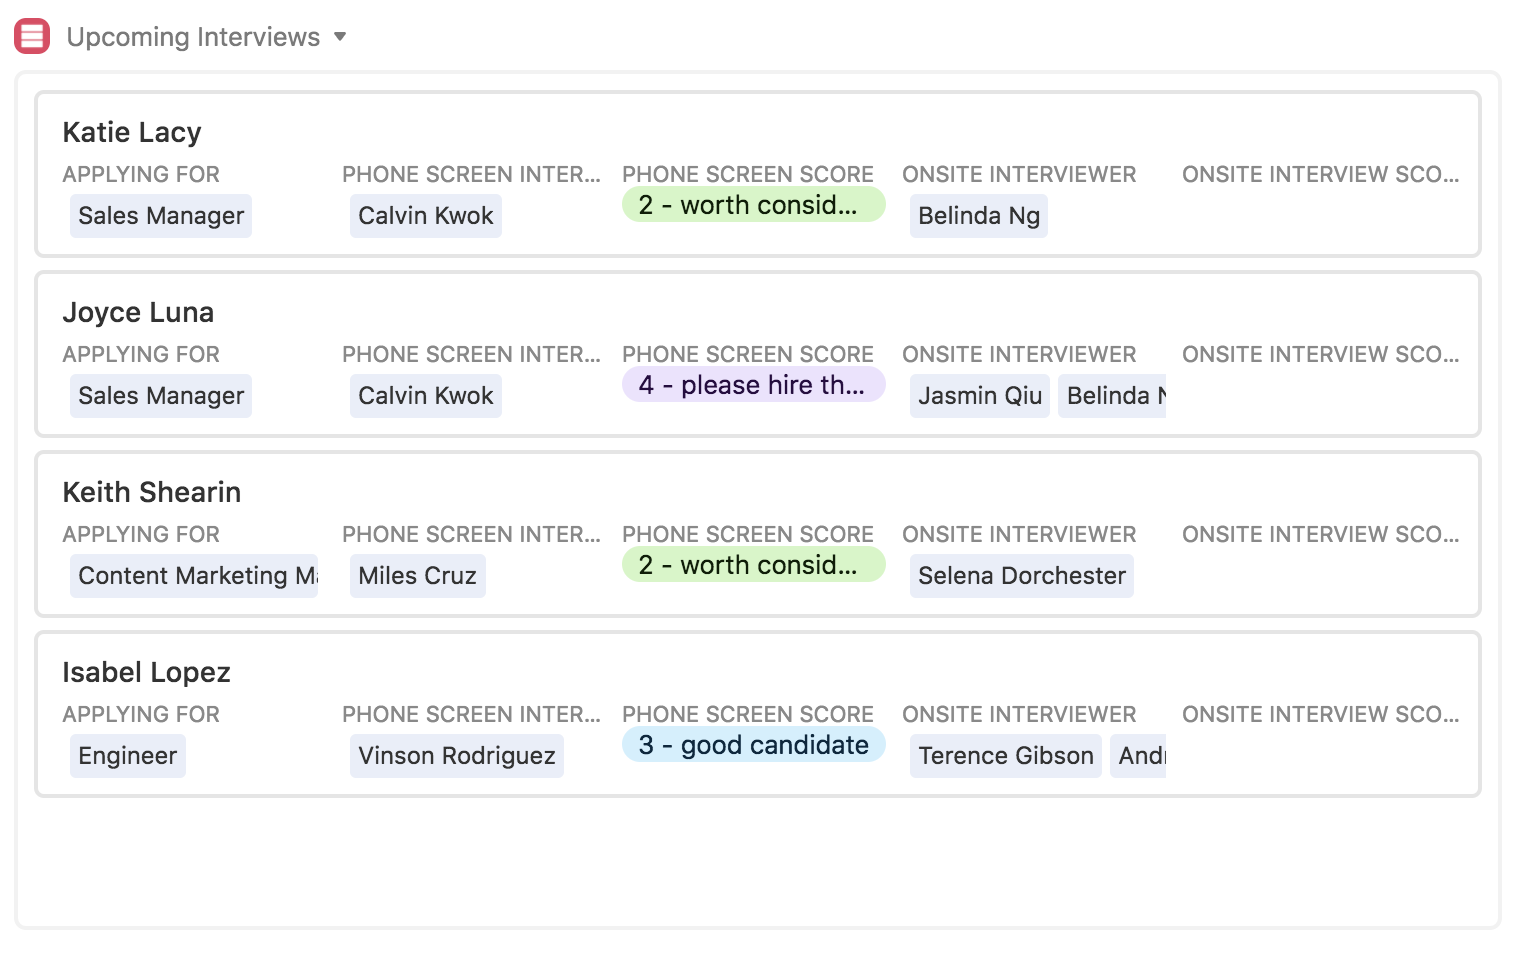
Step 1: Create a view that shows upcoming interviews.
If you don't already have one, create a view in the table that's filtered to show only applicants with upcoming interviews.
Step 2: Add a record list app.
Next, choose the add a app option from the apps menu, and add a record list app to your base.
Step 3: Configure the record app.
From the dropdown menu in the record list app's settings, select the appropriate table and the view you created in Step 1.
Now, team members can quickly reference a list of upcoming applicant interviews.
Monitor candidate scores in real time
Curious how your teammates rated their interviewees? The chart app can give you a high-level view into their assessments as they come in.
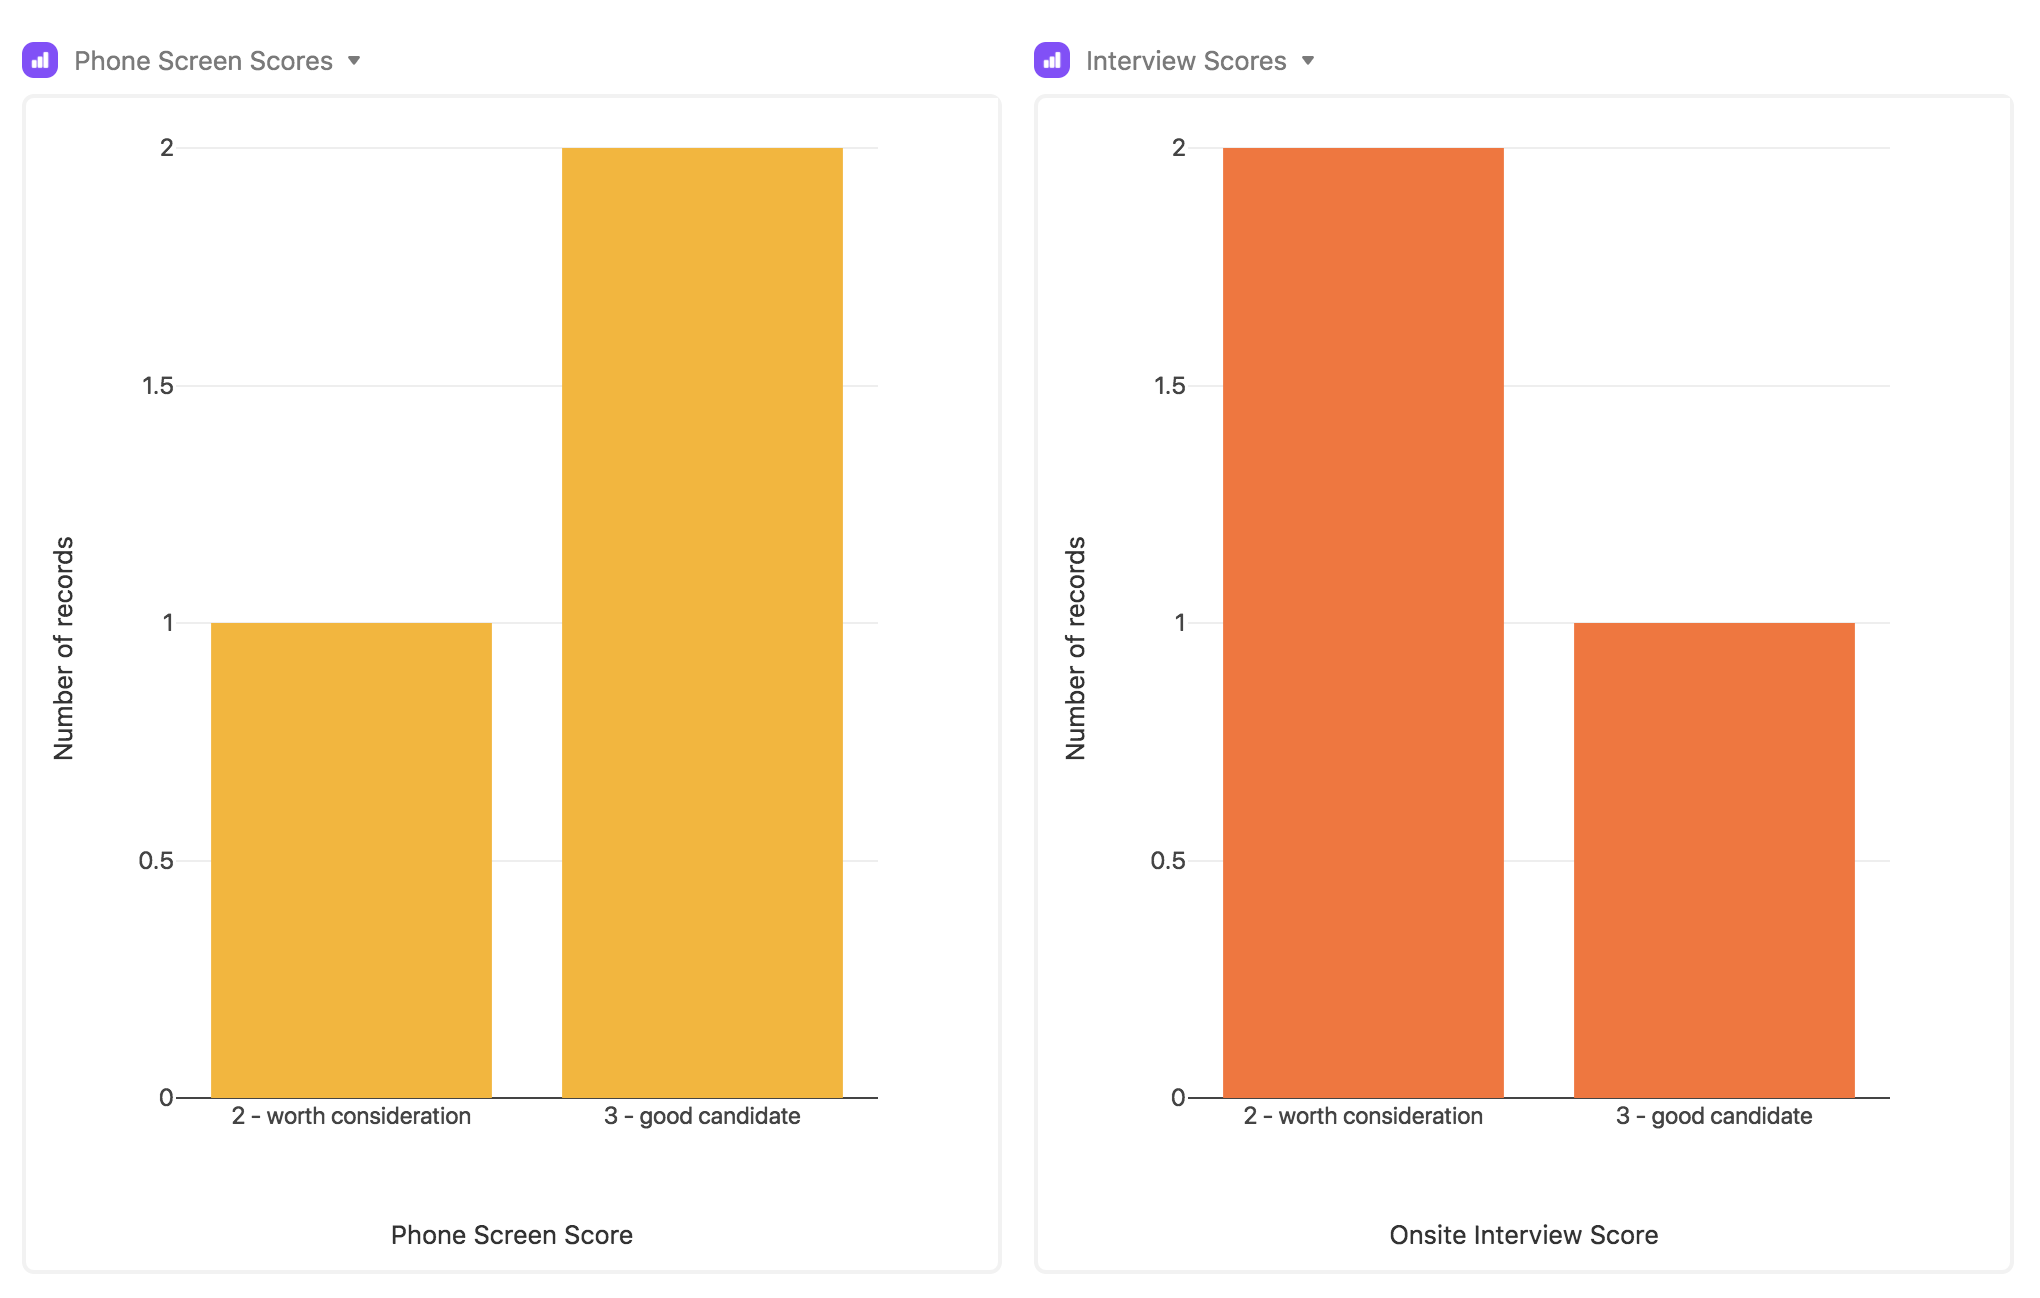
Step 1: Make a view of recent interviews.
If you don't already have one, make sure that your table has a view of interviews that have been completed and scored
Step 2: Add a chart app to your base.
Open up the apps menu, click the add a app option, and add a new chart app to your base. With the chart app, you can make a bar chart, a line graph, or a scatter plot.
Step 3: Adjust the chart app to fit your needs.
Once you've added the chart app, you can tweak the settings to match your needs. We suggest a bar chart for quickly seeing the number of applicants with each score. But of course, you can pick whichever type you want. If you're doing a bar chart, we recommend that the Y-axis be the applicant field, and the X-axis be a rating field showing the candidate score. (Tip: If you click into one of the bars, you'll see any candidates who got that rating.)
Text applicants an interview reminder
You've lined up a stellar candidate—now you need to get them to HQ. The send SMS app can take the heavy lifting out of making sure your interviewees have all the info they need ahead of their visit.
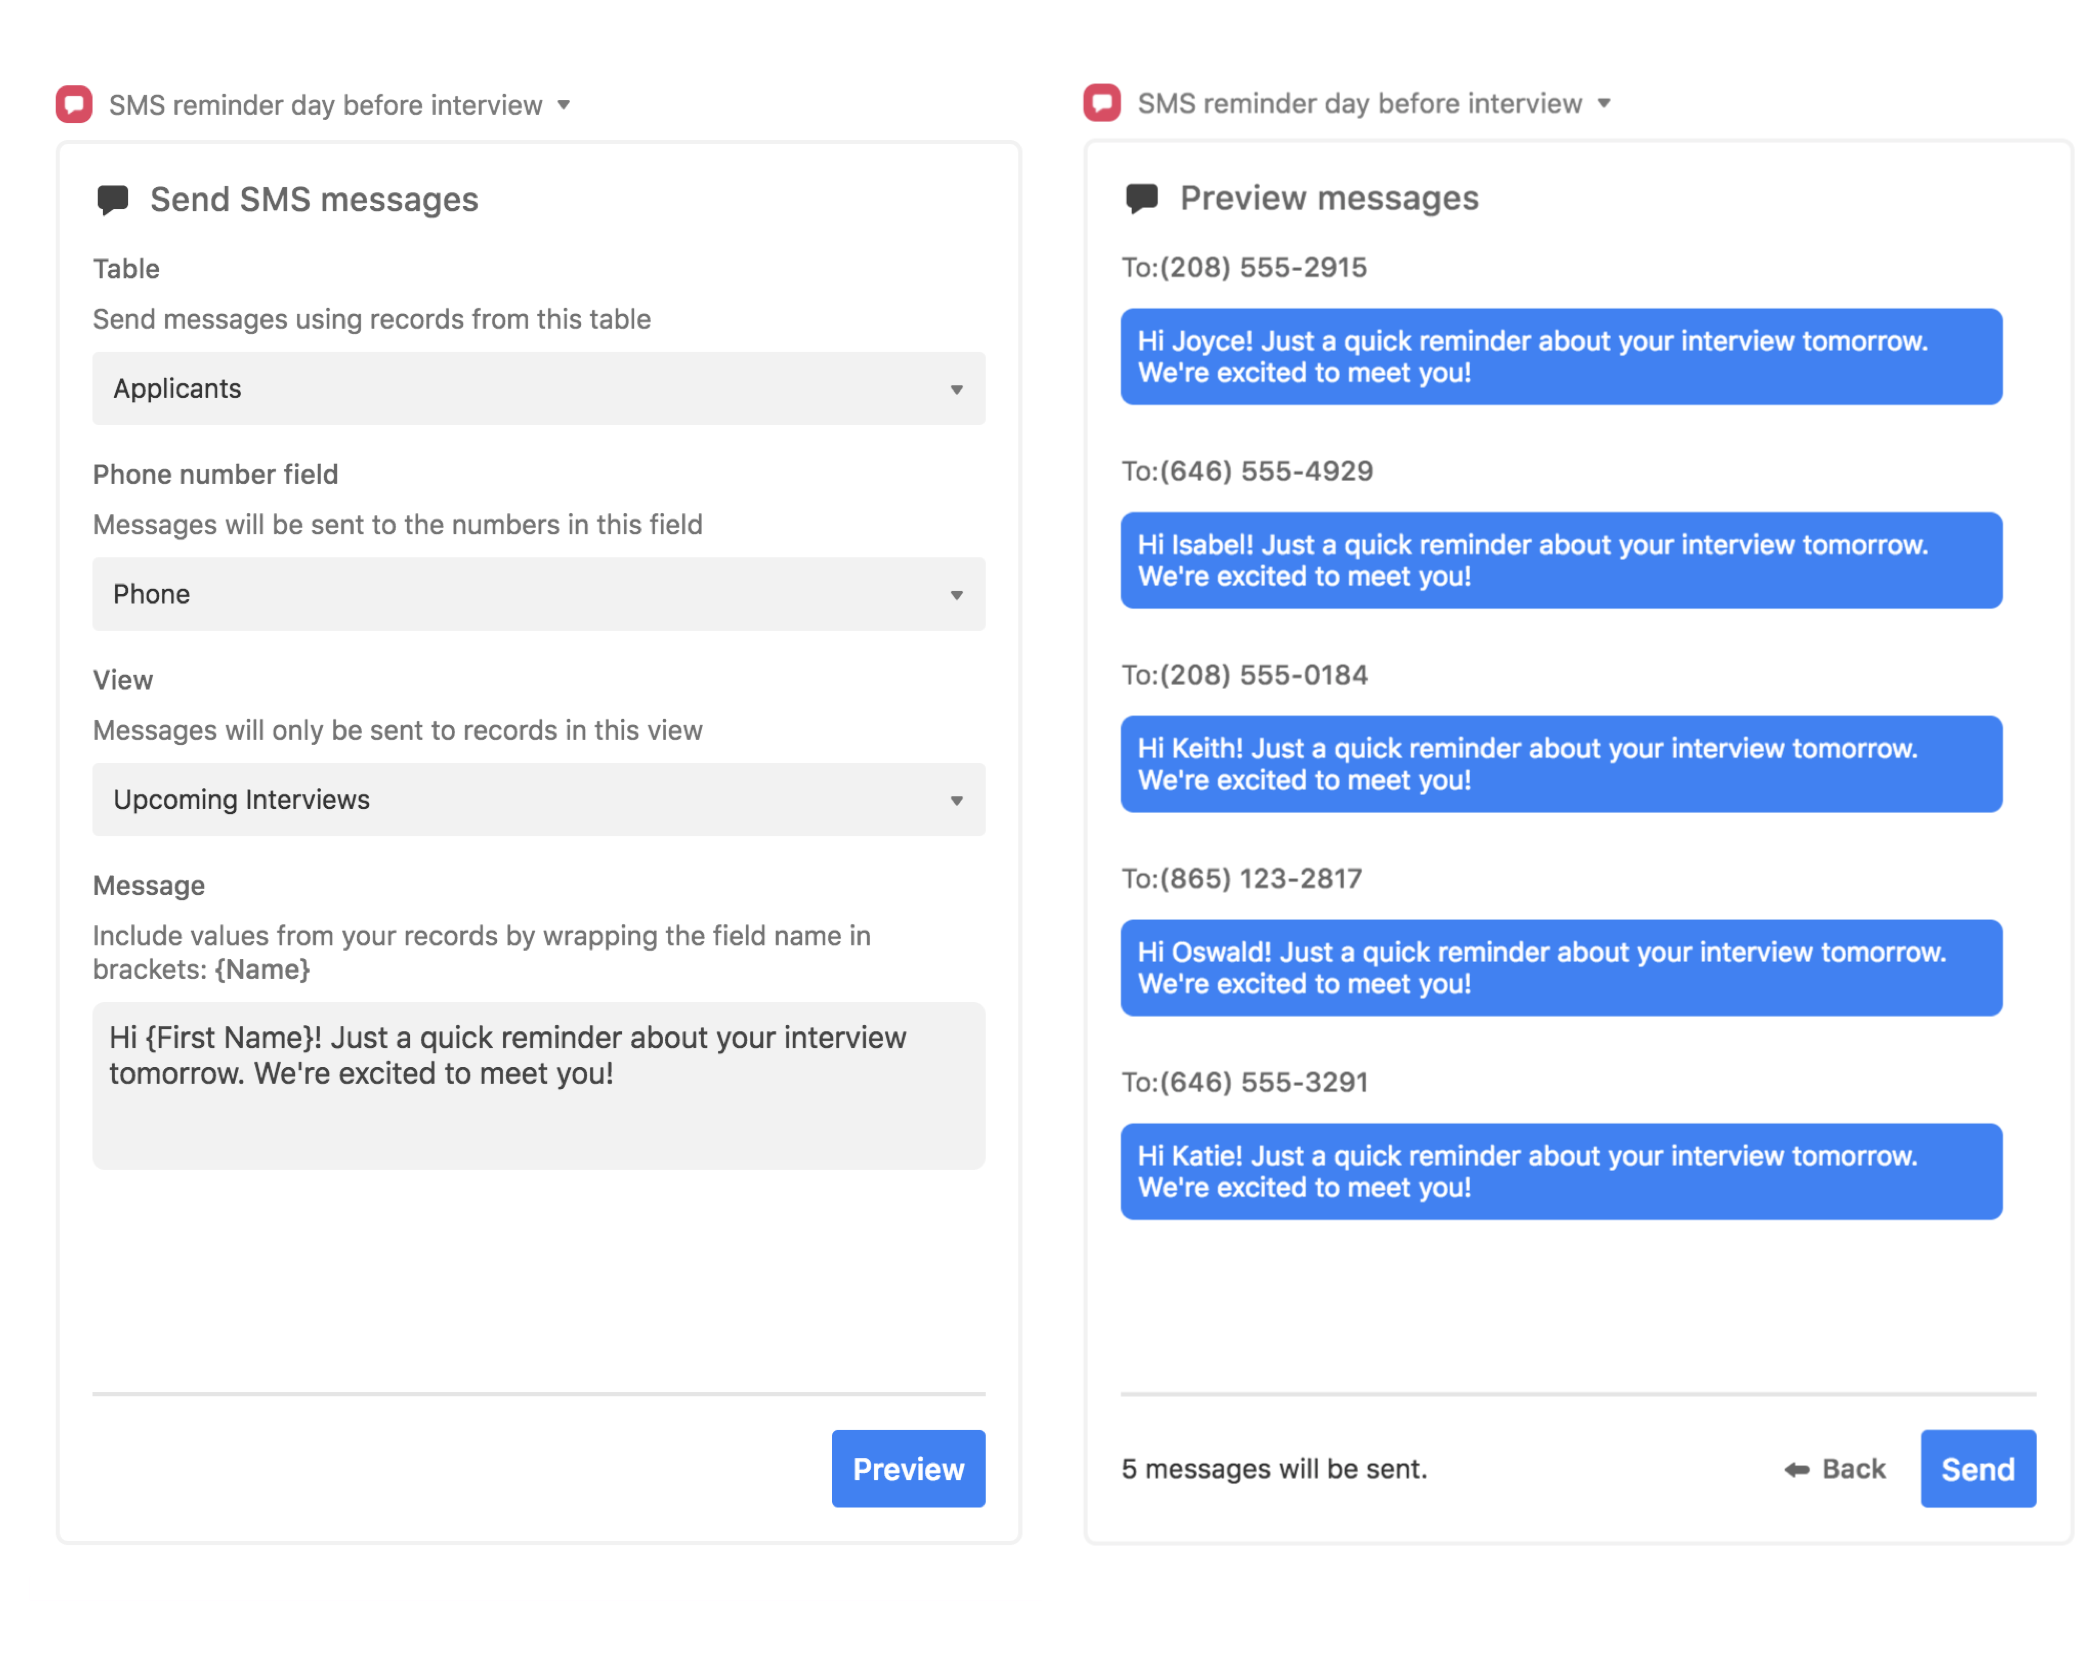
Step 1: Add a send SMS app to your base.
Note that you'll also need a Twilio API key in order to use this app. To add a send SMS app, just open up the apps menu, click the add a app option, and add a new send SMS app to your base.
Go through the setup process, picking the appropriate table and view (Tip: Use the same one you created for the record list!) and entering your Twilio API key.
Step 2: Compose your message.
Then compose a message that you want to send, including the relevant promo code. Remember that you can use curly brackets to take information from fields and put it into your message.
Step 3: Send out the message.
The next time you've got a round of applicants coming in for interviews, hit the send button and they'll get a quick reminder with essential info for interview day.
Print onboarding checklists in a snap
With the page designer app, you can quickly print out the latest version of your onboarding checklist straight from your base, and with your company's branding. Give your new hires a leg up by handing them master checklists to cover them from day one to day 90.
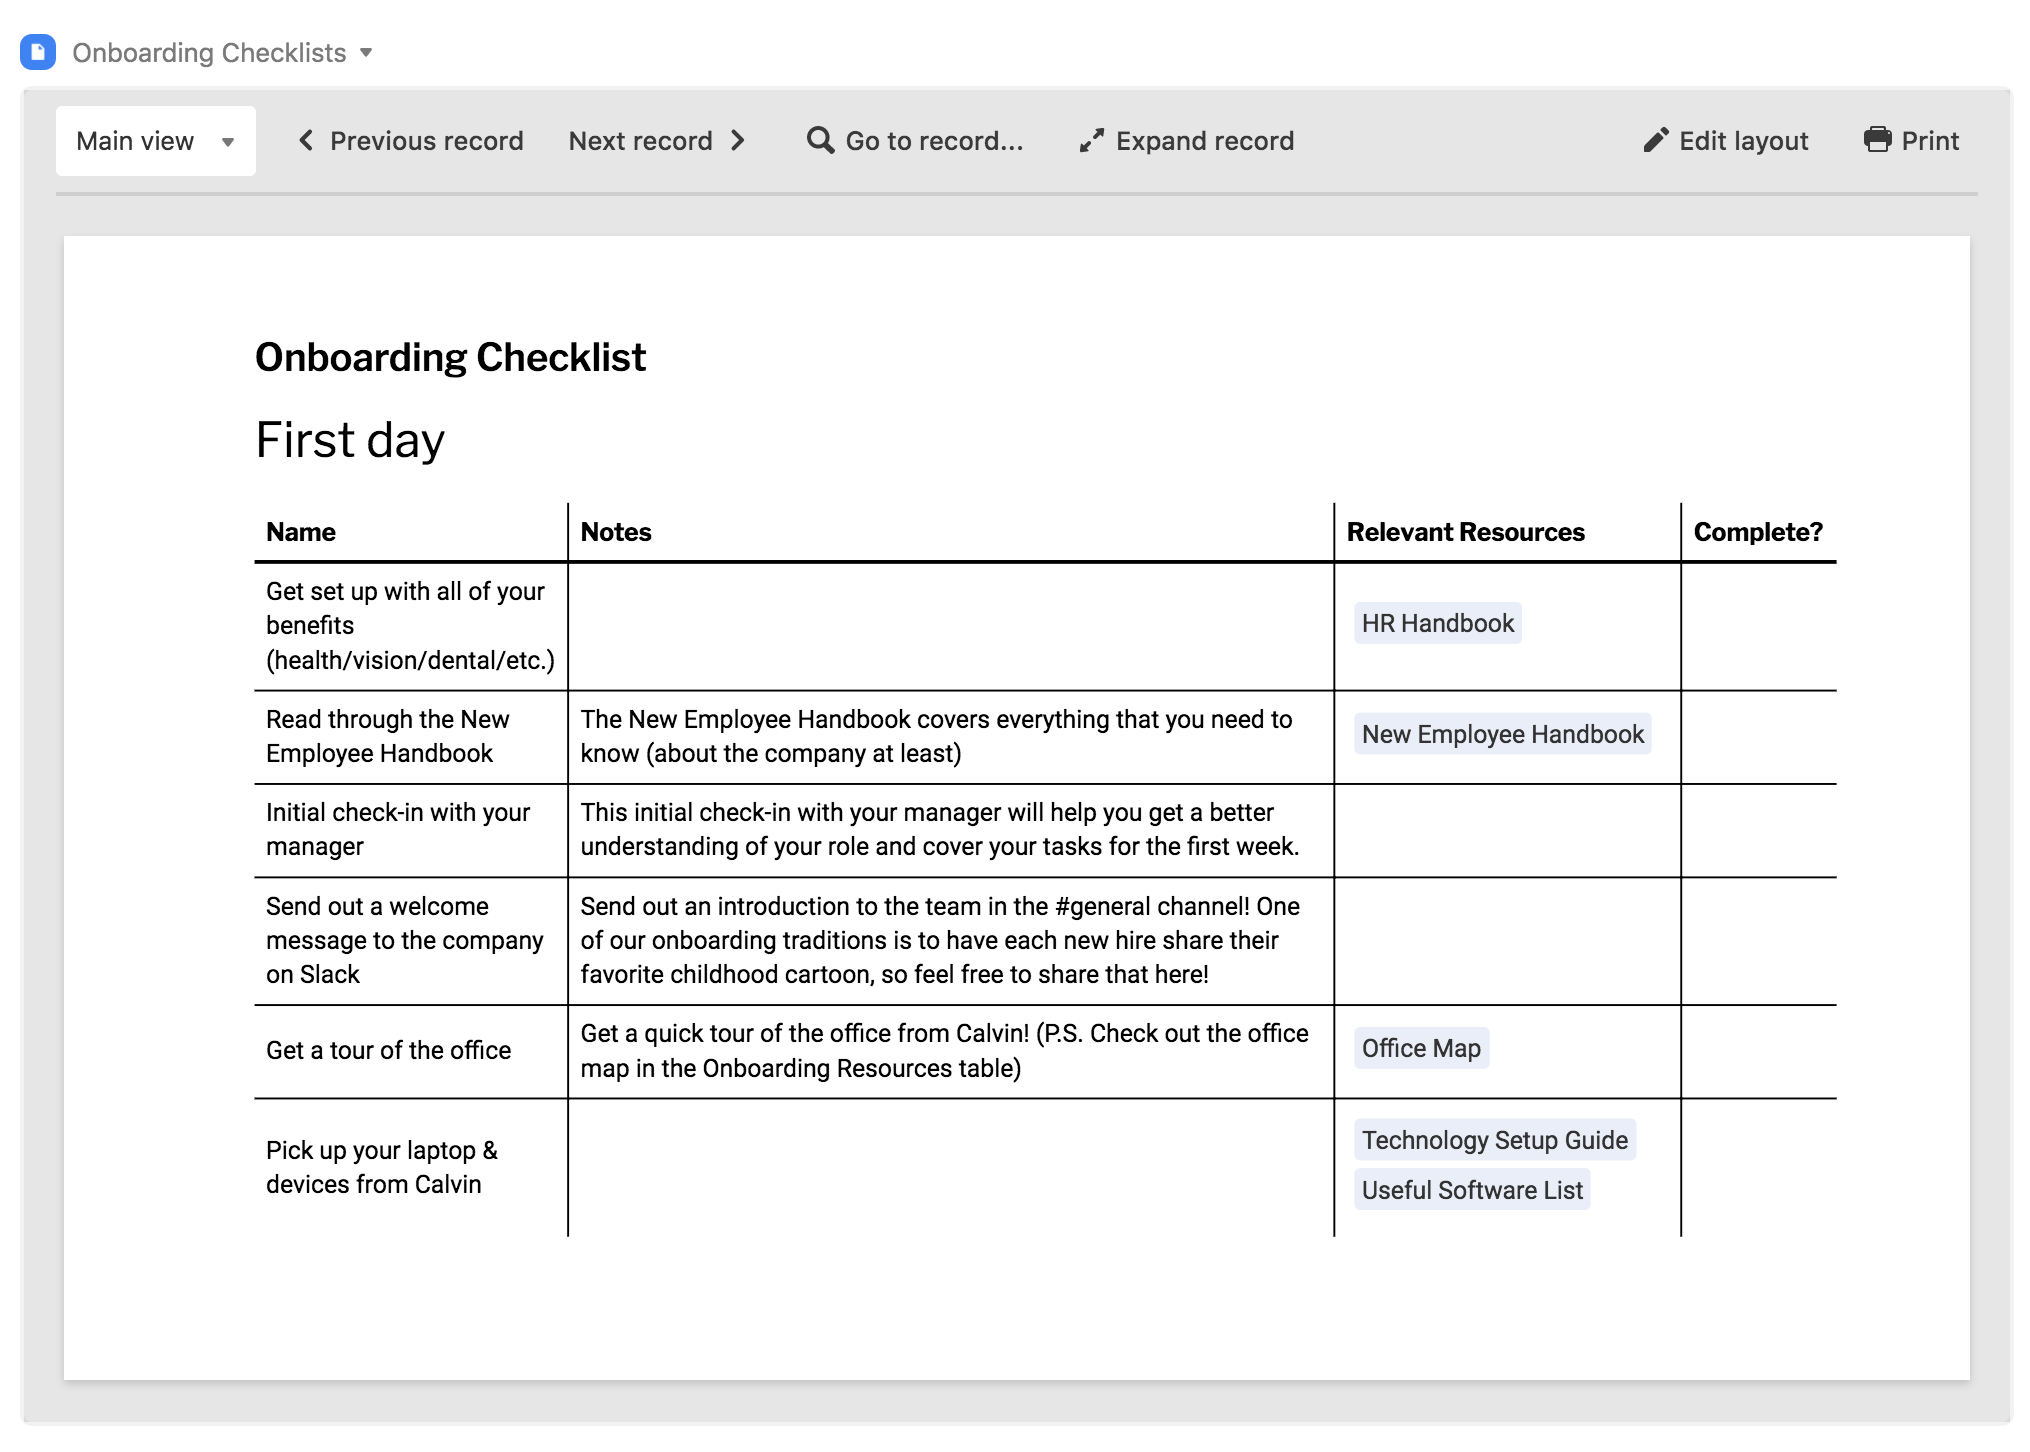
Step 1: Add a page designer app.
Select the add a app option in the apps menu, and add a new page designer app to your base. Make sure to pick the correct table and view, and select your preferred page size.
Step 2: Design your checklist template.
Choose what information you want to include on each page. You can drag and drop elements onto the page, tweak fonts and colors, and otherwise adjust according to your aesthetics to make a great template page for your checklists.
Step 3: Print your lists or export them into a shareable PDF.
When it's time to share checklists with new hires, you can quickly print or create PDFs from the relevant records.
Visualize your team structure
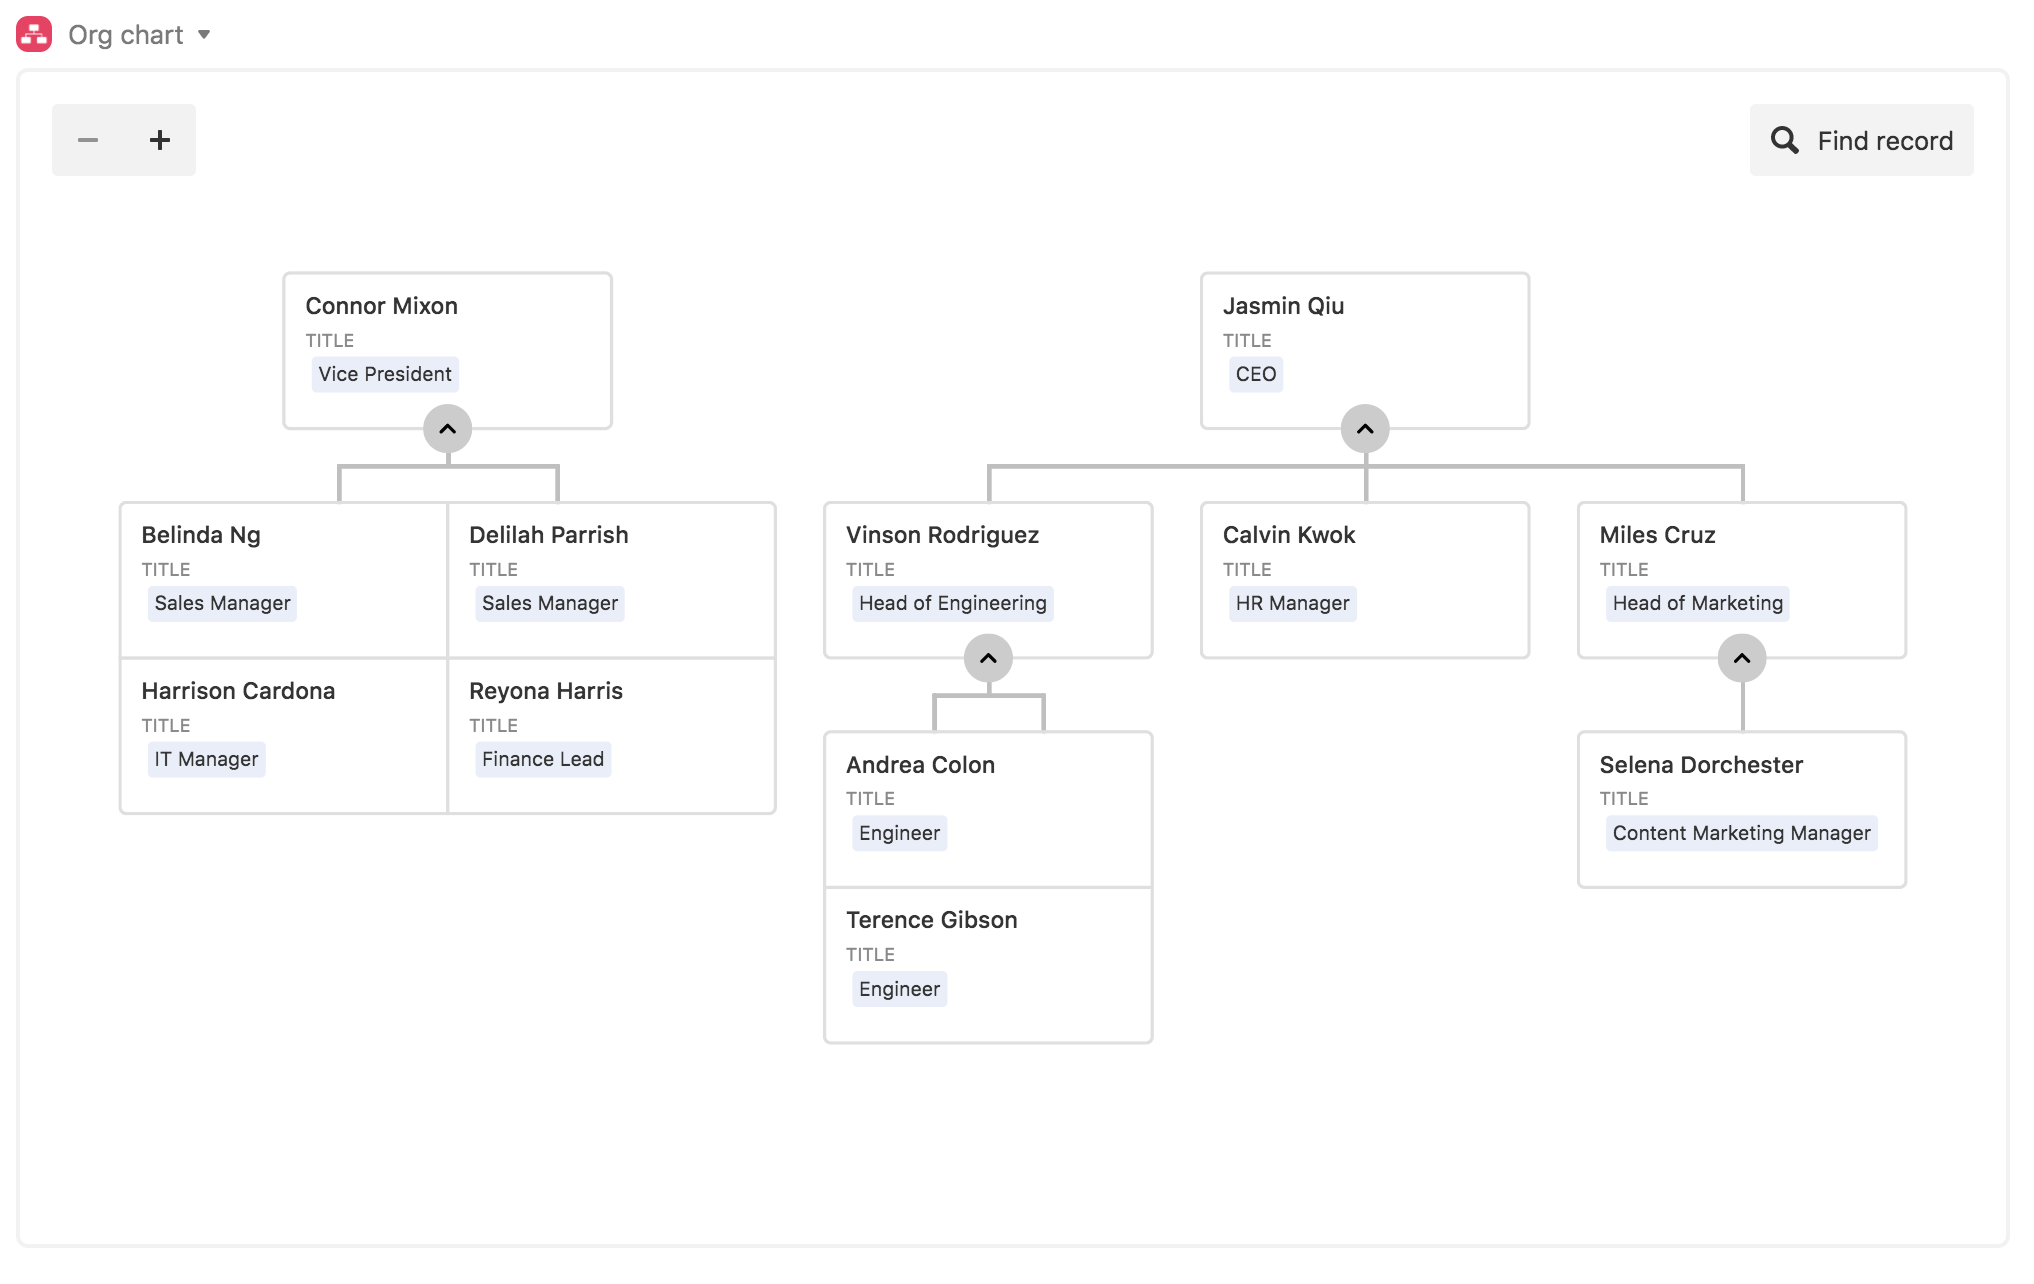
Your organization is constantly evolving—and now your org chart can keep up with the latest shifts. Use the org chart app to display your team's reporting structure in real time.
Step 1: Create reporting relationships.
To add hierarchy to your team table, create a linked record field that indicates who a team member reports to. Note that this linked record field must link to the same table in order to power the org chart. (So: if you're in the Team table, created a linked record field to itself, the Team table.)
Step 2: Add an org chart app.
Head to the apps menu and choose the add a app option. Select the org chart app and add it to your base.
Step 3: Configure the org chart app.
Choose the relevant table and view for your org chart, then select the field you created in Step 1 that denotes reporting structure. Indicate whether this field indicates a parent (ie. manager) or a child (ie. report). You can optionally include a secondary field, like a title, to display other helpful information in your chart.
Count down to teambuilding events
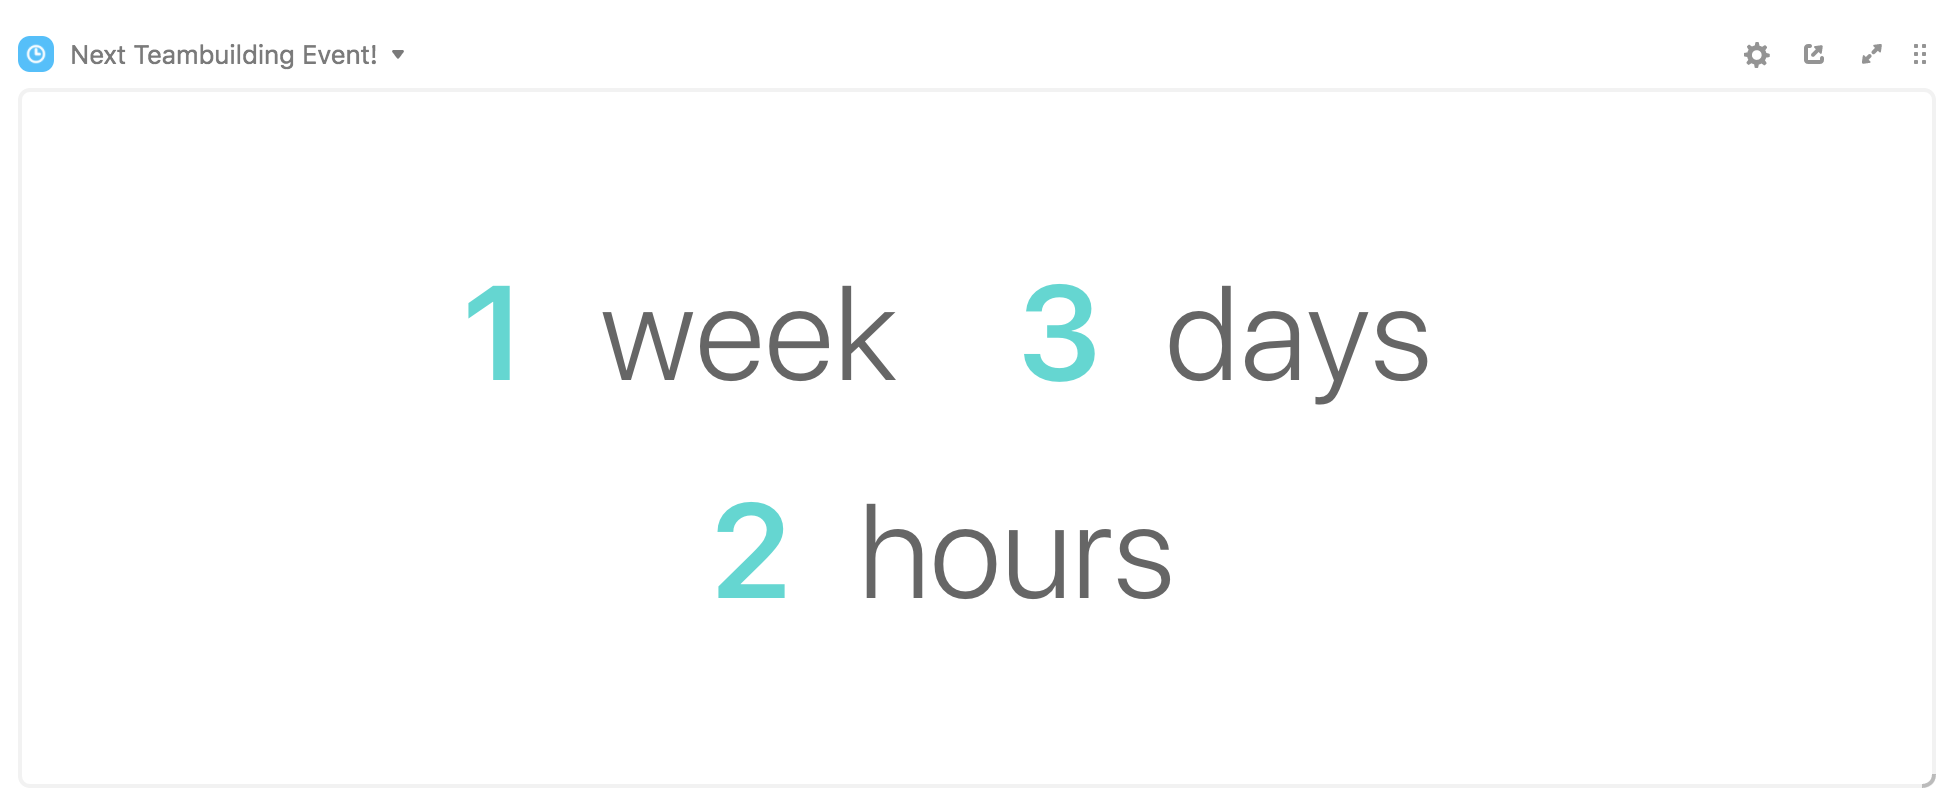
While you're busy juggling all these people processes, company events can really sneak up on you. Use the countdown app to keep track of exactly how long you have until your next event—and get your team fired up for it.
Step 1: Make a table of upcoming events, and a view of upcoming ones.
If you don't already have one, create a table that holds upcoming company events, and a view that's filtered down to show only those in the future.
Step 2: Add a countdown app.
Open the apps menu and select the add a app option. From here, add a countdown app to your base.
Step 3: Choose the dates you want to track.
Toggle the Date from view option and select the view with upcoming events. Make sure Earliest date is selected and check off the units you'd like to track.