Views let you visualize a base’s data in unique and thrilling ways, often leading to quick insights.
But navigating a large base can pose challenges when the sidebar begins filling up with views, and one small change in a collaborative view can change things for, well, everyone.
View management is essential for creators and collaborators, especially those with large bases. That’s why this year, Airtable released a variety of features to make view management even more accessible and easy to navigate than before, so users can quickly organize and curate their views (yes, personal views too!) however they’d like.
Note that many of these view management features are available on our Pro and Enterprise plans. Check out our view management documentation to learn more.
As a quick reminder, there are three distinct view permission types:
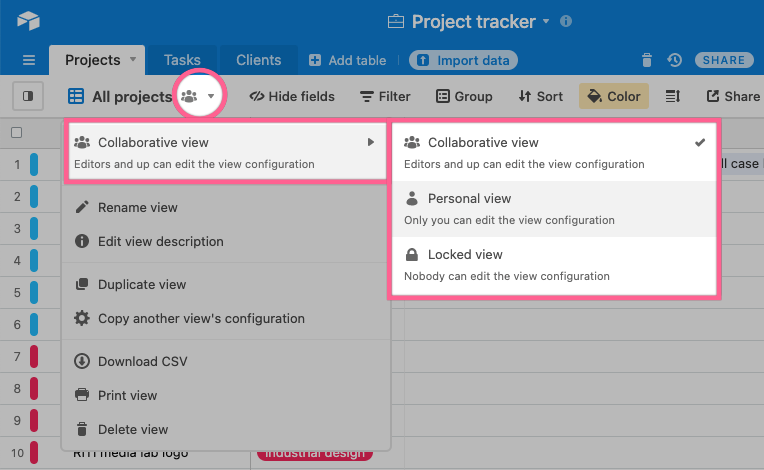
- Collaborative views: This is the default view type for newly created views, unless you have a large base (more on that later). In this view, editors and up can edit the view configuration.
- Personal views: This view type, available on Pro and Enterprise plans, can only be customized by the view’s owner. This means only the owner can change the view’s grouping, field order, record coloring, and more.
- Locked views: Locked views are another premium feature for Pro and Enterprise users that prevent all collaborators from altering the view’s configuration until they’ve been unlocked by a collaborator with creator or owner permissions.
Shall we, ahem, review this year’s updates?
Keep your views organized
When the views in your base begin to pile up, it’s time to organize. We’ve added several new features this year to help users file away views, like:
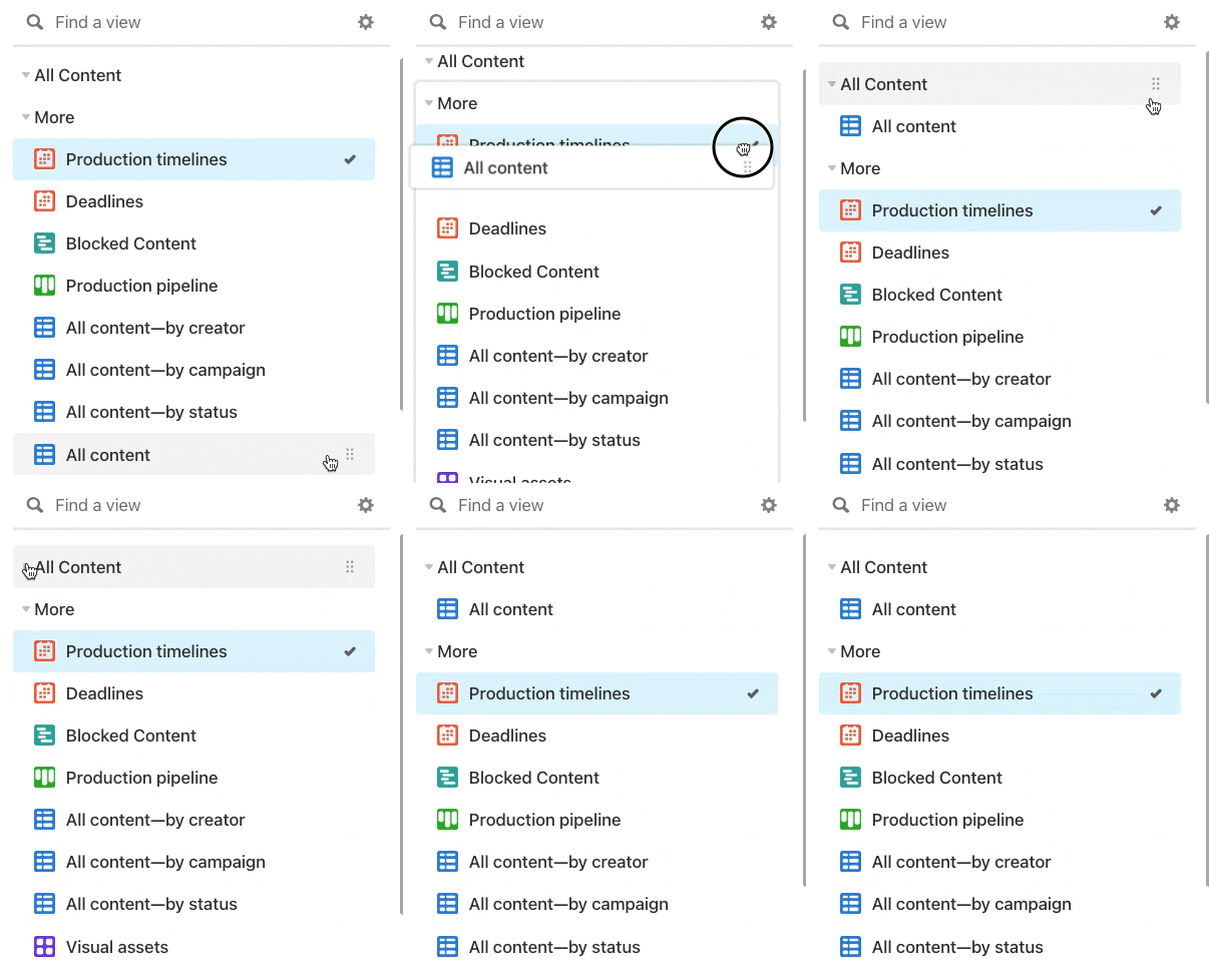
- View sections: Collaborators at the creator level can organize all of their views into collapsible sections when they open the view sidebar. Think of view sections as folders—they’re handy ways to categorize a lot of views under one name or theme.
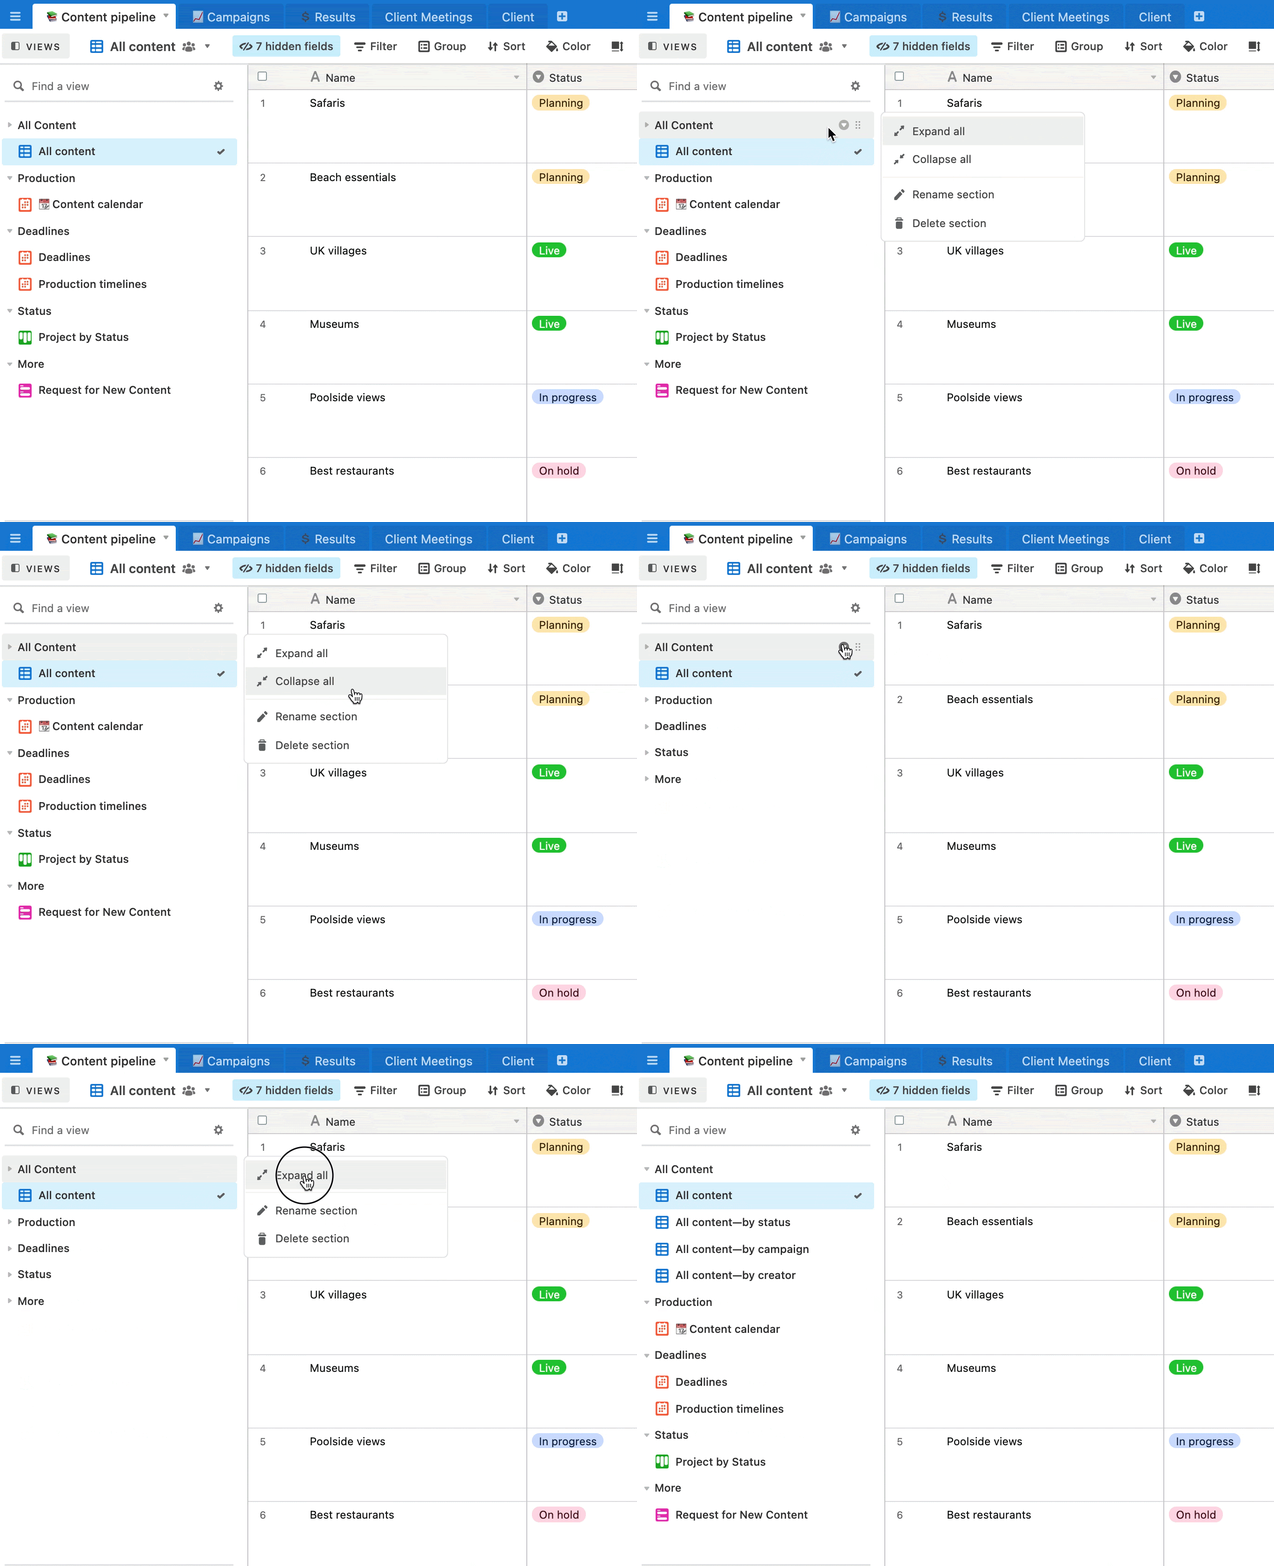
- Expand/collapse all view sections: Got a lot of views in a lot of view sections? Good news: you can now expand or collapse all of the sections at once. Simply right click on any view section and choose “expand all” or “collapse all” for a clean sweep.
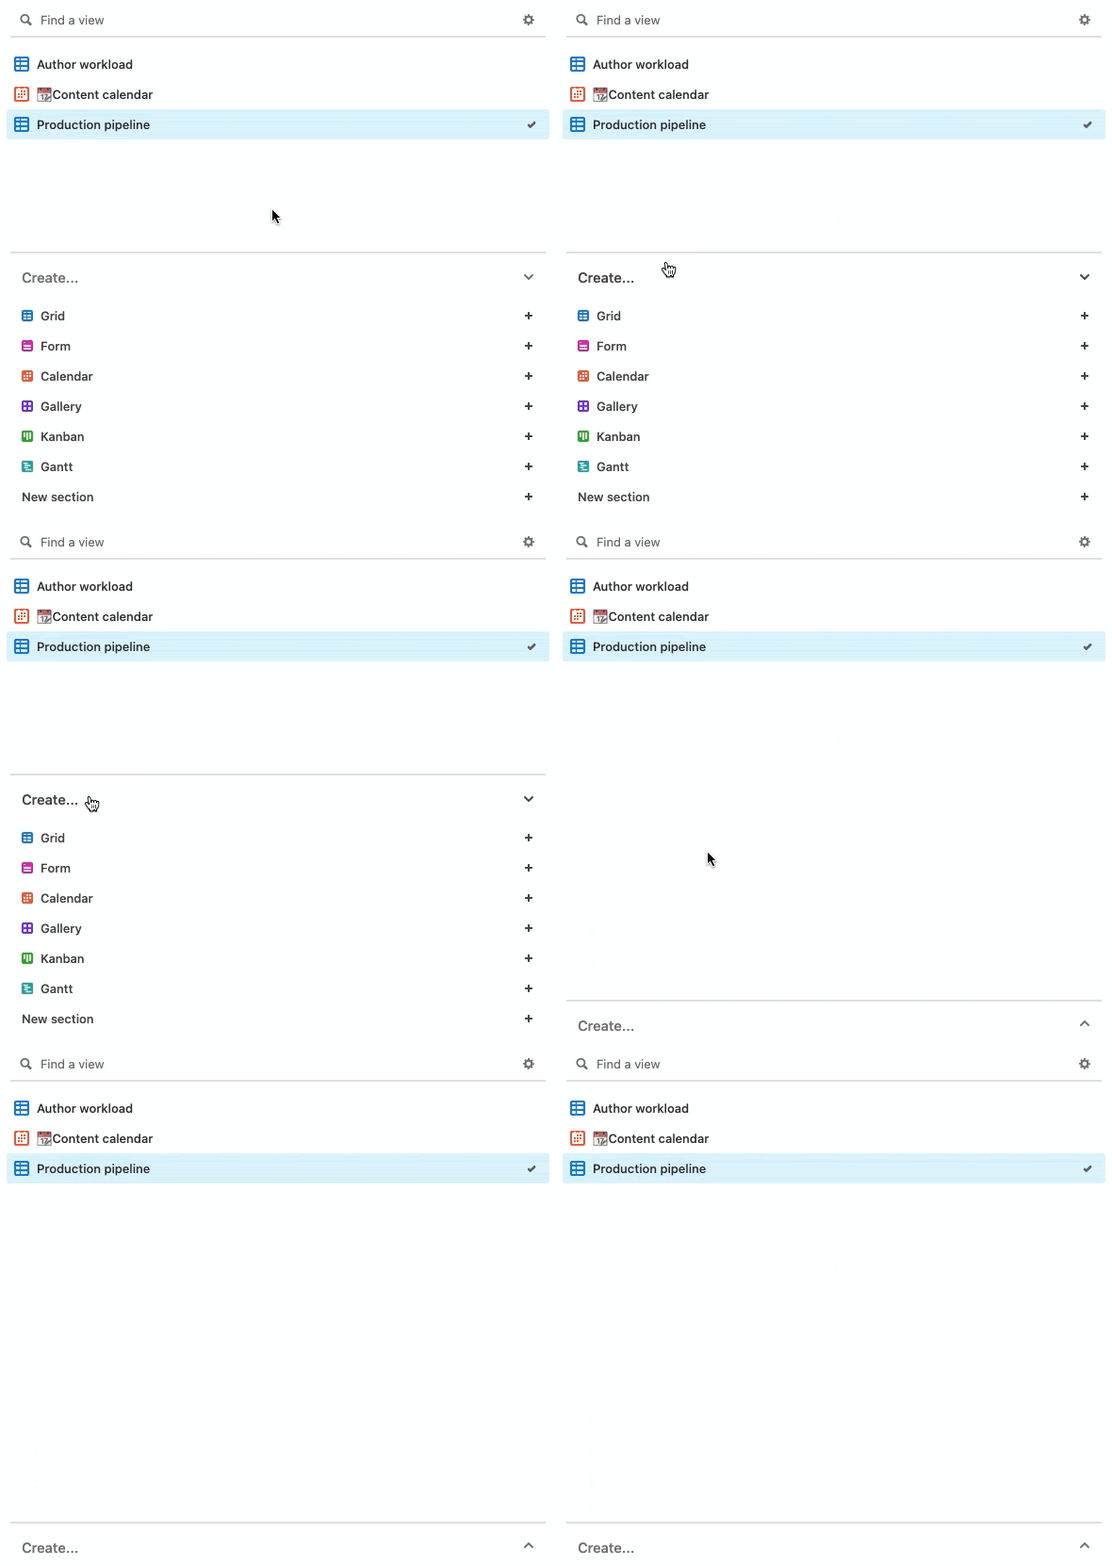
- Collapsible “create view” panel: You know that panel that lets you choose from our ever-expanding list of view types? You can now collapse it with a click, freeing up real estate so you can better manage your view sidebar.
- Consolidated view menu: We made some updates to the main view menu for ease of use. Click the button toward the top to edit the view configuration.
Curate your view experience
Thanks to more options to get the views you need in a jiffy, excessive scrolling is a thing of the past.
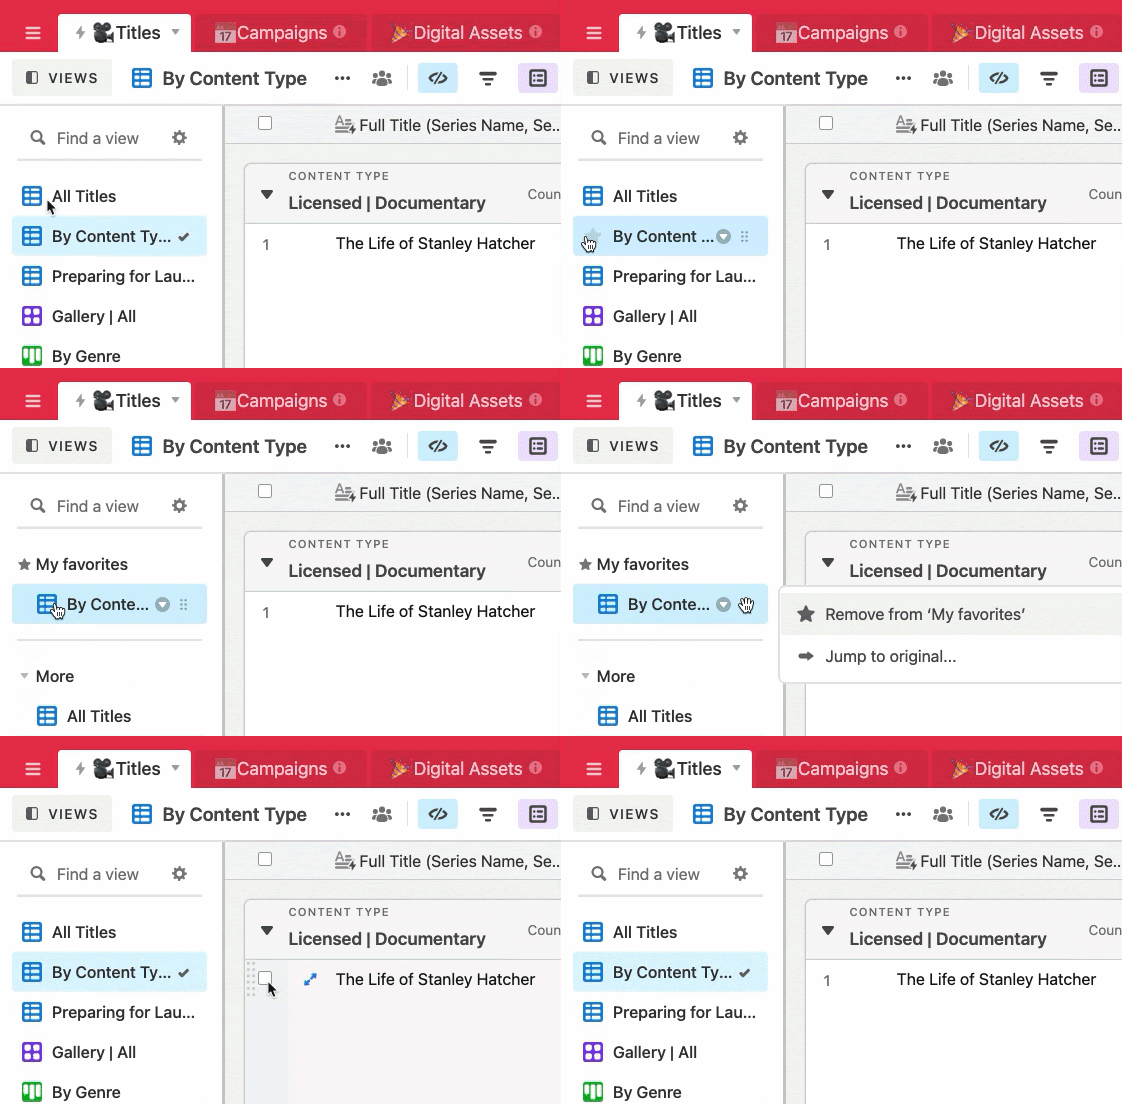
For one, you now have the option to favorite or “star” the views most relevant to your workflow. Favoriting a view will send it straight up to the “My favorites” section at the top of the view sidebar.
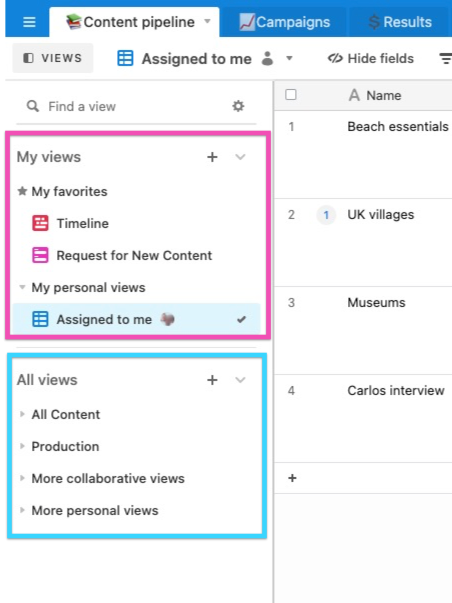
You might have also seen that there are two overarching view sections in the sidebar: “My views” and “All views.” We call these super-sections. Your favorited or personal views will automatically be housed in “My views,” while all the views ever made in a table can be found in “All views.” This includes personal views, too—the “All views” super-section has a designated section for everyone’s personal views, so you can still find them when needed.
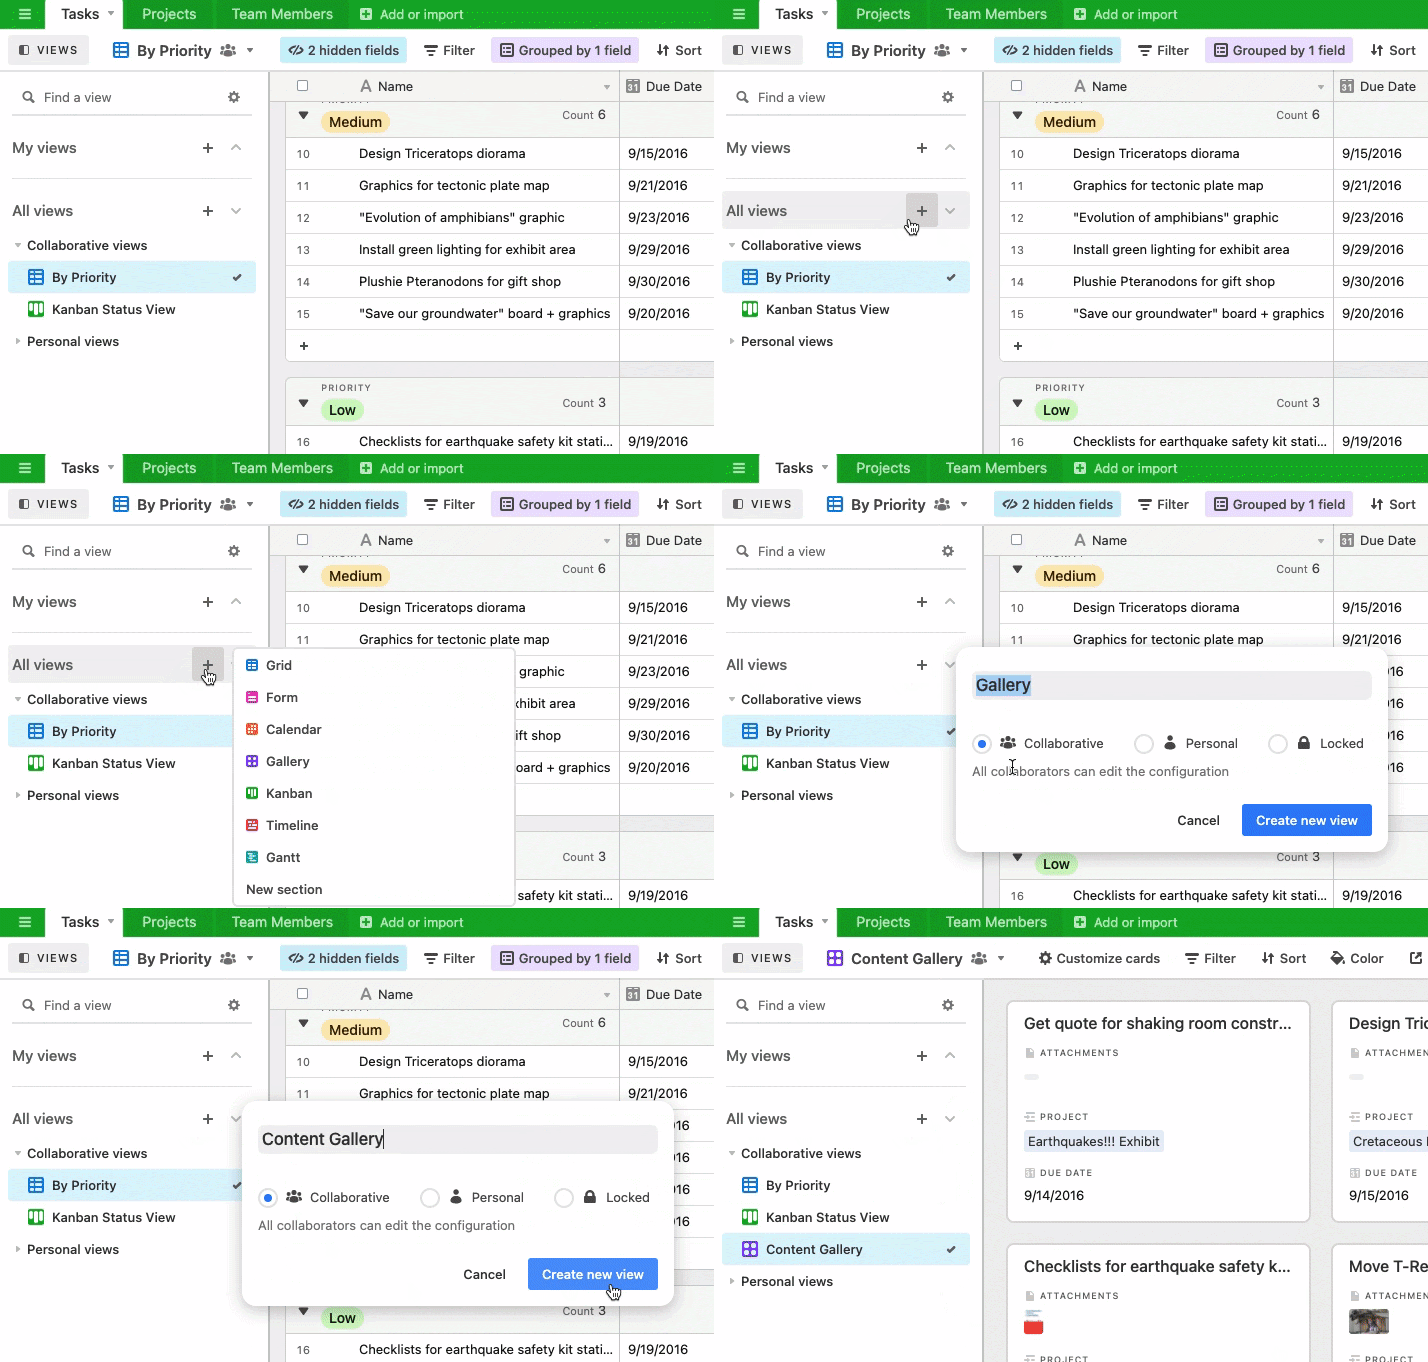
And if you want to create a new view without having to move it into the right section, you can use shortcuts. For instance, clicking the plus button by “My views” will create a personal view, while the shortcut beside “All views” generates a collaborative view.
Experiment with personal views
Personal views are perfect for experimenting with data visualization...without messing with the data. We’ve made a couple of tweaks to make personal view use easier than ever.
Now, personal views can be reassigned to other collaborators in a base. Rather than setting up a view for a collaborator and having that individual make the view personal, a view owner can reassign a personal view themselves.

We’ve also unveiled a new view creation flow, which will be the default anytime you create a view. This flow makes it easier for users to capture information upfront by requiring details at the creation stage, like the view’s name and visibility type.

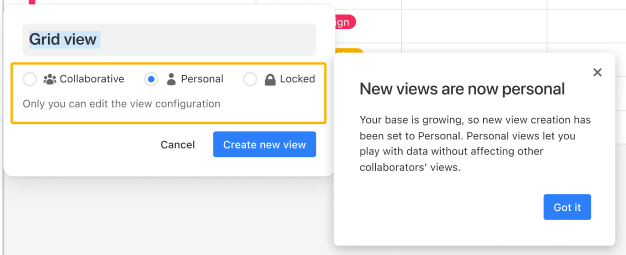
And as an extra safeguard, we’ve made personal views the default view creation type in large bases. Any new view created in a large base will automatically be set to personal until it’s manually changed (phew!)
You’re already spending a lot of time in views. With these new features, you can save time—for yourself and everyone else in your organization.
Enjoying the view? Drop us a line in community to let everyone know what you think, or read more about views here.