Gearing up for a new production means juggling an endless number of potential options. You need to find, sort through, and lock down sets, cast members, costumes, and props—while keeping an eye on the budget for each.
When a given day might find you lining up auditions, rummaging through the prop room, and then running across town to confirm the latest shoot location, you need a lightweight way to leverage all the pieces in play.
Airtable apps can turn location lists into interactive maps, automatically tag your costume photos so you can easily find everything that's red and flowy, and help visualize your new cast in three dimensions.
With that heavy lifting out of the way, you can focus your expert eye on finding the next great shoot location.
Use the guide below to streamline your pre-production:
Watch budget spend across projects
Auto-tag your costume library
Map shoot locations for easy scouting
Compare cast members in 3D
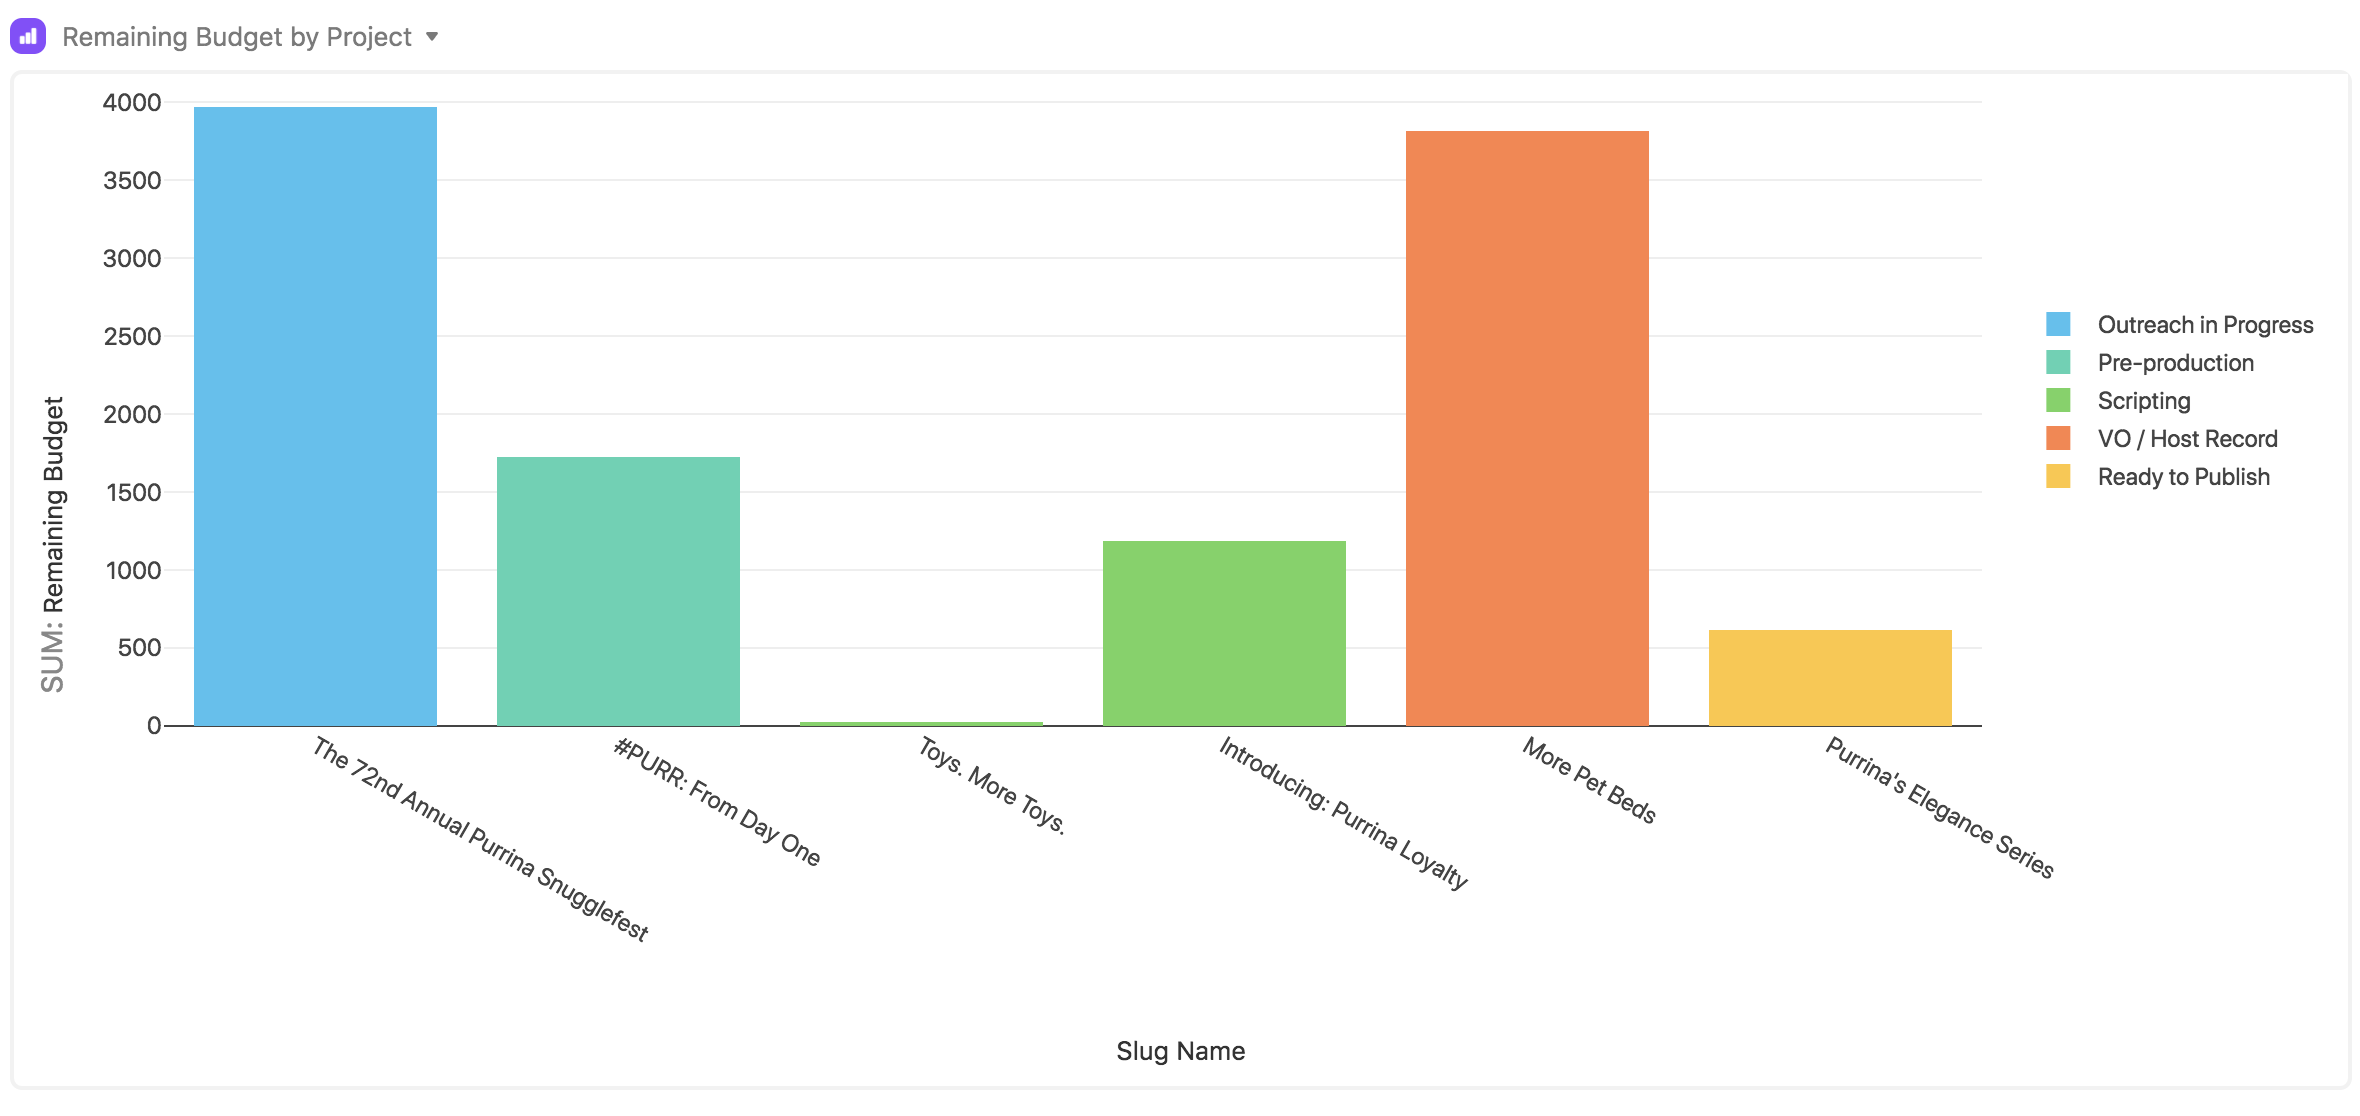
Watch budget spend across projects
Tracking your remaining spend in real time gets tougher when you're balancing multiple video projects. The chart app can give you a high-level look at budget status in a glance.
Step 1: Enter your budget details.
If you don't already have one, make sure that your base has a table that includes your project budget and current spend. Remember to include a currency field! Set up a formula field to calculate remaining spend by subtracting the current spend from the total budget.
Step 2: Add a chart app to your base.
Open up the apps menu, click the add an app option, and add a new chart app to your base. With the chart app, you can make a bar chart, a line graph, or a scatter plot.
Step 3: Adjust the chart app to fit your needs.
Once you've added the chart app, you can tweak the settings to match your needs. Of these three types of graphs, a bar chart is best suited to comparing between different groups, so we suggest a bar chart for comparing spend by project. But of course, you can pick whichever type you want. If you're doing a bar chart, we recommend that the X-axis be the name of the video project, while the Y-axis should be the formula field showing remaining spend.
Auto-tag your costume library
How many pairs of blue sneakers does your team have on hand? The Vision app, powered by Google's Cloud Vision, can make finding that answer a lot easier. Use the Vision app to analyze photos and apply attributes like color, type, and logos to your base for easy searching.
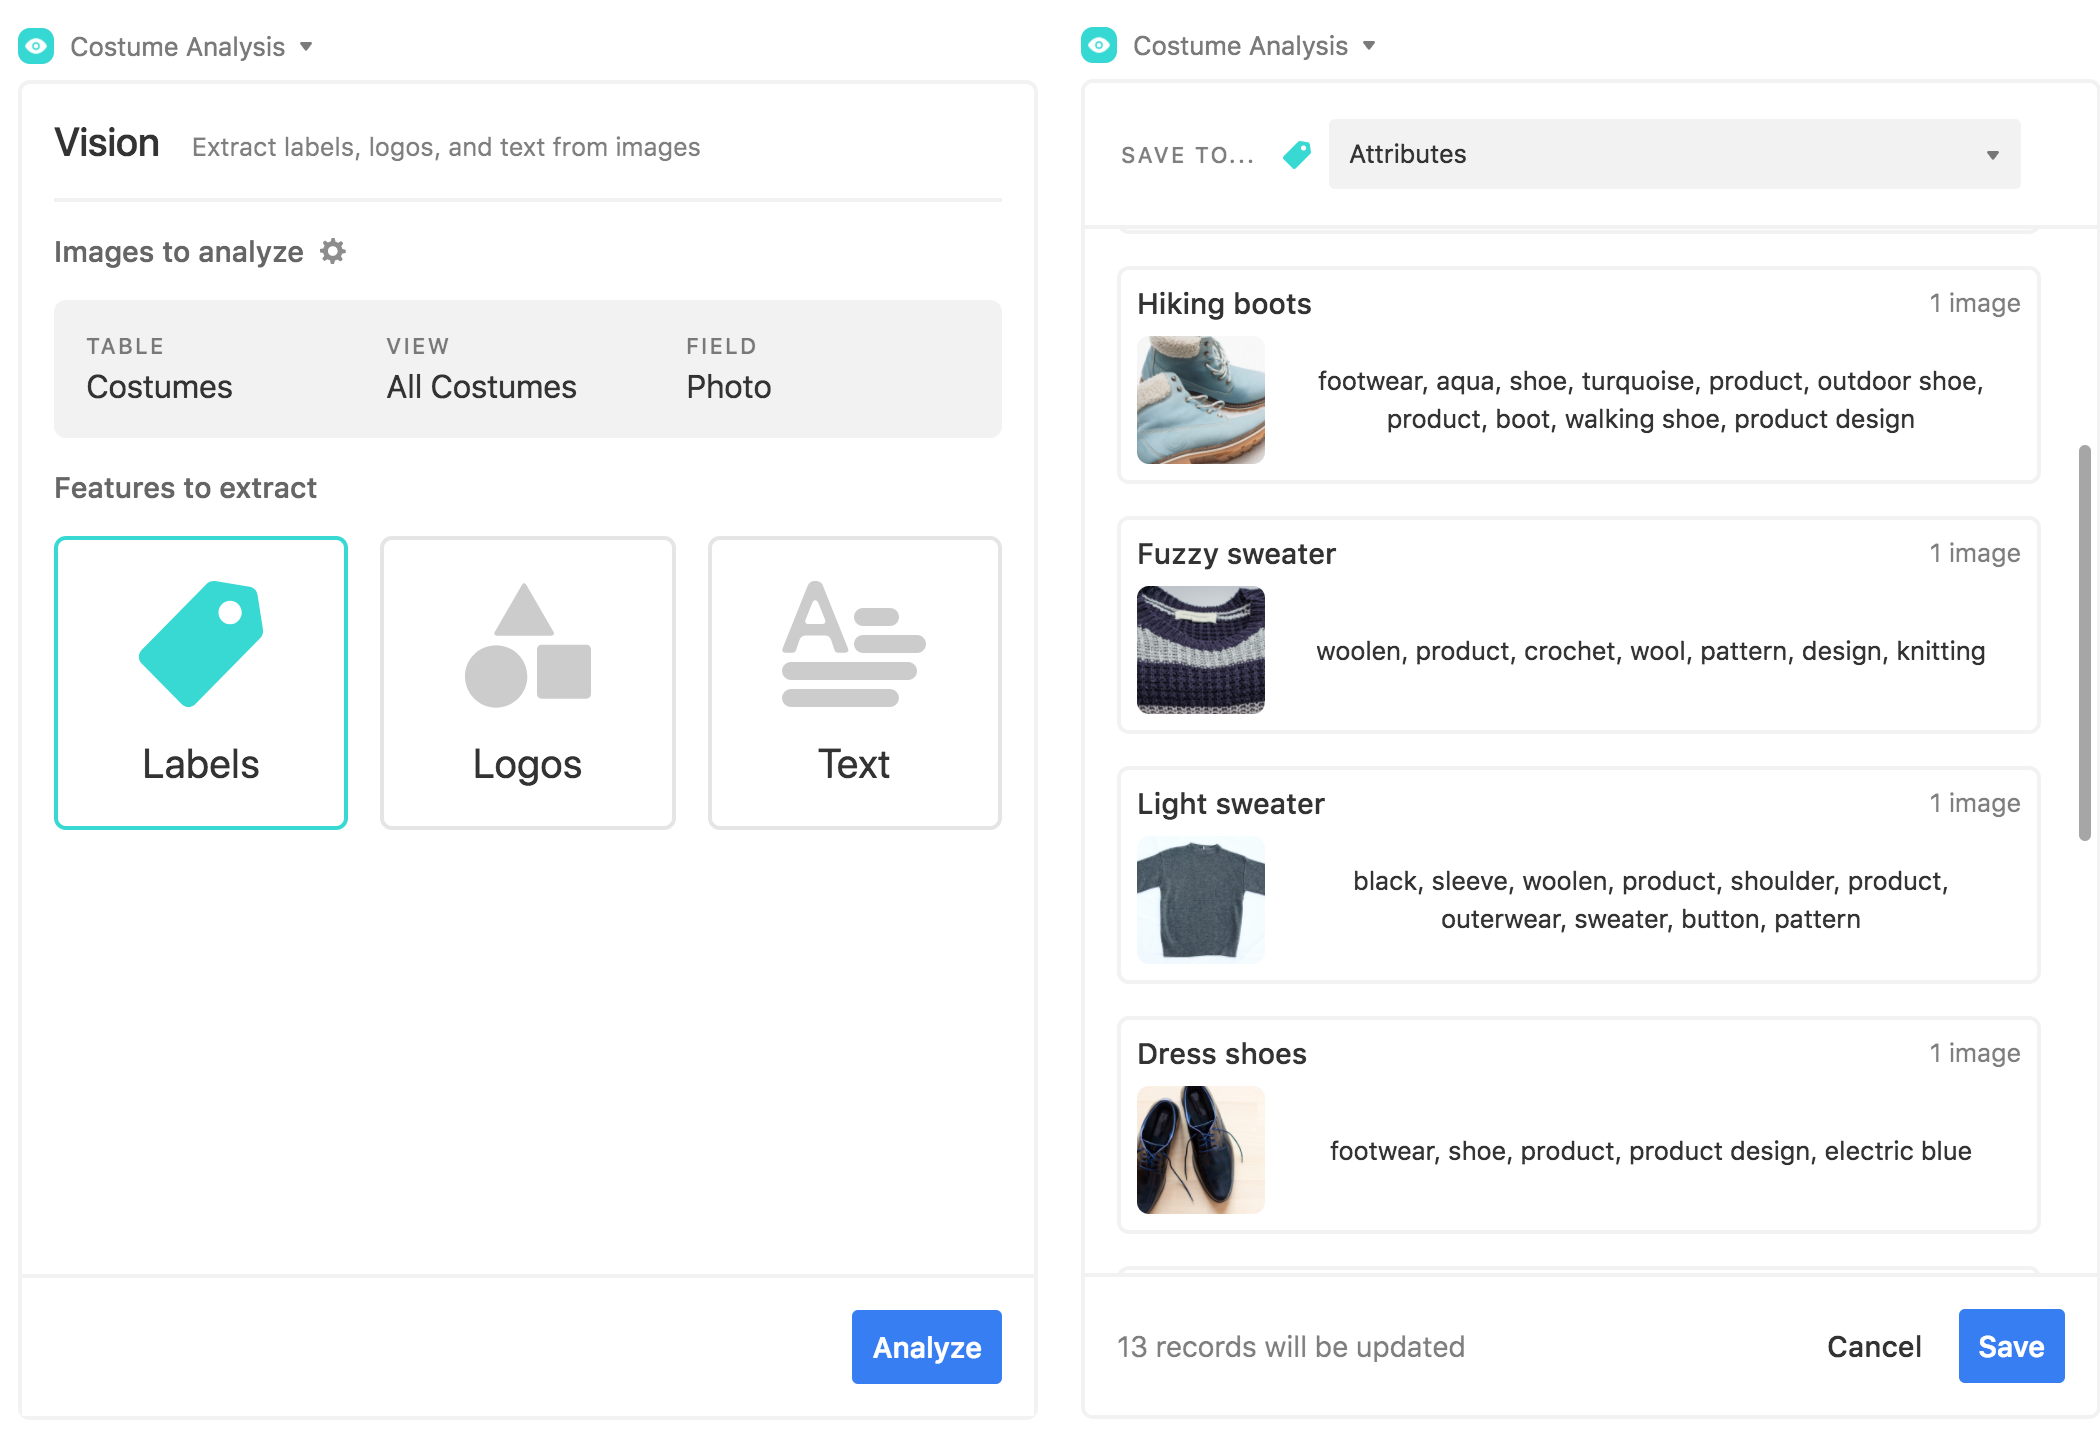
Step 1: Add photos to your base.
Make sure you have a view that includes images of the objects you'd like to analyze. You'll also want to add a long text field for the metadata that you'll generate through Cloud Vision.
Step 2: Add a Vision app and enter your API key.
Open up the apps menu, click the add an app option, and add a new Vision app to your base. Note that to use this app, you'll need to set up a Google Cloud Vision account and locate the API key associated with it. Once you retrieve this key, enter it into the Vision app.
Step 3: Analyze your assets.
Choose your table of images and the attachment field you want to analyze, and the type of metadata you'd like to generate. Cloud Vision can extract labels, logos, and/or text. In the next step, you'll choose which text field you want to write the results to.
(For an extra power-up, once you've run the Vision app, you can convert the text field it writes to into a multiple select field, which will allow you to group, sort, and filter by like attributes across images.)
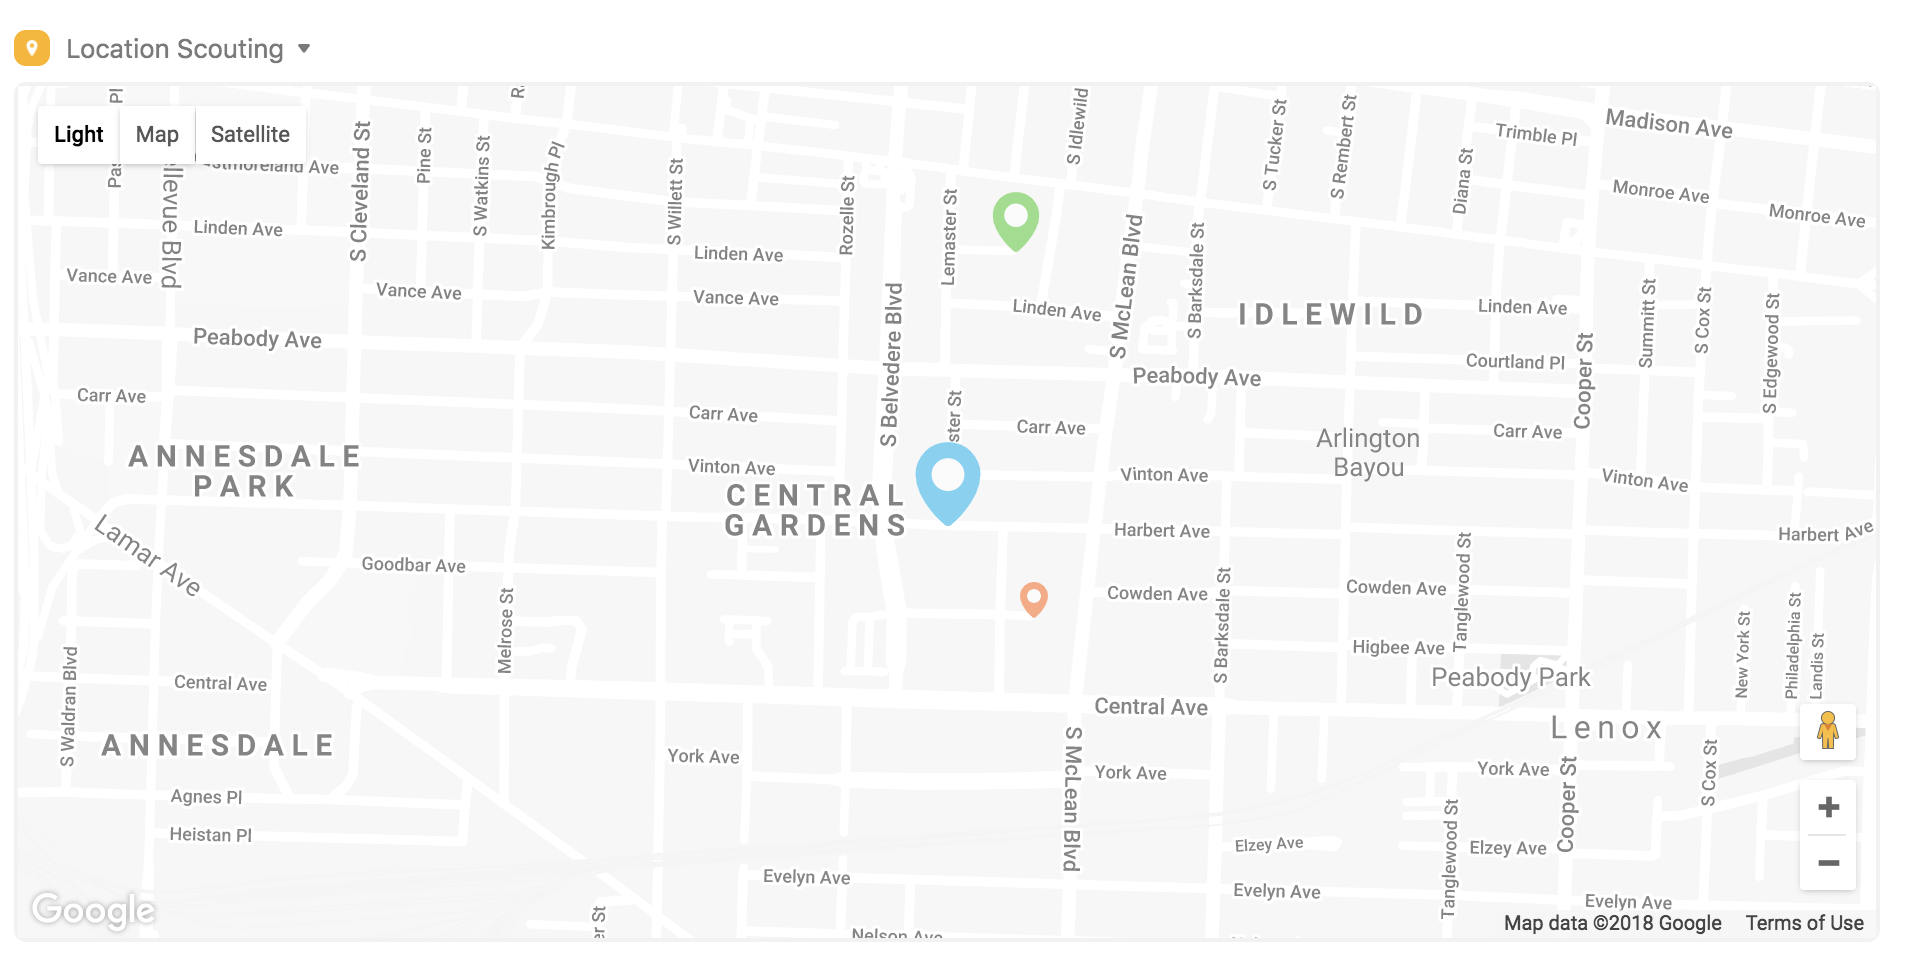
Map shoot locations for easy scouting
Juggling visits to new locations all over town? Use the map app to plot your destinations and quickly see which to prioritize.
Step 1: Set up a location field (with addresses or coordinates) and a cache field.
If you don't already have one, make sure that your table of locations includes a single line text field or a long text field with the relevant addresses. (You can also use a field using latitude-longitude coordinates instead of addresses.)
You'll also need to create a new, empty single line text field to serve as your map app's geocode cache field. The app will use this field to save some additional information for each address in order to display markers on the map.
Step 2: Get a Google Maps API key.
The map app requires you to have a Google Maps API key. You can easily grab a Google Maps API key by visiting this Getting Started guide and clicking the button that says “Get a key.” (If you don't already have a Google account, you'll need to create one to use for Google Developers.) Once you get the API key, hang on to it—you'll need it for Step 3.
Step 3: Add a map app to your base.
When you're ready, open up the apps menu, click the add an app option, and add a new map app to your base. Go through the setup process, picking the appropriate table and view, selecting the location field and geocache field from step 1. You can specify the color and shape of the map markers, and you have the option of scaling the sizes of the markers to the values in a numeric field. (Try linking marker size to your own personal rating field.) Lastly, you'll need to paste in your Google Maps API key from step 2.
And that's all you'll need to do! Once you've set up your map, you can view it in one of three styles (Light, Map, or Satellite) and even look at your locations using Street View.
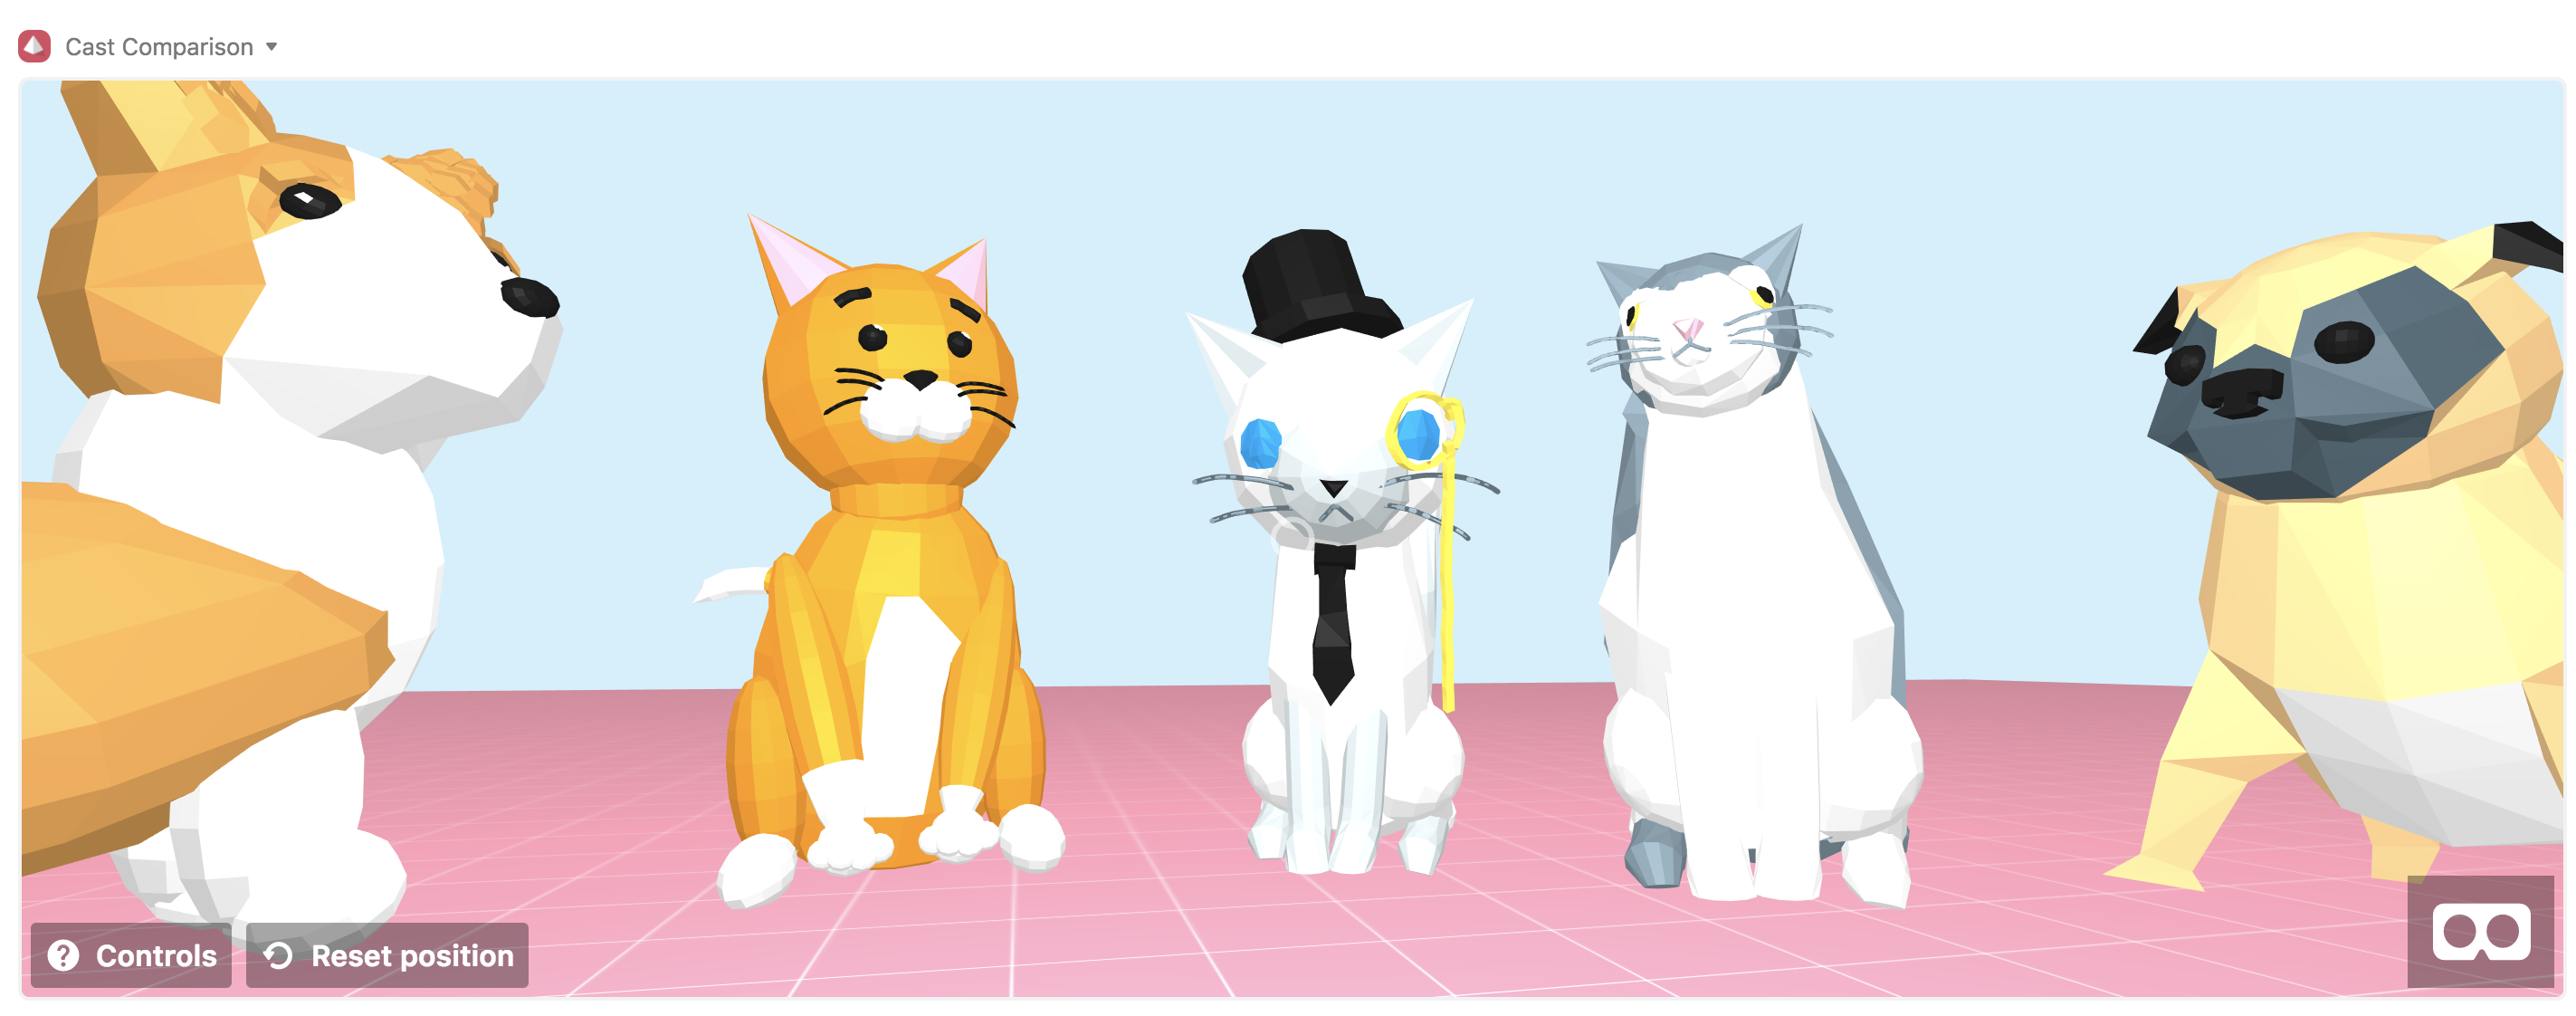
Compare cast members in 3D
When you're choosing the best fit for a new role, what's better than seeing your potential cast in three dimensions? With the 3D space app, you can see how your cast members stack up in virtual space. This app could also be used for comparing sets or checking out prop inventory at scale.
Step 1: Make sure your base contains 3D model files.
Create an attachment field in the relevant table, and fill it with 3D model files.
You can upload any of these file types: COLLADA, gLTF, or OBJ/MTL (in this case, please include both the OBJ file and the MTL file in the same record, in the same attachment field). The 3D space app also supports 2D image files, which will render as flat images in the 3D space. Good sources for 3D model files are poly.google.com, Sketchfab, and Clara.io.
You'll also need three number fields to serve as the X, Y, and Z coordinates for each model.
Step 2: Add a 3D space app to your base.
In the apps menu, select the add an app option, and add a 3D space app to your base. You'll need to specify the table, view, field, and coordinate fields you set up in Step 1.
Step 3: Move your models around in space.
Your models will start out in the locations dictated by their coordinates, and you can shift their positions by adjusting those coordinate fields directly, or by clicking and dragging them around. You can see the controls for adjusting your models' location by clicking the View controls button on the bottom left of the app.