When you're on a small team, rolling out a new process can be as simple as sending a couple of Slack messages or having a well-timed one-on-one meeting. As your team grows larger, however, it becomes ever more necessary to articulate your existing processes—and to think about how you can best train new team members in those processes. What's more, as you gain more team members, individuals will become more likely to specialize—different people will become involved in different parts of your processes and will need to be able to focus on just the most relevant information.
Read on to learn more about how your growing team can most effectively use locked and personal views, and other tips for a more streamlined view navigation experience.
Using locked views
Using personal views
Keeping your views organized
Lock it down
Airtable's latest new feature, locked views, makes it easier to bring large numbers of new team members onboard—without having to worry that they might inadvertently disrupt your workflows as a result of inexperience. Locking a view allows you to prevent other collaborators from altering a view's configuration options until it's been explicitly unlocked by another collaborator with creator permissions—that means you won't have to worry about other collaborators changing the filters, field visibility, record coloring, and so on.
The very first thing you'll want to do if you're bringing new team members on board to your Airtable base is to lock any views where unplanned changes to the view configuration could disrupt your team's workflow.
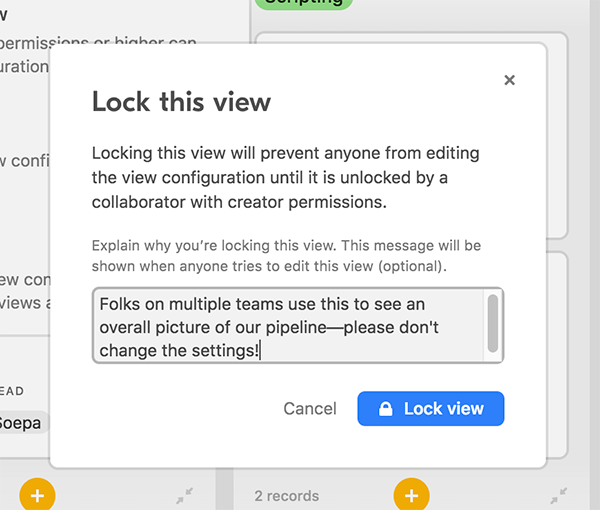
When you lock your views, be sure to leave a helpful lock message that will give the other people with whom you're working more context for why you locked the view. The message will appear any time another collaborator with creator permissions tries to unlock the view.
There are several situations in which you might want to lock a view.
Lock views that are central for your team
If there's a canonical view (or several) that plays a central role in your team's workflow, locking it can prevent confusion caused by a teammate's errant filter application or field rearrangement.
As one example, let's say that your video editorial team has a kanban view showing your entire video production pipeline and how different videos are progressing through the different stages of production. This view is useful for all team members who want to quickly get a high-level overview of the pipeline, so a carelessly added filter could lead to frustration for team members wondering why half the records in this view are missing.
Lock views for share links and embeds
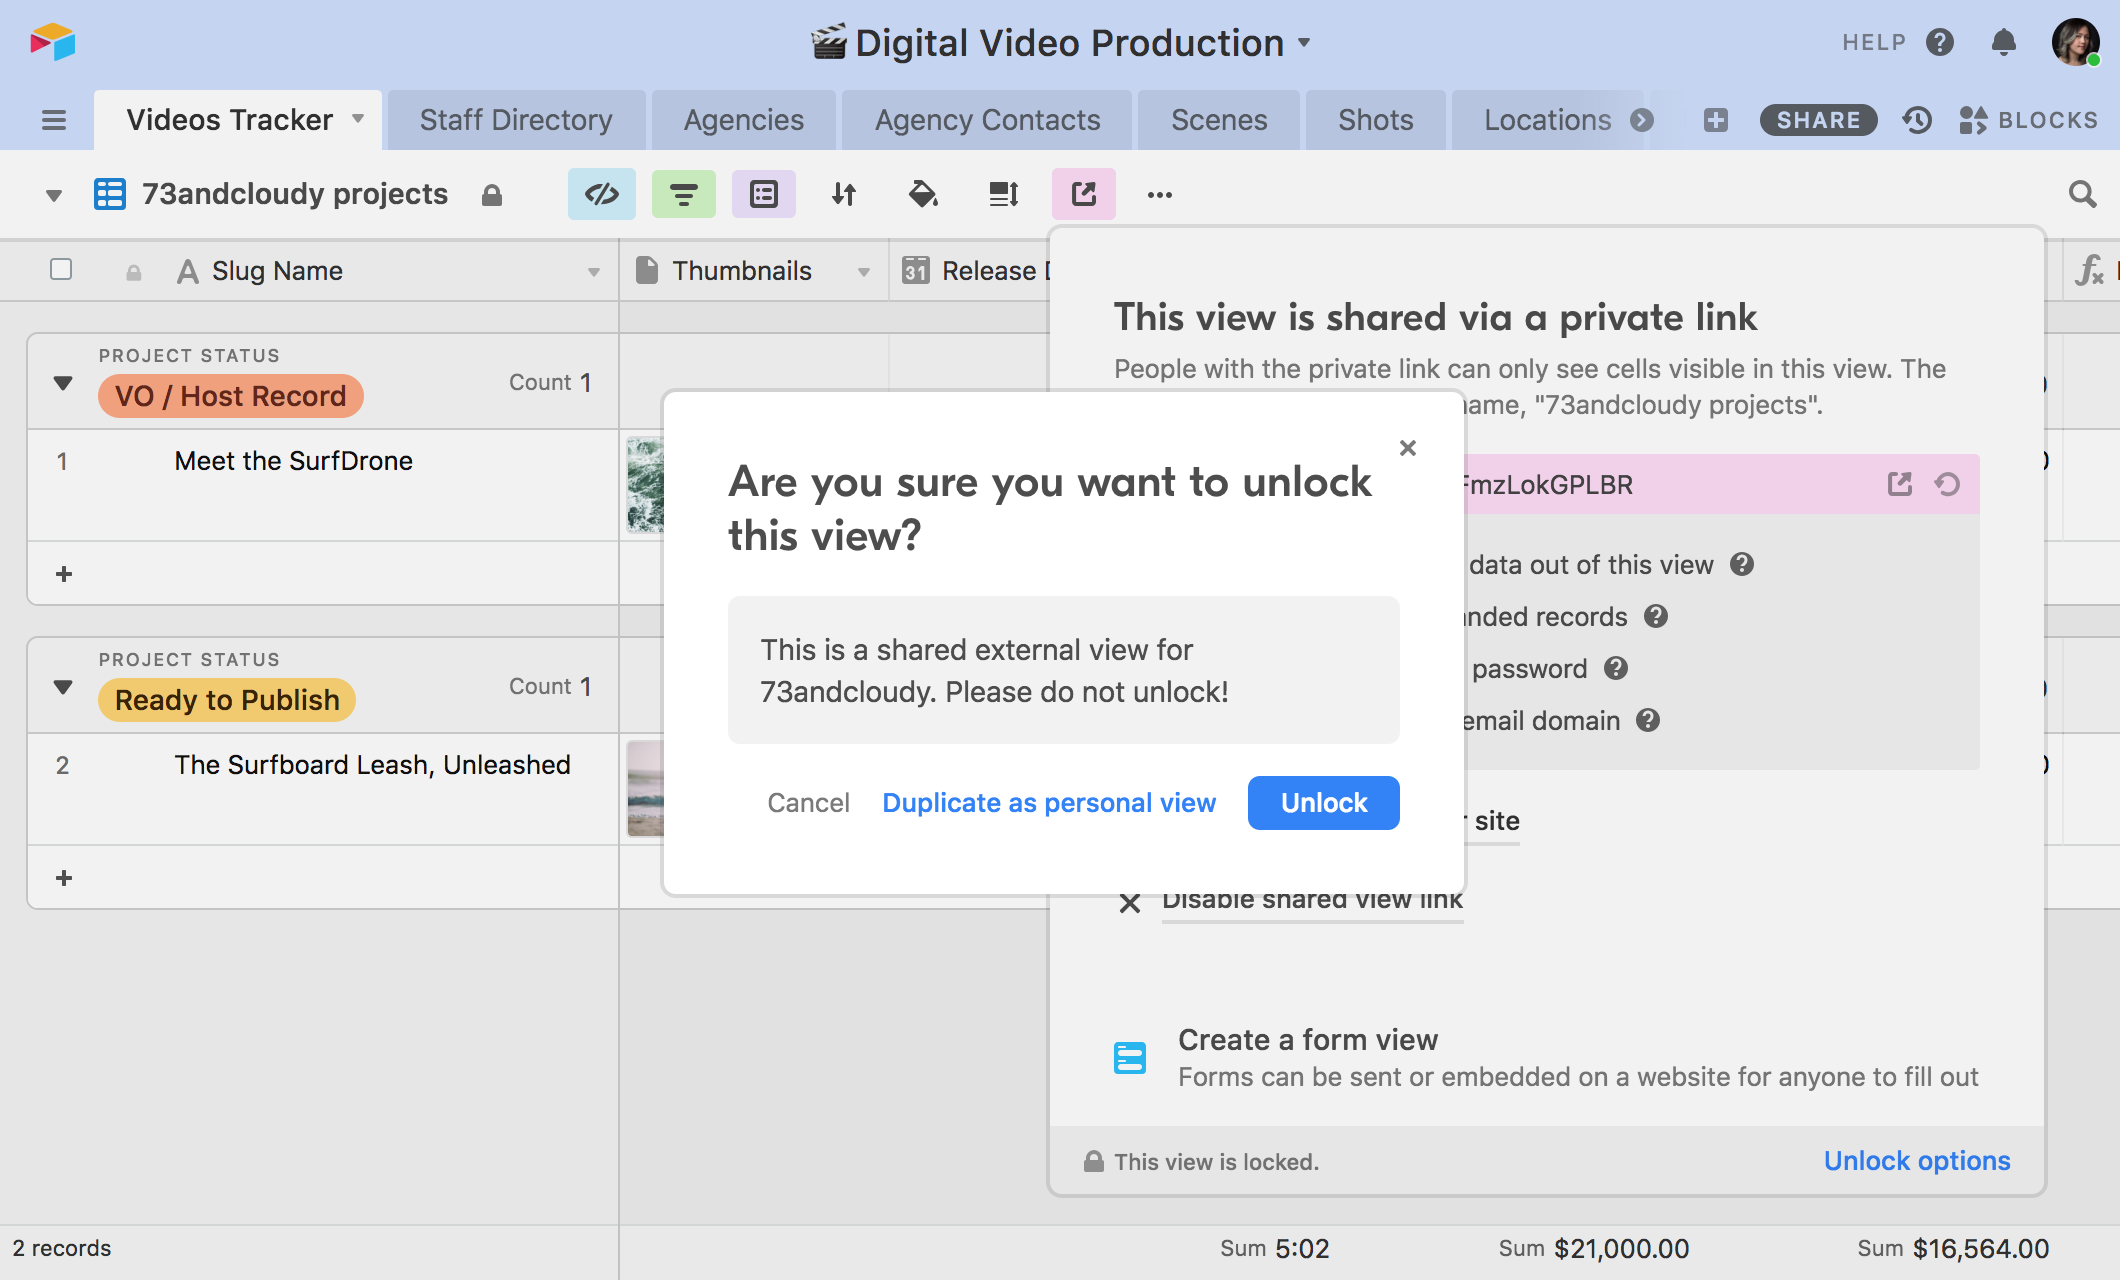
Another time you might want to lock down a view is if you've created a view for a view share link or embedded a view elsewhere. Suppose your organization is working with an agency, and has created an external-facing view share link for that agency that uses filters to show just the projects relevant to them. Locking the view associated with the view share link will help ensure that external collaborators won't inadvertently see sensitive internal information as a result of someone mistakenly removing a filter.
Lock views for blocks
Many blocks are used most effectively in tandem with customized views, and locking these views will keep your blocks working as intended: your summary blocks will return the correct numbers, your countdown blocks will count down to the correct deadlines, and your SMS messages will send to the correct people.
For example, let's say you want to set up a chime block that triggers whenever a project has been completed. To do this, set up a view with a filter such that the view that only shows records that have been marked as complete. Then, configure a chime block to trigger whenever a new record appears in that filtered view. By locking this filtered view, you can ensure that the chime will only sound at the appropriate times.
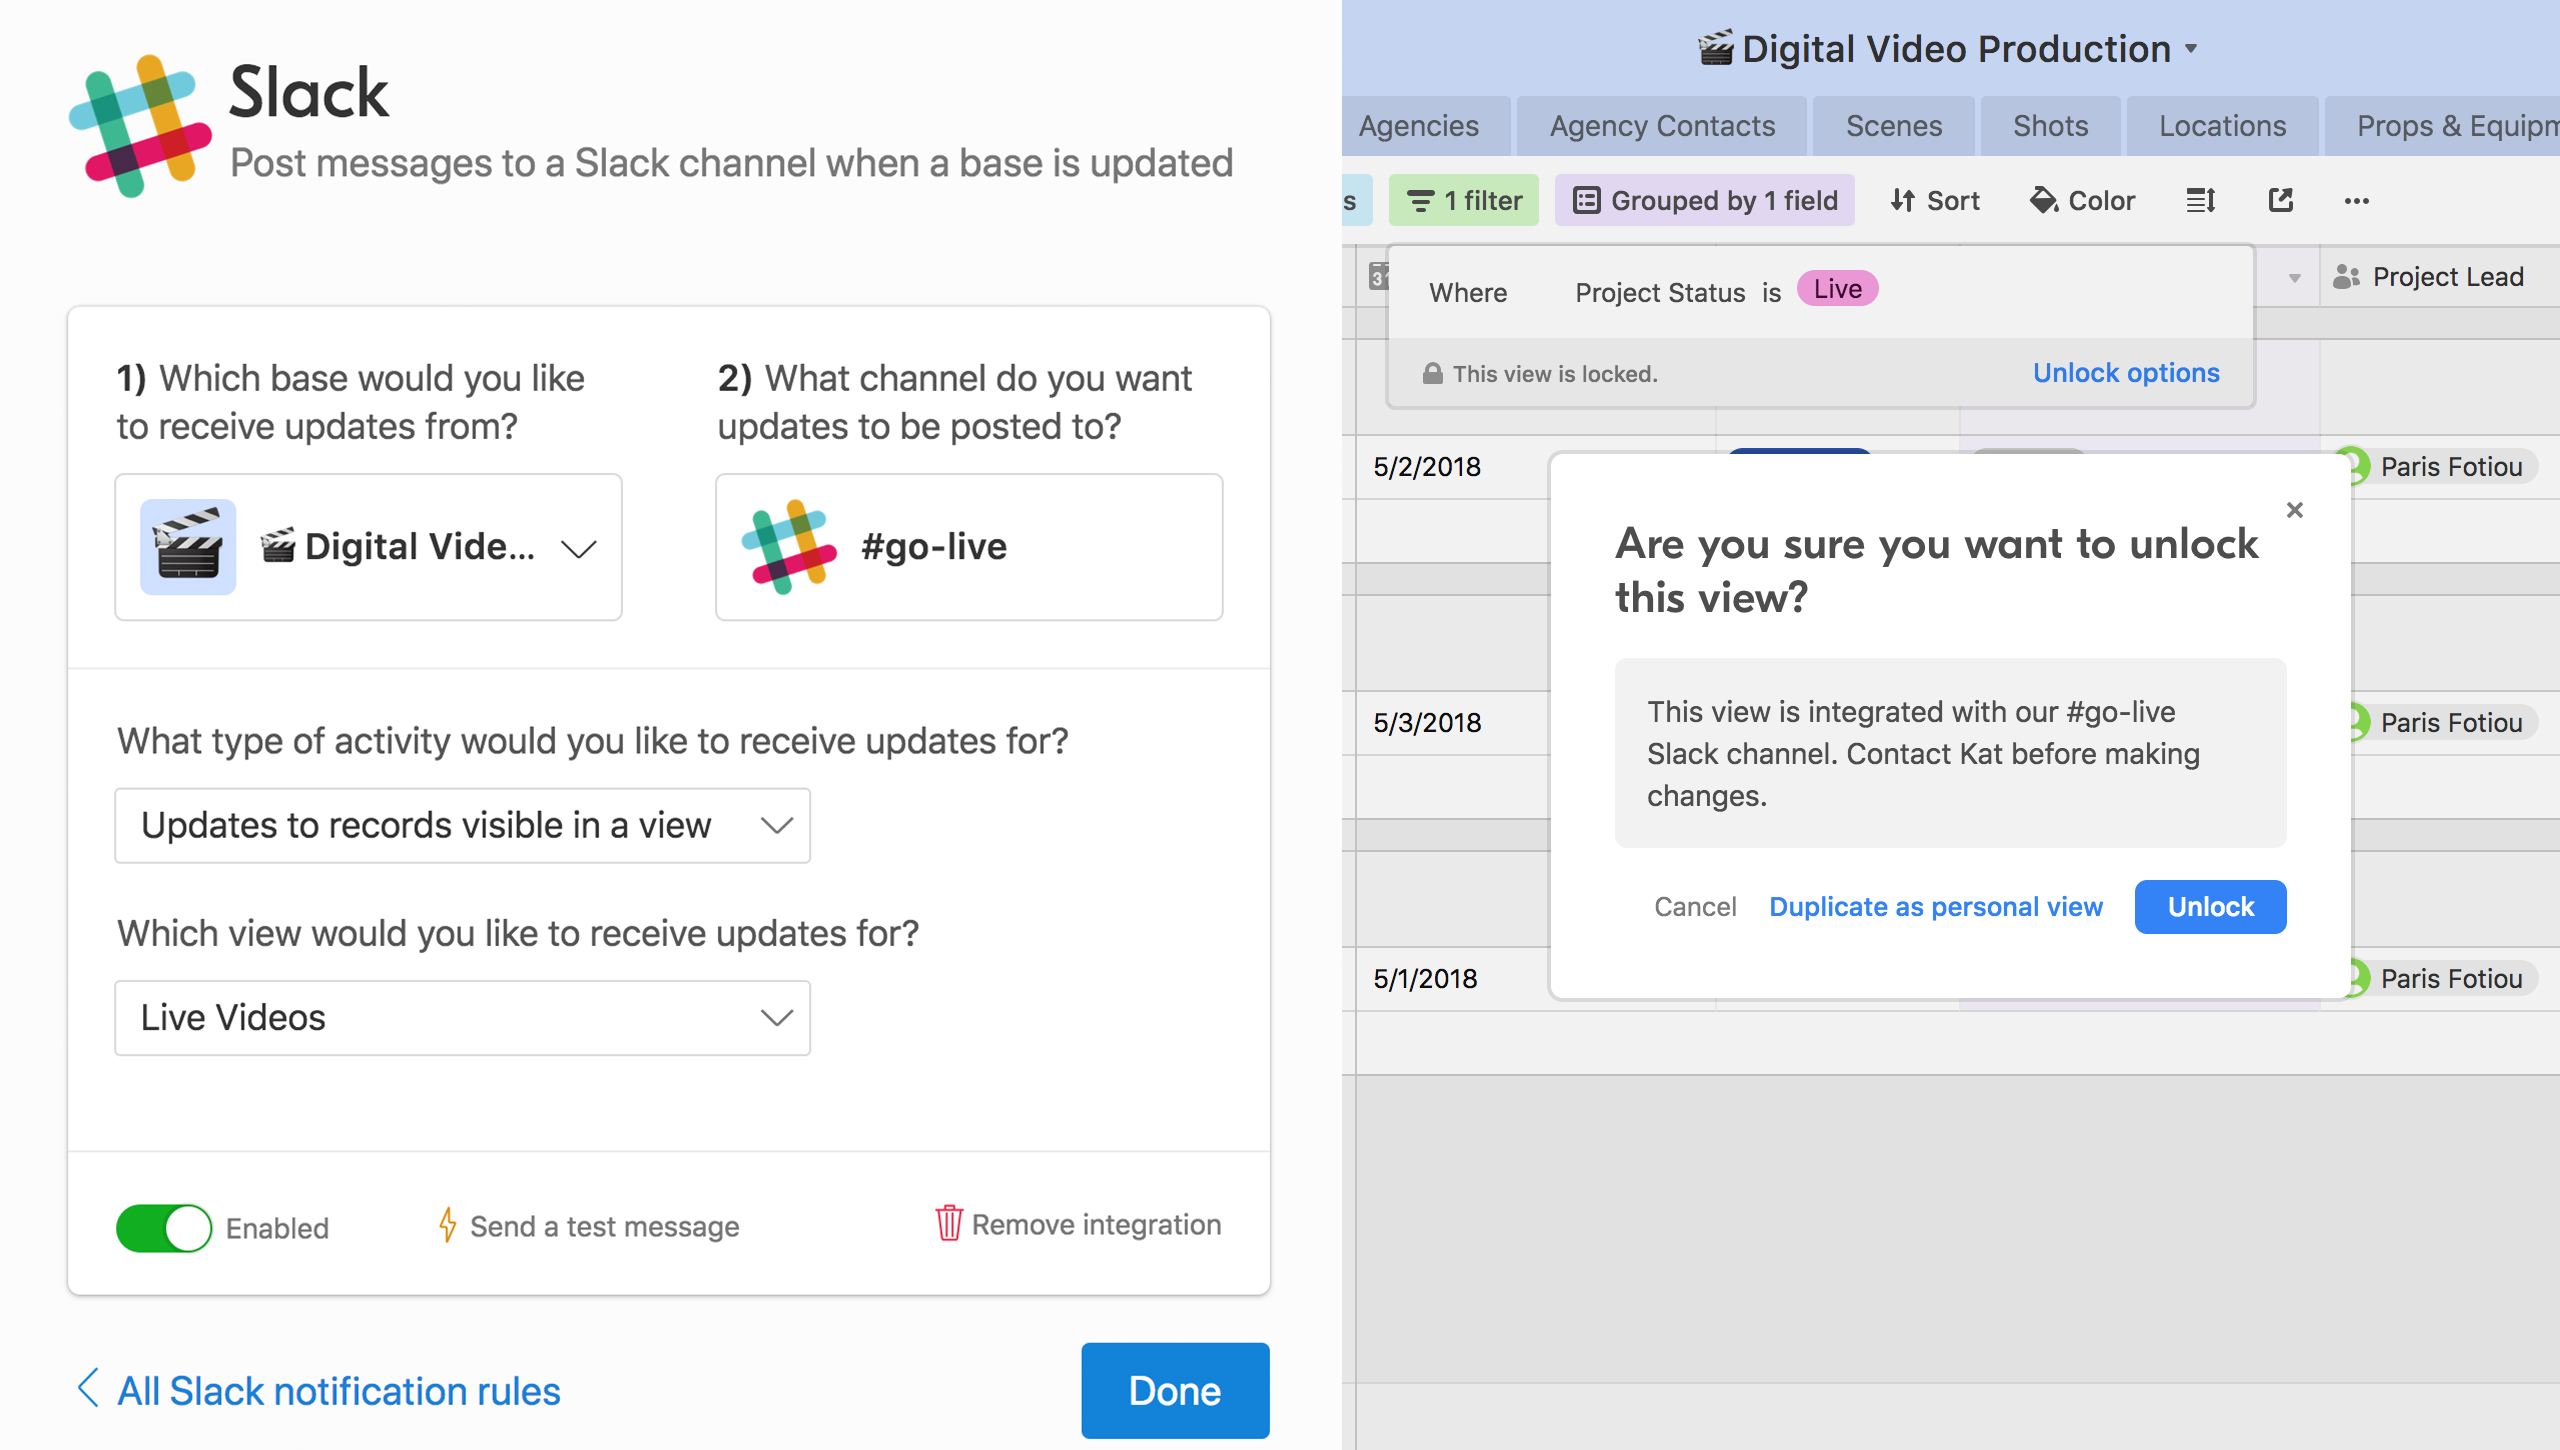
Lock views for integrations
When you've created a view to power a specific integration—whether that's a Slack integration or an integration through Zapier—it's especially important that the configuration of that view doesn't get changed, as unexpected changes to a view's configuration can break your integration. To avoid any workflow interruptions that might come about as a result of you or one of your collaborators forgetting which views power which integrations, lock critical views and leave helpful lock messages.
Now it's personal
Locking views can do wonders by preventing the accidental editing of views that are of general interest to the entire team. Personal views, on the other hand, enable individual team members to customize views to their specifications: with personal views, only the collaborator who created the view can edit the view's configuration. This way, different team members with different responsibilities can create views optimized for their specific workflows and needs. Team members can also bookmark their personal views so that they can more quickly access the information that's directly relevant to their specific work.
Additionally, other collaborators' personal views are hidden from your view switcher by default, making it easier to navigate through just the views that are relevant to your needs.
Here's a neat trick you can use to speed up the creation of personal views for all your team members. You might have noticed that if you try and unlock a locked view, you'll see an option that says “Duplicate as personal view.” This will create a new personal view for you that has all the same configuration options of the locked view—meaning the same fields will be hidden, the same filters will be applied, and the same record coloring conditions will carry over.
That means you can set up a view with the view configurations that will be helpful for most of your fellow collaborators, lock it, give it a helpful name like “👉 Copy this for your personal view,” then have each new team member make a personal view, starting by making a copy from this locked view.
Keeping your views organized
As your team scales, your growing Airtable base will likely accumulate more and more views. Here are a few techniques you can use to keep all your different views straight.
View-naming conventions
Your team should work out what naming conventions you're planning on using for your different views. One that we recommend is prefixing view names with specific emoji depending on their intended purpose or who's using them.
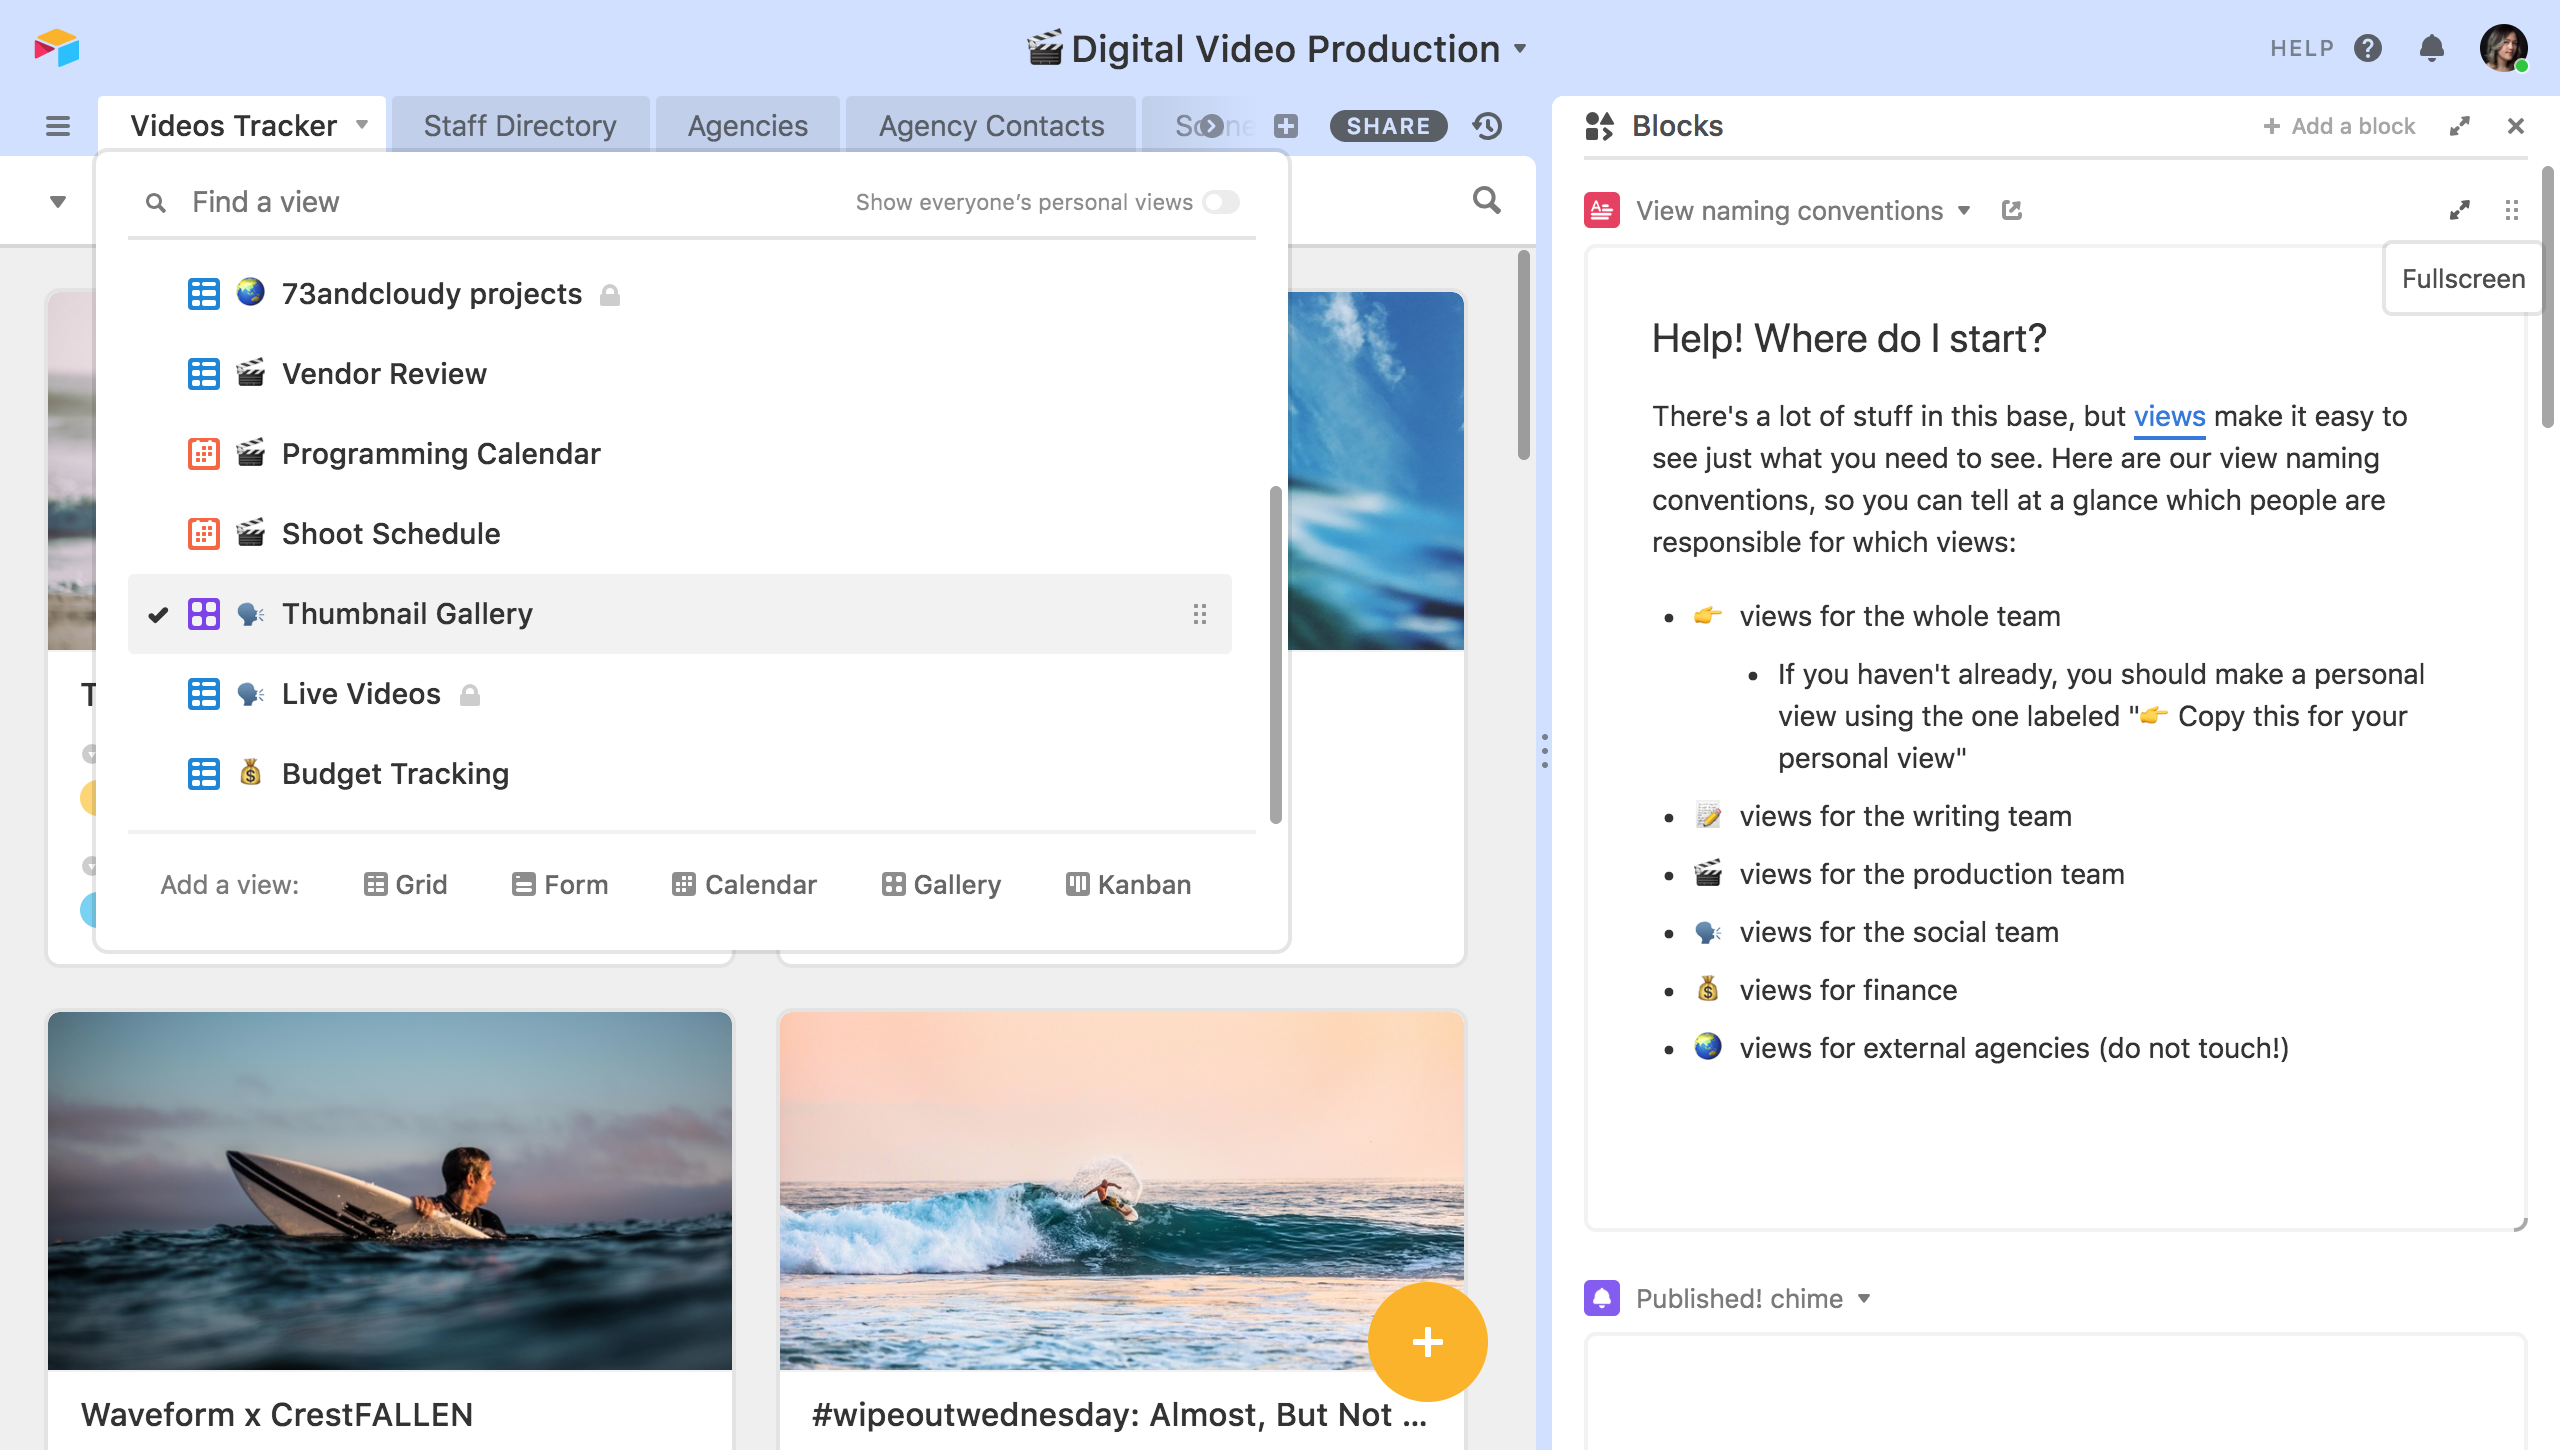
In addition to view naming conventions, you can also rearrange the views in the view switcher to better suit your team's needs: you might want to group all views of a certain kind together, or place the most frequently used views toward the top of the switcher. Just use the drag handles to change the view order.
View search bar
Instead of manually scanning a long list of views to try and find the one you want, try using the view search bar. When you open up the view switcher, you can start typing into where it says “Find a view” to enter a search query. You can bring up the view switcher even faster with the keyboard shortcut Ctrl + Shift + K (Cmd + Shift + K on Mac). Click on the search result of your choice to be directly brought to the view you want—or navigate through the different search results with the Up and Down arrow keys, and hit the Enter key to select a view.
Scaling your processes is an inevitable part of growing your team, but it doesn't have to be painful. In fact, as long as you have tools that are flexible enough to grow with your team, scaling up can be a valuable opportunity for you to better understand how your team works and implement more robust systems—setting you and your team up for success far into the future.
Locked views and personal views are both available on Airtable's Pro and Enterprise plans. Not a Pro user? It's never too late to upgrade—and Pro plans come with even more premium features, like custom-branded forms, advanced calendar features, and an expanded color palette. Check out our pricing page for more details.