If there were an official guide for freelancers, the first chapter would likely convey the importance of establishing structure in your work.
Being your own boss and setting your own hours? Sure, that sounds like a cushy time, but every full-time freelancer knows the long hours and/or late nights can be punishing when you don’t have a system to manage your multiple projects, invoices, and pitches.
Just ask Cole Fortman, an Airtable and Softr no-code consultant and full-time freelancer who relies on Airtable to handle nearly every aspect of his work (and life).
“There’s a lot I have to think about as a freelancer, like managing work for my regular clients, taking consultations with new clients, and putting out my own content,” Cole said. “When people see all of the work I’m doing and ask how I can do it all by myself, I point to Airtable. I don’t even know how I’d be able to function without it.”
Want to be as productive as Cole? Here are just a few of the many ways you can use Airtable to not only structure your freelance workflow, but improve it.
Design an interface to manage outreach to potential clients
Freelancing almost always involves hustling… for new projects, new clients, new skillsets. And sometimes it requires reaching out to strangers with whom you have absolutely no connections.
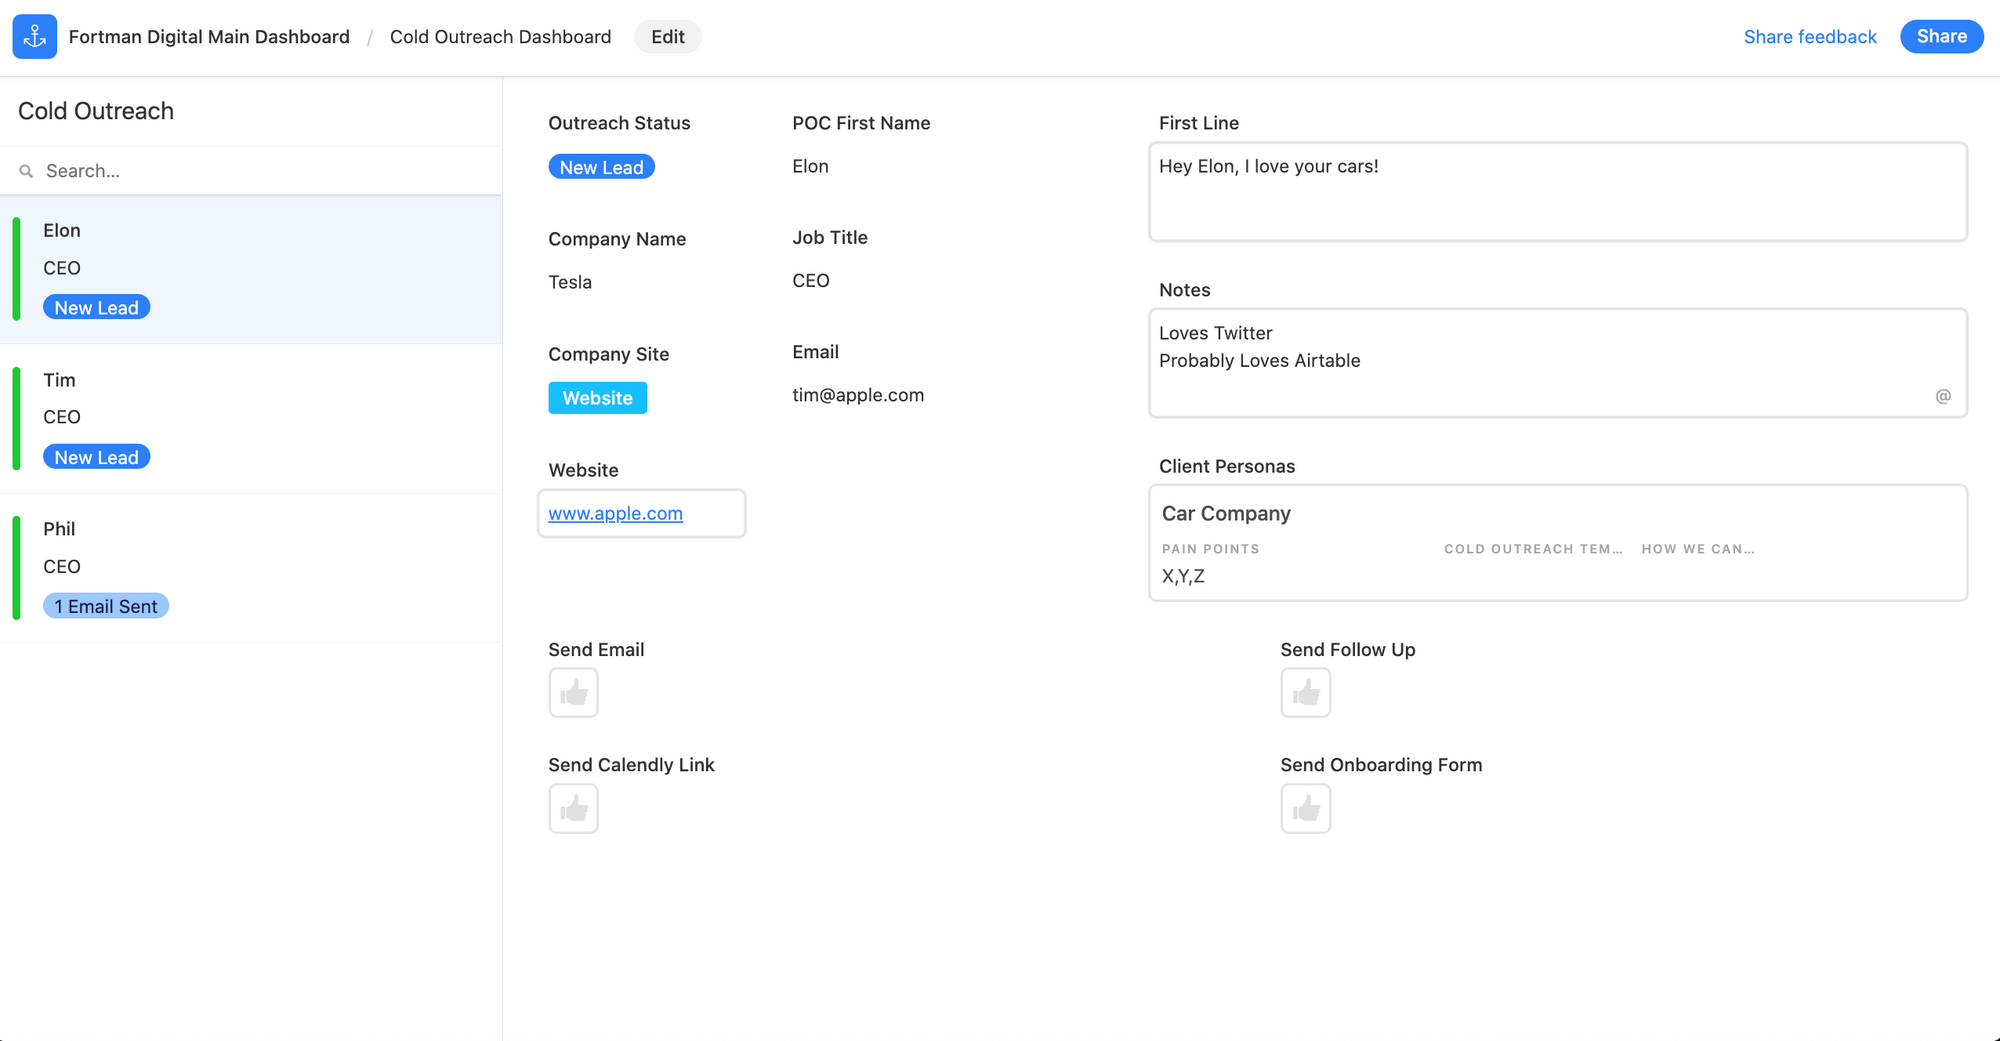
In addition to a cold outreach base for storing contact information, Cole also has an interface (shown above) as a dashboard when sending emails. Using Interface Designer, he designed an interface that lets him scroll through his contacts, pull one to see at-a-glance info, and take action.
And to make outreach as straightforward as possible, he added four buttons: one that sends the first email, another that sends a follow-up email, a third that schedules a meeting through Calendly, and a fourth that sends an onboarding form to the client.
“I like to think of Airtable as my second brain,” Cole said. “It’s helpful to have something like an interface, where I can click through contacts easily and just hit a button when it’s time to send a follow-up email.”
Want to get started on building your own interface? Click the “Interfaces” button in the top-left corner of the base you want to use to create a new interface. To make an interface similar to Cole’s, we recommend selecting the record review layout, which lets you go through numerous records at a time.
> Click here to learn more about button fields, which let you trigger actions (like sending an email) directly from your base or interface.
I like to think of Airtable as my second brain. It’s helpful to have something like an interface, where I can click through contacts easily and just hit a button when it’s time to send a follow-up email.
Create a Form view to onboard with new clients quickly
Onboarding is a multi-step process that involves a lot of back-and-forth, and if you’re a freelancer building new relationships with clients, chances are you’ll have to onboard numerous times.
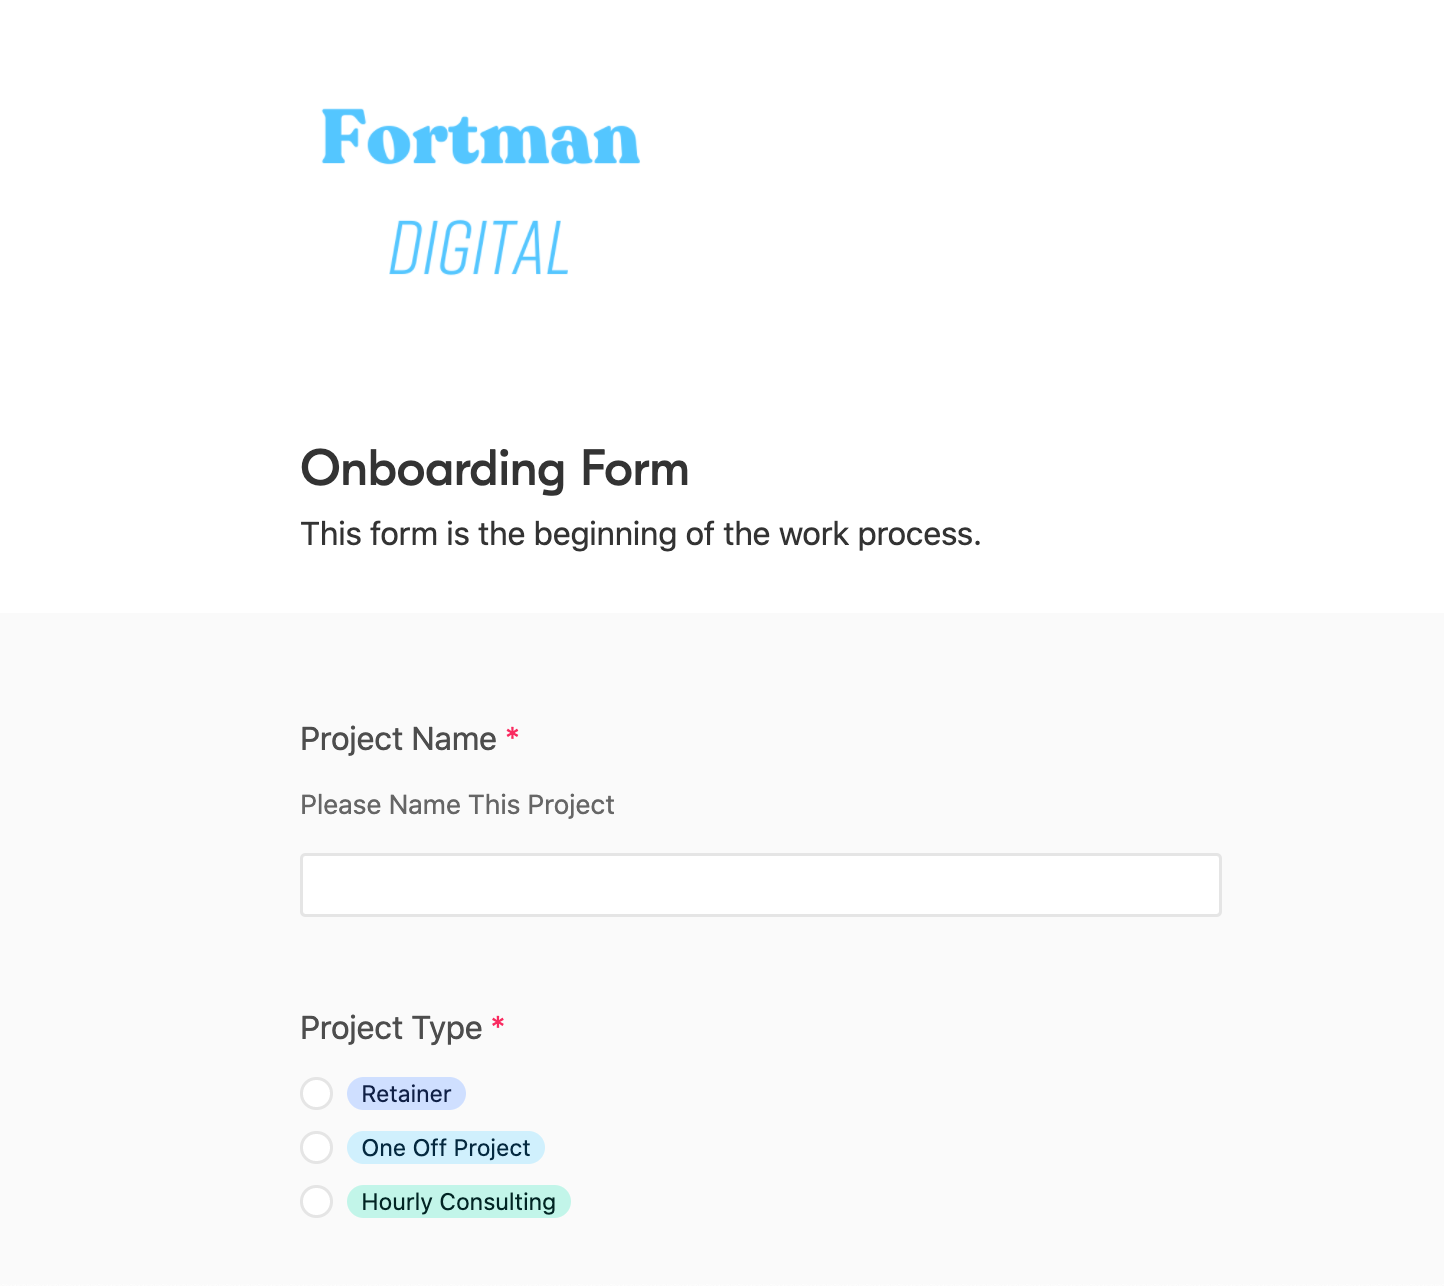
To cut down on time and make onboarding as painless as possible, Cole created a Form view in Airtable (shown above) that he sends to all new clients to capture information like client name, email, and invoice amount. All information that clients submit automatically populates a table in Cole’s base.
Create this view by heading to the Views panel in the left-hand section of your base and clicking “Form.” The fields that appear on your form are populated based on all of the fields you have in your grid view–add more or hide them depending on what information you’d like to collect.
Airtable forms also support file attachments, so clients can easily include any contracts or documentation they need you to sign in their submissions.
> Try creating a Form view in your base here
⚡ Pro tip: Go a step further like Cole and create an automation that generates an invoice in Stripe when a client submits a form.
Follow the status of multiple projects with Kanban view
Juggling projects for several clients at the same time can get overwhelming, especially when there are different stages to track for each, from works in progress to rounds of approvals.
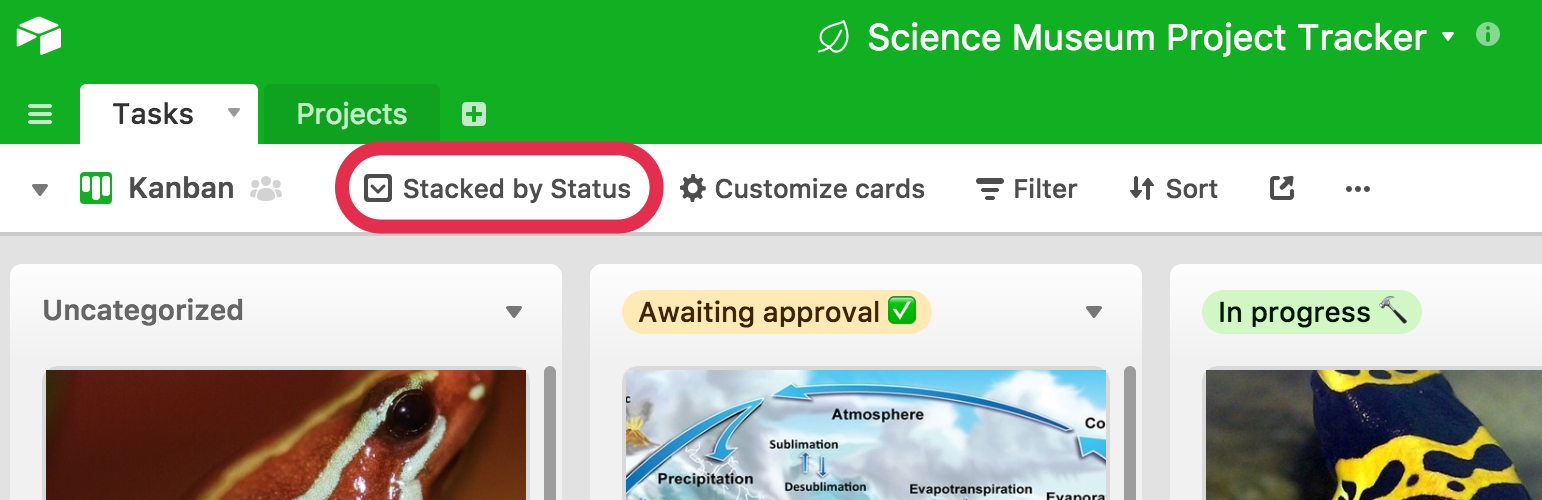
Enter Kanban view, which visualizes your freelance work cleanly in columns of stacked cards. By stacking your records by status, you can see all of your projects and/or tasks according to what stage they’re in.
> Click to add a Kanban view in your base now
Add a new Kanban view by heading to the view panel on the left-hand side of your base and selecting “Kanban” from the list of views. You’ll need to choose a grouping field, which determines how your records will be stacked–in the image above, we’ve grouped our records by “Status.”
Choose which fields to show or hide on your Kanban cards so you only see the most relevant information for each project, like client name. And for your convenience, cards can be dragged and dropped–you can quickly move a project from “done” to “paid” once your invoice has been processed.
Log hours with the Time tracker app
Freelancers deserve to be paid for their work, and every second counts. Documenting how long it takes to complete tasks is an essential part of getting paid for your time.
Thankfully, Airtable has an easy-to-implement solution for logging hours: the time tracker app. A Pro plan feature, the Time tracker app lets you time your tasks in minutes or hours, then it timestamps the relevant record when you’ve finished.
To add the Time tracker app, open the app marketplace at the top of your base, click “Add an app,” and search for “Time tracker.” You’ll first need to connect the app to your desired table and view, and then select your duration field to include the timestamp (this should be an existing number field or duration field in your base).
Clicking “start tracking” allows you to either create a new record or add a timestamp to an existing record. Once the timer starts, you can begin your task and even leave your base or Airtable completely–the timer will continue to run. Click “stop tracking” when you’ve finished your task, which will add the timestamp to your record’s duration field.
Now, adding up the total amount of time for any given project will take just seconds, providing an accurate estimate of project duration and speeding up the freelance invoicing process. ⏰
Conduct research & gather inspiration from other sites with the Web clipper app
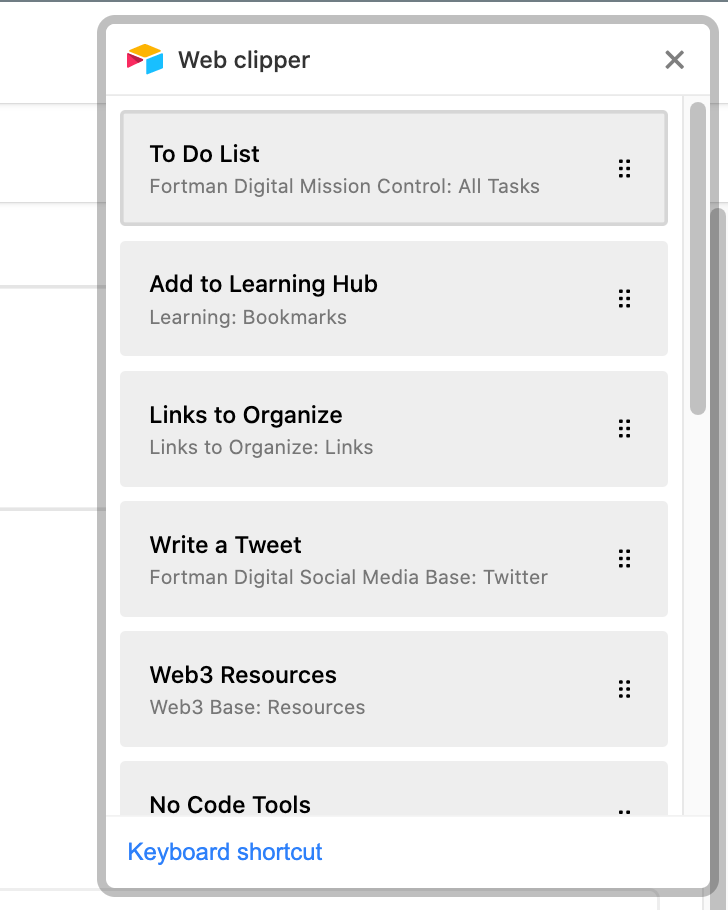
Finally, it can be hard to stay motivated when you’re on the freelance grind. Fortunately, Cole found a way to capture inspiration when it hits: through Airtable’s Web clipper app, which lets you gather information from a web page and use it to create records right in your base.
“I don’t have to go back to my base every time I find a website I like or want to take notes on my competition,” Cole said about using “one of the most underrated Airtable features,” in his own words. “I set the app as a keyboard shortcut and in seconds, I can capture what I like and it’ll turn into a record automatically.”
To use the app, you’ll have to first install the extension in Google Chrome. Then, go into the base you want to use and add the web clipper app through the app marketplace. Add a clip action by giving it a name and assigning a table to gather the records, and then start choosing the content you want to capture in fields, like an article title or product photo. You can even take a screenshot of the entire page.
So the next time you stumble across an insightful article that can inform your next project, just click the Web clipper and add a record. It’s as easy as clicking a button…literally.
With Airtable, you can create a freelance system that not only stores your contracts and project tasks in an organized way, but also minimizes the grunt work from your end so you have more time to connect with others and create amazing work for your clients.
Upgrade to an Airtable Pro plan for access to premium features like apps, automations, record coloring, and more to support your freelance workflow.