Having a single source of truth for your social media posting is crucial, especially if you’re trying to coordinate your posts across multiple platforms. One way to make this easier is to connect your social media content calendar directly to your social media accounts, so that you can automatically post when the time is right.
Here’s how you can use Airtable Automations to automatically tweet for you. If you’d like to automate your social media content calendar, you can either make a copy of the base below—which already has the automation built into it for you—or you can follow these step-by-step instructions to add this automation to an existing social media content calendar.
Setup
In order to build this automation, you’ll need a couple of ingredients. First, you’ll need an Airtable account and a Twitter account. You’ll also need to have an Airtable base in which you’re organizing the posts that you’d like to tweet out. A social media calendar base or other type of content calendar base is likely a good fit.
Required tables and fields
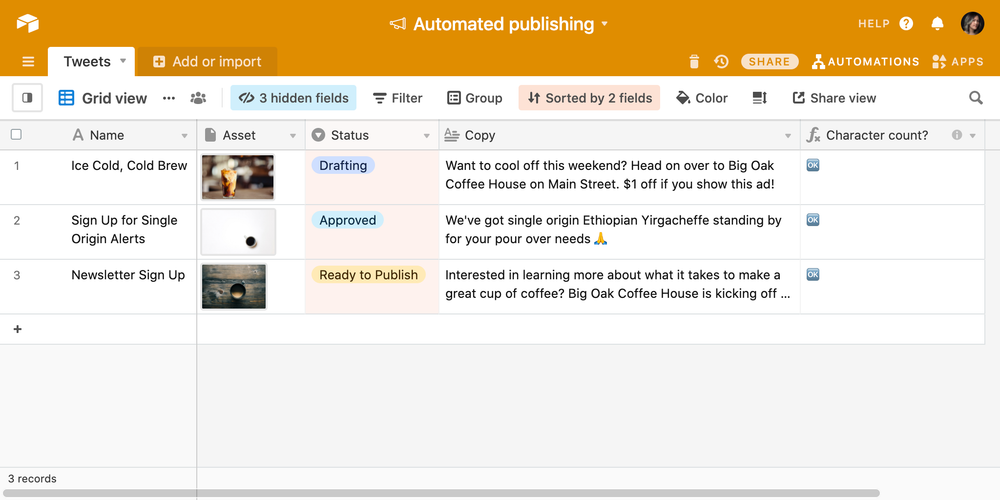
In your Airtable base, you should have a table (called “Tweets,” or something similar) which includes the posts that you’re going to tweet out.
In this table, you’ll need the following:
- A long text field, which will contain the text of each tweet you’d like to post. Call this field “Copy,” or something similar.
- A single select field, which will contain select options designating the status of each tweet. Call this field “Status,” or something similar. This status field should include at least these three options:
- “Approved” (To designate tweets that are ready to be posted when the time is right)
- “Ready to Publish” (To mark tweets that you would like to post, when you would like to post them)
- “Posted” (To designate tweets that have already been posted)
If you’d like, your table can also include the following optional fields:
- An attachment field, which will contain image files to be posted to Twitter alongside the text of your tweets. Call this field “Asset,” or something similar.
- A formula field, which will check the character count of the text in the “Copy” field, and indicate if the text in the “Copy” field exceeds 280 characters. For example, the formula
IF(LEN(Copy)>280,"🚨","🆗")returns a siren emoji if the text in the “Copy” field is greater than 280 characters, and an OK symbol if the text in the “Copy” field does not exceed 280 characters.
Instructions
Now that you’ve set up the required table, fields, and view, you’re ready to make your automation.
Step 1: choose your base and create a new automation.
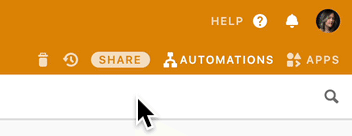
Open the base that you prepared following the Setup section above, then click the Automations button in the top right of your base. This will open the Automations side panel.
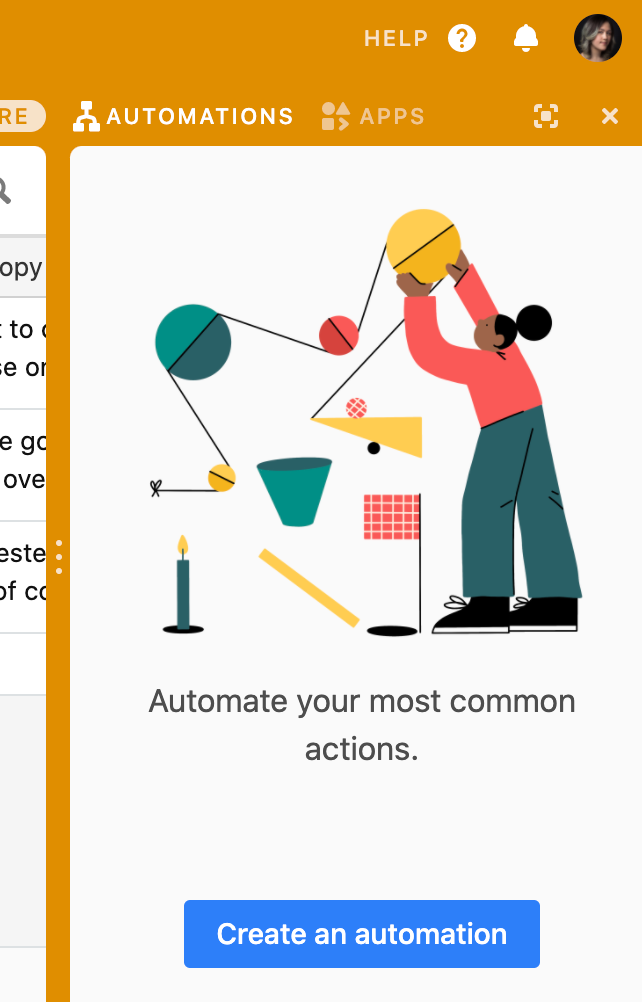
Once the side panel is open, click the blue “Create an automation” button.
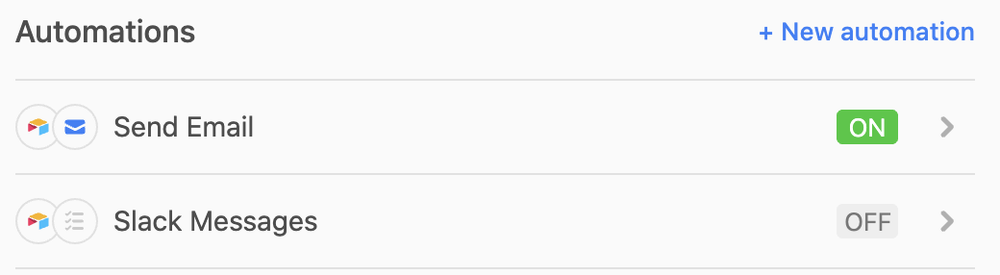
If your base already has some automations, you can create a new one by clicking on the “+ New Automation” button above the existing automations.
Step 2: set up your trigger
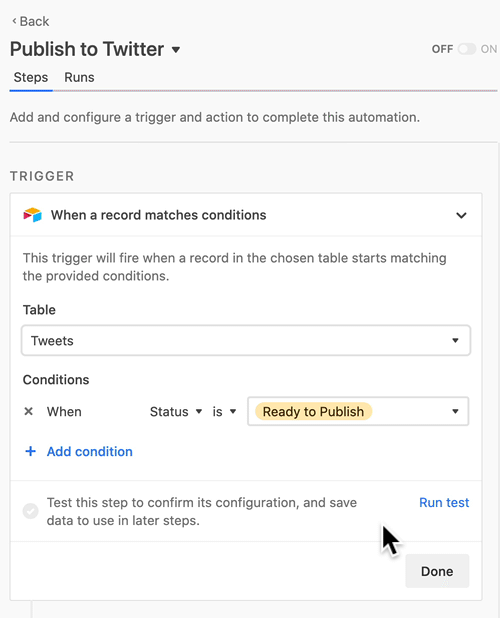
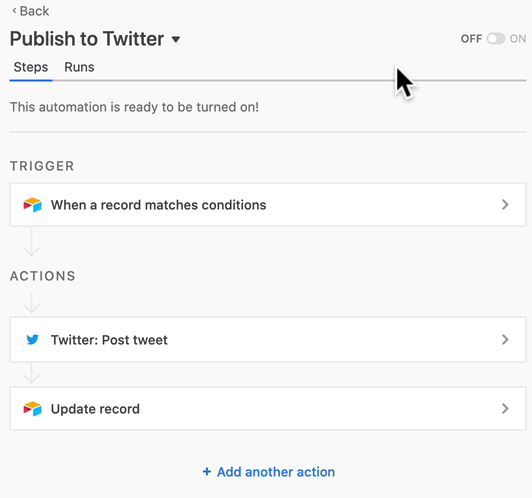
Once you’ve created your automation, you can give it a name, and then begin by choosing a trigger. The trigger is the event that starts the automation. In our case, we want the trigger to fire when we mark a tweet as being “Ready to Publish,” which will cause it to enter the “Ready to Publish to Twitter” view.
Click the “+ Choose a trigger” button. A menu will appear with a wide variety of potential triggers. Since we want this automation to trigger when one of our tweets matches a specific condition—in this case, when, when a tweet has been marked as “Ready to Publish”—select the “Airtable: When record matches conditions →” trigger.
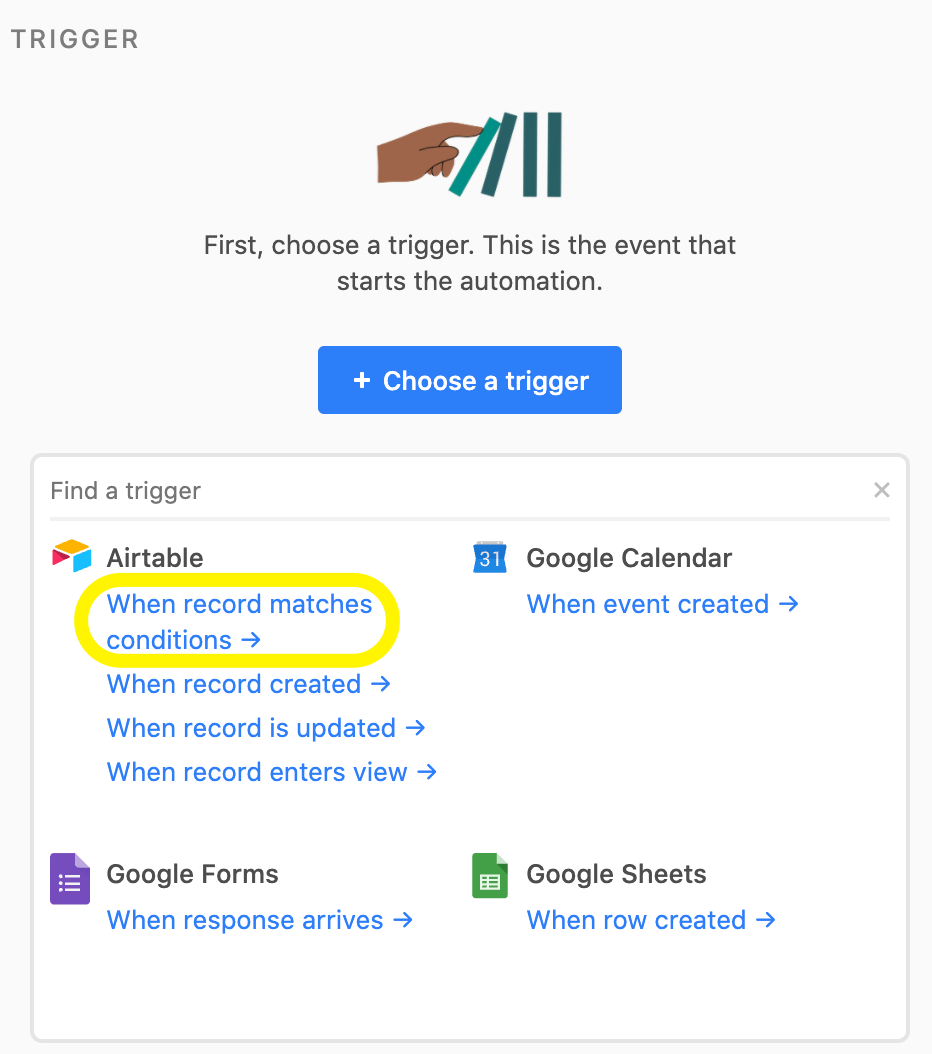
Now you’ll have to specify the conditions under which the trigger will fire. First, pick the specific table (“Tweets”) from the earlier setup you did.
Then, click the “+ Add condition” button to add a new condition. If you’re already familiar with using filters in your Airtable base, the process of adding a condition is very similar: you pick a field, operator, and comparison value so that you can construct statements like "When [Status] [is] [Scheduled]." You can also add additional conditions if you’d like, although in this example, we’ll stick with just a single condition.
Make sure to run a test to ensure that everything is in order, and click the “Done” button when you’re finished. (You’ll be able to use the variables from the test data to help you set up the action later.) Note that you need to have at least one tweet marked as “Ready to Publish” for the automation to get the test data, so if the test is failing, check to see if you have at least one tweet marked as “Ready to Publish.”
Step 3: set up the post tweet action
Actions are the tasks that get performed after a trigger fires. In our case, the action we want to perform is to take the text from the “Copy” field of the record that was just marked as “Ready to Publish” in the “Status field,” and post that as a tweet.
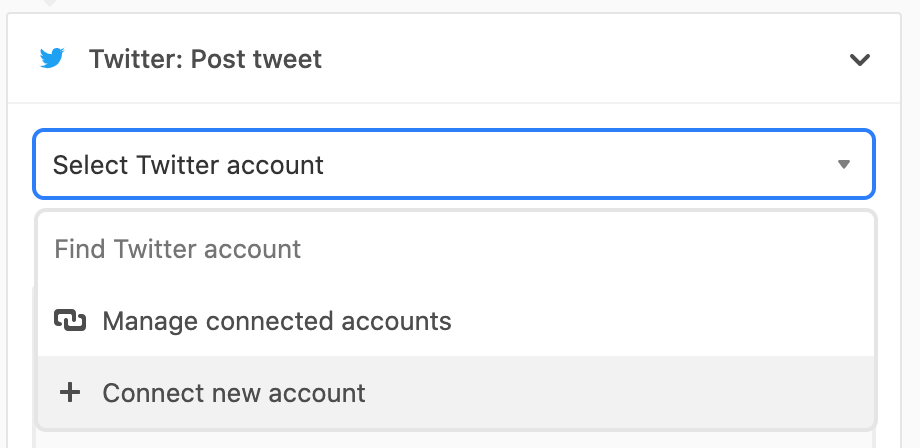
Click the “+ Add action” button. A menu will appear with a wide variety of potential actions. Select the “Twitter: Post tweet →” option. Next, you’ll need to select the Twitter account from which you’d like to post. If you haven’t connected a Twitter account before, you’ll need to authorize Airtable Automations in order to connect your account.
The “Message” section of the Post tweet action includes the text of the tweet you’d like to send. We could insert static text if we wanted, but in this case, we want the body of the tweet to be comprised of the text from the “Copy” field. In order to set this up, click the blue + button—this allows you to insert variables from the trigger step.
From there, mouse over “Record (from Step 1)” then click the “Continue” that appears. This brings up a list of potential variables from the record in the trigger step. In our case, we want to insert the text from the “Copy” field, so mouse over the “Copy” field and click the blue “Insert” button.
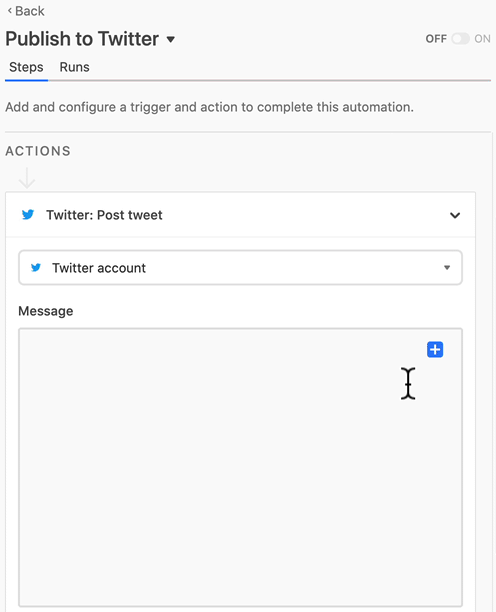
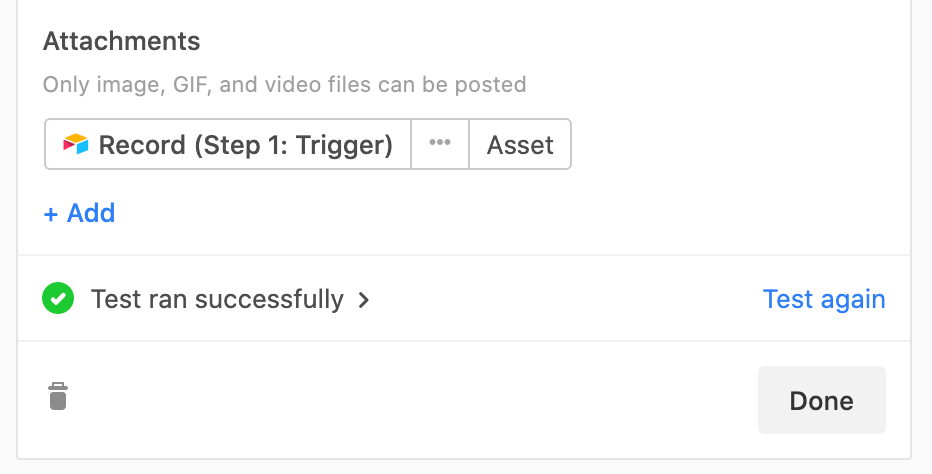
There’s also an optional “Attachments” section of the Post tweet action. If you chose to add an attachment field earlier, you can insert that field in this section by clicking the “+ Add” option, selecting “Record (from Step 1),” and then selecting “Asset” (or whatever you named your attachment field).
Make sure to run a test to ensure that everything is in order. Please note that if the test runs successfully, the automation will post your tweet test data from step 1, so run your test with caution!
If everything looks good, click the “Done” button when you’re finished.
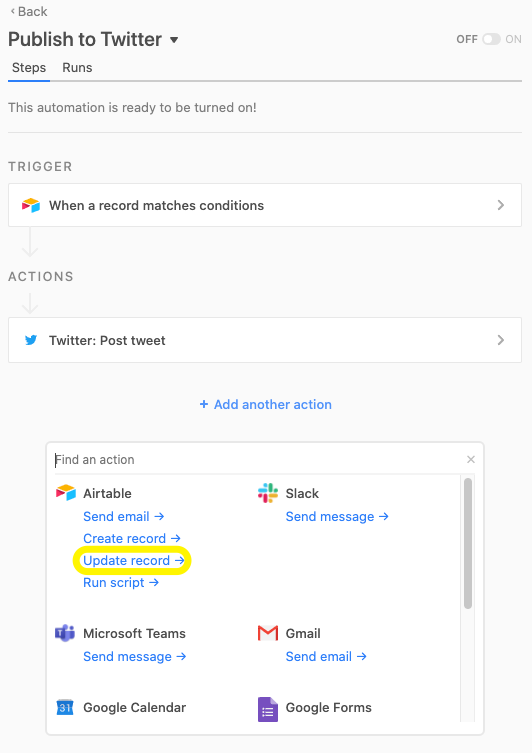
Step 4: set up the update record action
Once you’ve tweeted out your post, it only makes sense for the status of the associated record to change from “Ready to Publish” to “Posted,” so let’s add a second action that will do this for you automatically.
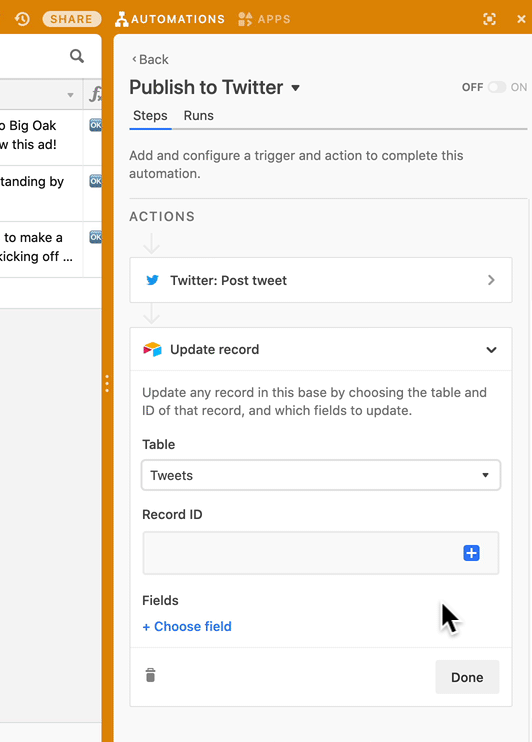
Click the “+ Add another action” button underneath your Post tweet action, then select the “Airtable: Update record →” action from the menu.
From there, you’ll need to pick the table that contains the records you’d like to update, which in this case is the same “Tweets” table where your tweets all live.
You’ll also need to specify the record ID of the record you’re looking to update (the record ID is a unique identifier for each record). In this case, we want to update the same record from the trigger step, so click the blue + button, then select “Record (from Step 1),” and insert the Record ID from the record in the trigger step.
Now that we’ve identified the record we’d like to update, we have to specify how we want the record to be updated. In this case, we want to change the value of the “Status” field from “Ready to Publish” to “Posted.”
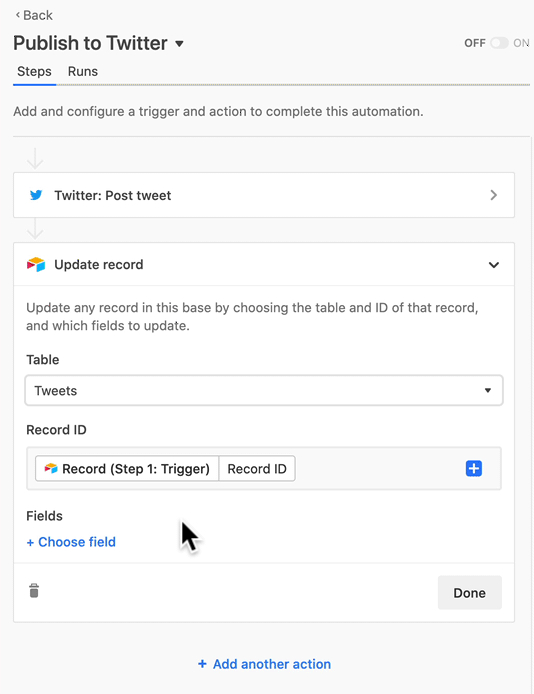
To do this, click the “+ Choose field” button, then select the “Status” field, and type in “Posted.”
Make sure to run a test to ensure that everything is in order. If the test runs successfully, the automation will update the status of the tweet in the test data from step 1 from “Ready to Publish” to “Posted.” If everything looks good, click the “Done” button when you’re finished.
Step 5: turn it on
If everything looks good and you’re ready to post, go ahead and toggle your new automation on. Happy tweeting!
This is just one of the ways in which you can use Airtable Automations to orchestrate a custom workflow. Have more Automations guides you’d like to see from us? Give us your suggestions on our community forums.
You can also sign up below to get notified by email whenever we post a new guide!