When reviewing and approving content, a good chunk of time is spent sending updates back and forth between collaborators. Rather than addressing, drafting, and composing those messages yourself, you can set up an automation in your Airtable base to do it for you whenever you mark a content record as approved.
Setup
Make a copy of the base below if you want to test out a working setup for this automation or just follow these step-by-step instructions to create a similar automation in a base of your own.
In order to build this automation, you’ll need a couple of ingredients. First, you’ll need an Airtable account with a base you want to use for this automation. You’ll also need an email address that you control for testing purposes (even though this automation will send emails to other people under normal circumstances).
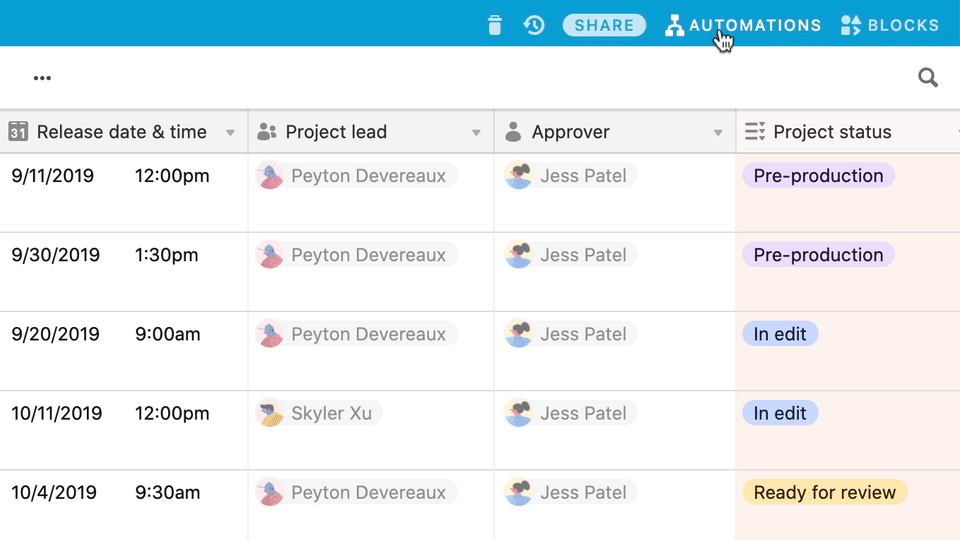
Once you’ve selected your base, pick the table you want to work with and make sure it has a single select field. If not, you should create one as we’ll use it to trigger this automation in the second step.
Instructions
Now that you have everything you need you’re ready to create your automation.
Step 1: open your base and create a new automation.
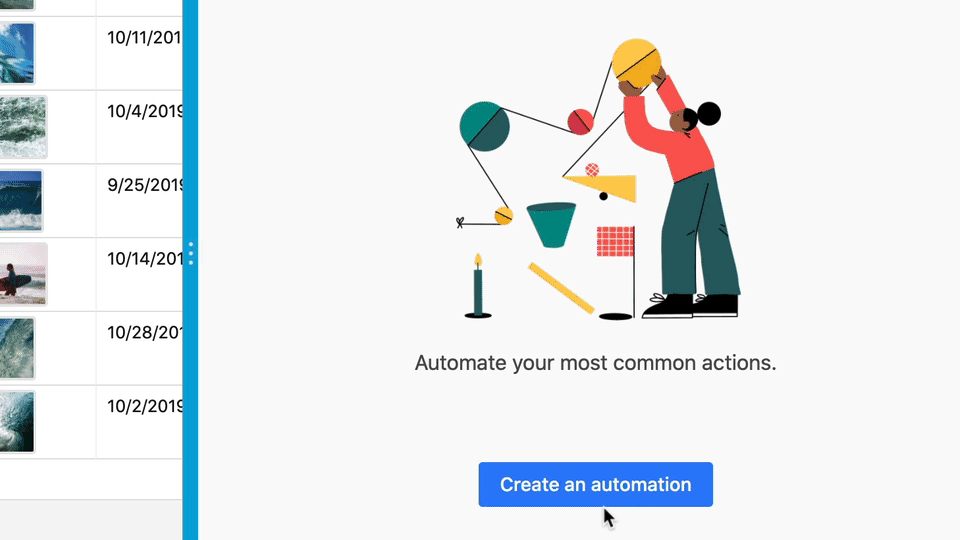
Open the base that you prepared following the Setup section above, then click the Automations button in the top right of your base. This will open the Automations side panel.
Once the side panel is open, click the blue “Create an automation” button.
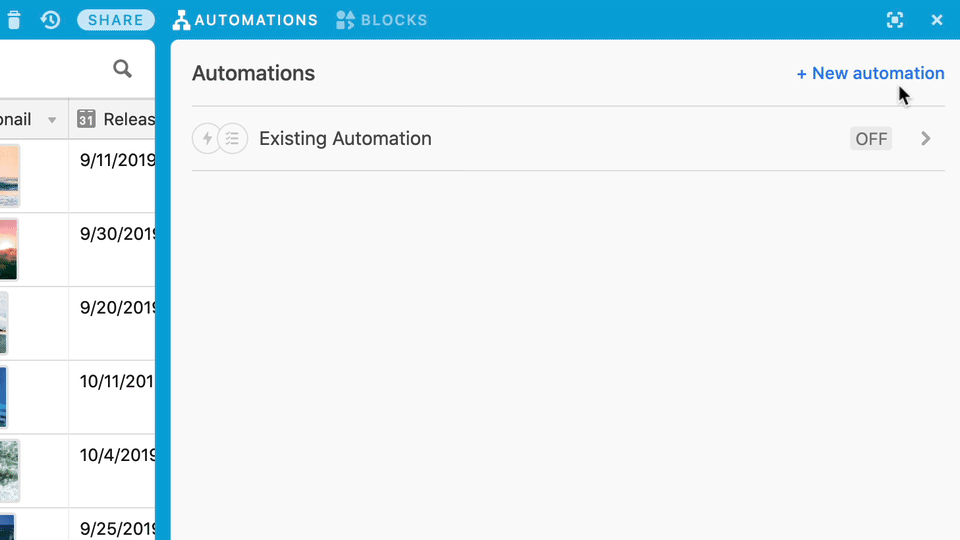
If your base already has some automations, you can create a new one by clicking on the “+ New Automation” button above the existing automations. Feel free to rename it if you’d like.
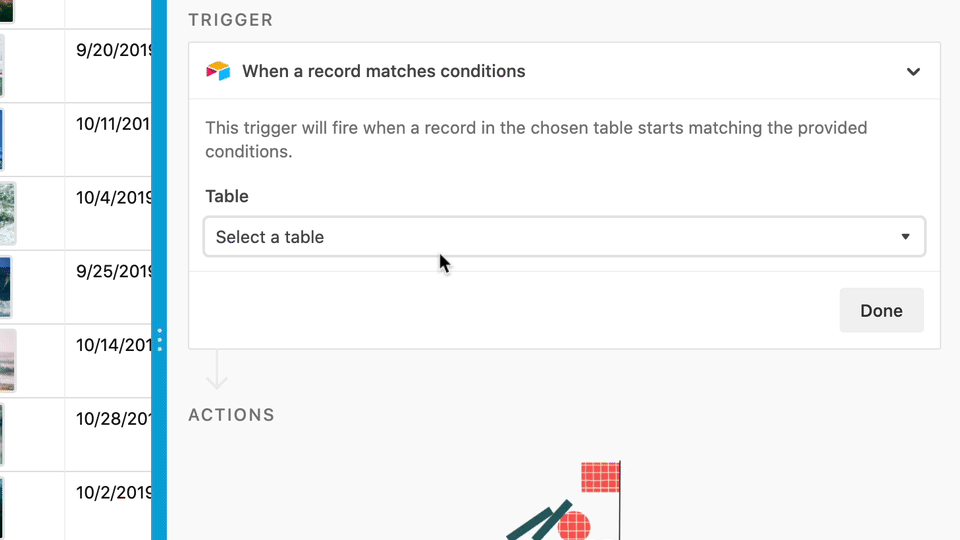
Step 2: set up your trigger
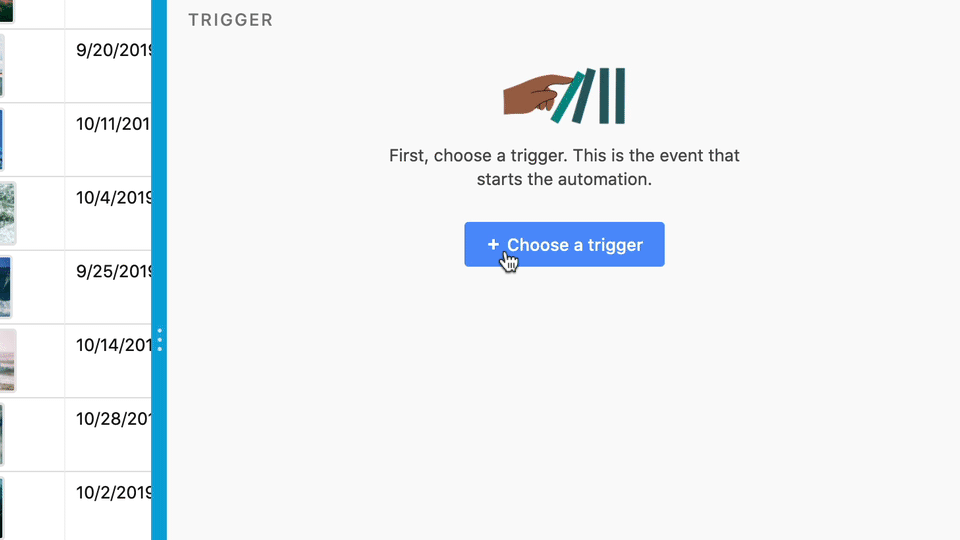
Now let’s set up your trigger. First, click the blue “+ Choose a trigger” button and then select “When record matches conditions” from the options under the Airtable header.
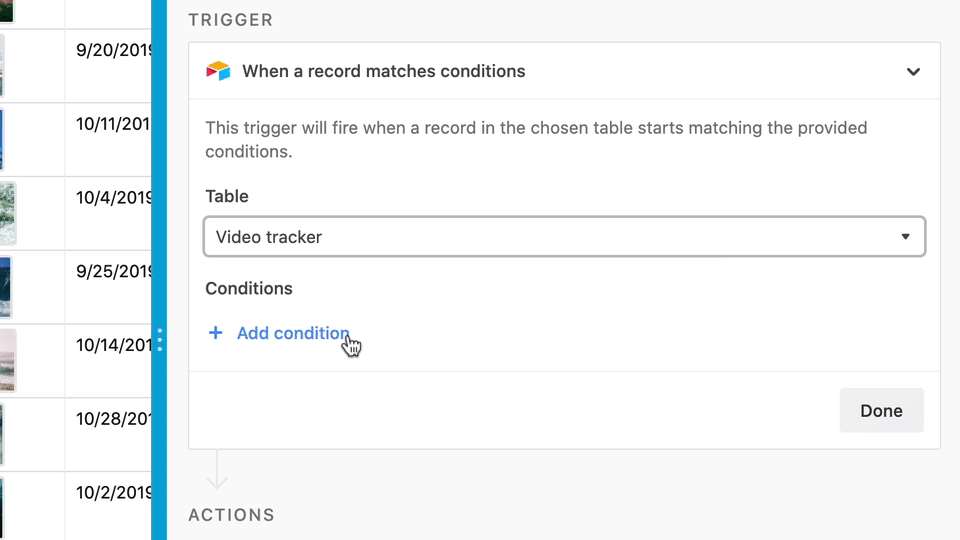
Next, select the table you want to work with.
Now click the blue “+ Add condition” text, select the single select field you’re using to track the status of each record, and set the condition to “is exactly” and the name of your approved status option.
As you can see in the example above, we’re checking to see if the “Project status” field contains the exact value of “Ready to publish” so that this automation will trigger anytime a record is set to that status. However, you don’t have to use the same names for this automation to work. You can set up this kind of automation to match the value of any field you choose—it’s just easiest with a single select field.
When you’ve finished setting up your trigger, click the blue “Run test” link to make sure everything works.
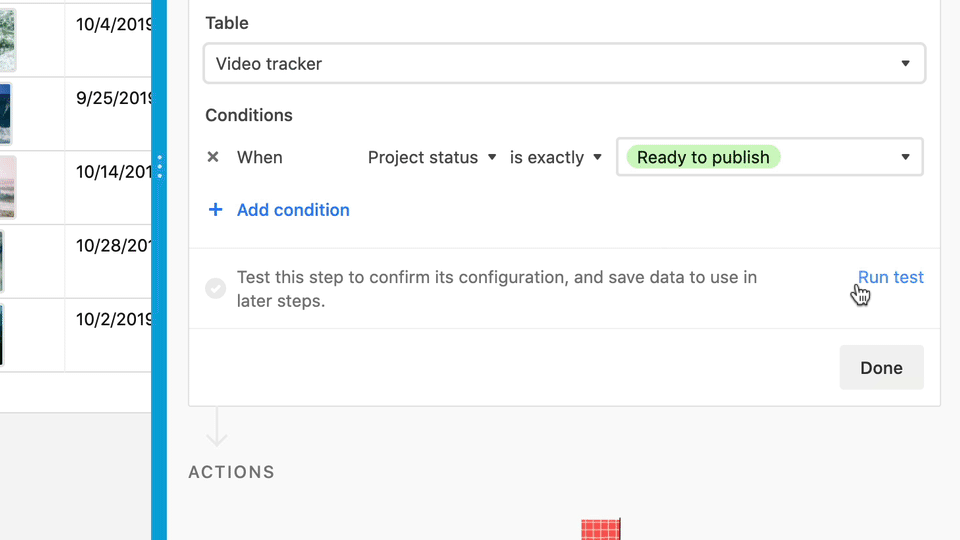
This test looks for a sample record to use for the action step(s) in your automation, so make sure you have a record in your chosen table that meets the triggers conditions (e.g., a single select field for tracking status with an option for approvals like “Ready to publish”). Our example base has a record like that so the test will run successfully. If you don’t have a record that meets these conditions, create one now and run the test again to get a successful result.
Remember: your test record should use your email address so you can receive the test email message! You won’t receive it when testing the trigger step, but you will receive the test email when testing your action step/completed automation later on.
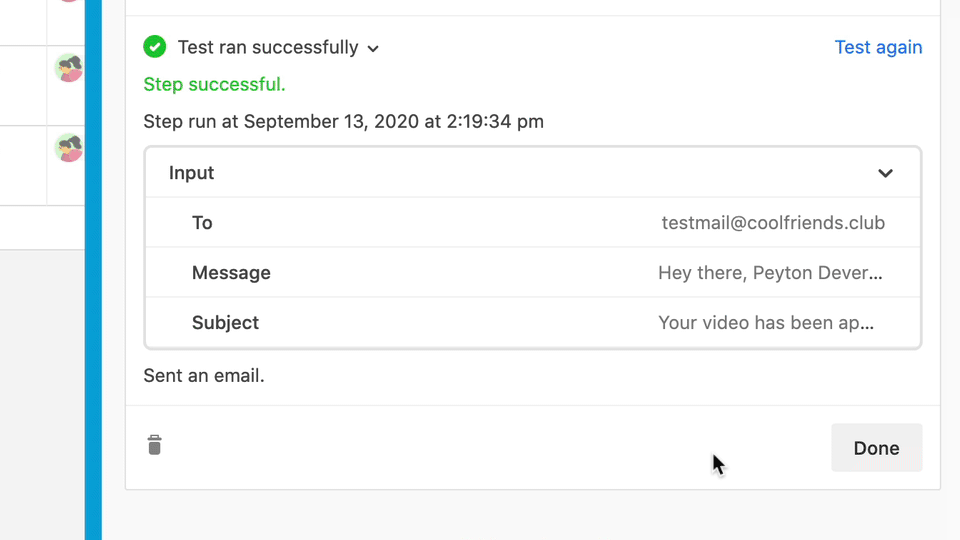
Once your test runs successfully, you can click “Test ran successfully” to show the contents from the record it retrieved. When you’re ready, click “Done” and move on to the next step.
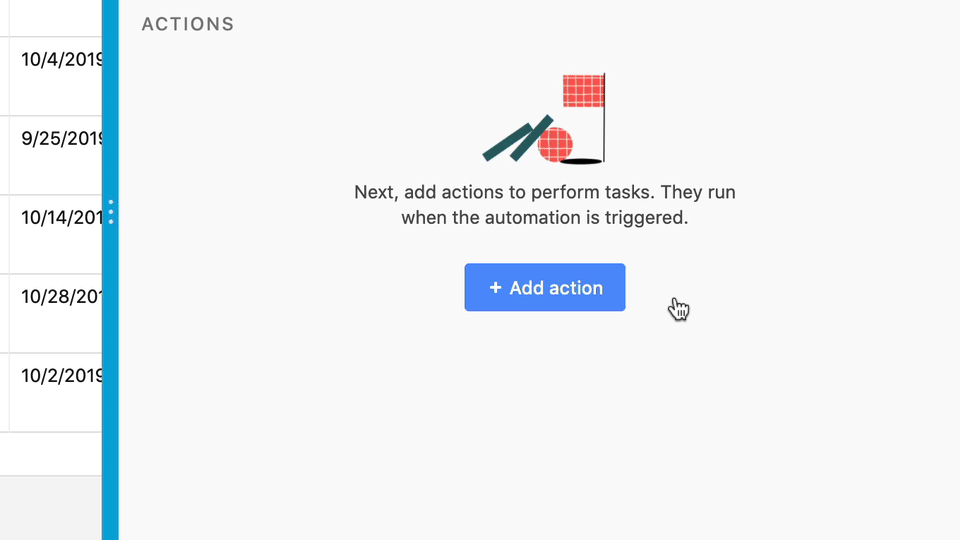
Step 3: set up the notification action.
Actions are the tasks that get performed after a trigger fires. Our example base has a form that allows people to submit video pitches and records are added to it whenever the form is submitted. When the pitches are reviewed and set to approved, we want to send an email to the submitted to let them know. We’ll use an email action to accomplish this.

To create this action, click the blue “+ Add action” button and choosing “Send email” under the Airtable header.
You’ll now see three email-related fields (To, Subject, and Message) to fill out just like you would when composing a normal email. However, you can insert dynamic information into this message that comes from the fields in your base. When the notification triggers, that information will be filled in just like it was in the newly-created record.
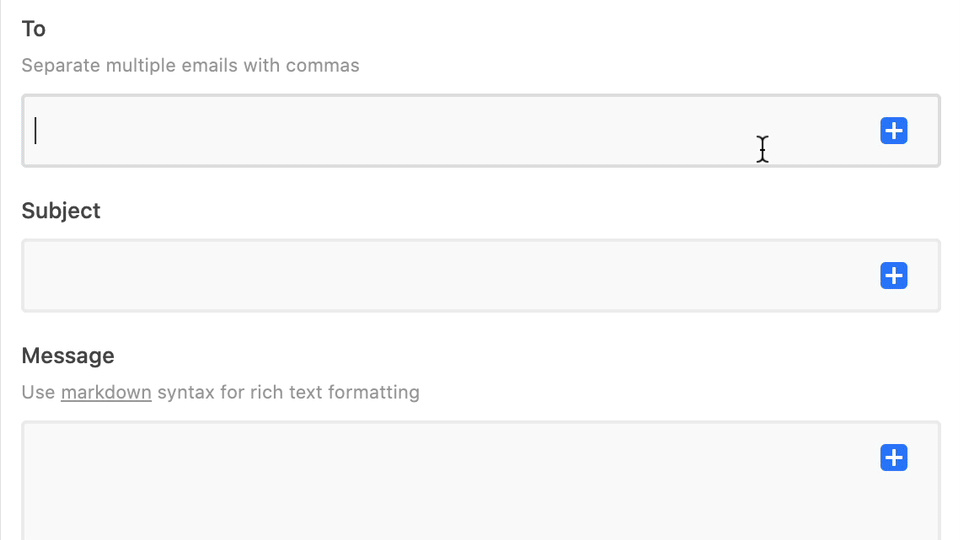
This allows you to create a message to the customer that includes text relevant to their request. It also provides you with a means of specifying to whom the email should be sent. By clicking the “+” button in any of the fields, you can choose information from the triggered record that will fill itself in automatically.
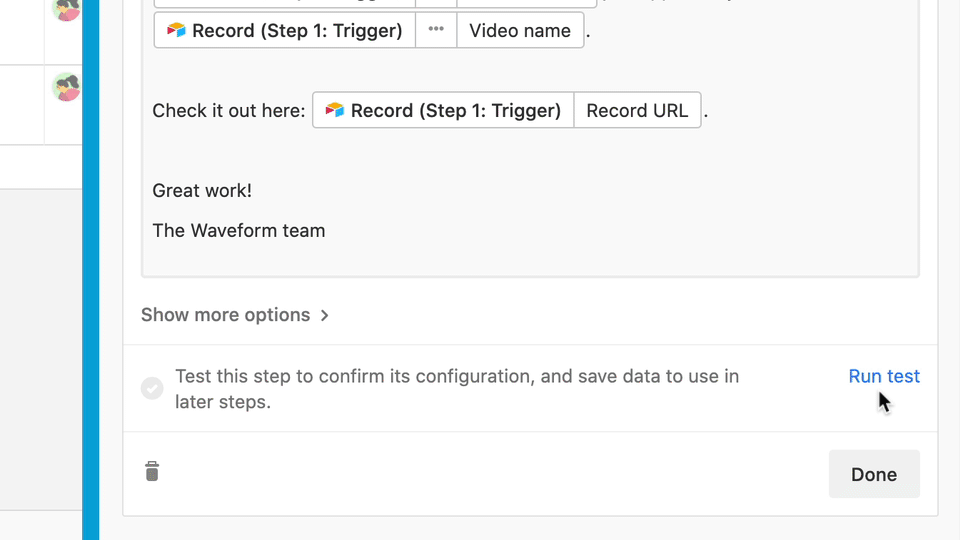
Because we want to send an email notification to the customer we’ll set the “To” field to the contents of the collaborator field that contains the email address (and other information) from the submitter. We’ll also set the “Subject” field to the title of their request and include other details in the body of the message (in the “Message” field) along with some additional friendly wording for context.
When you have your steps completed, make sure to run a test! You’ll receive an email at the email address you specified in your test record, so make sure you put your own email address in there before you run the test. If you didn’t, change the sample record and run the test on the trigger step again to pull in the new data. Once you’ve done that, you can run the action test and check your inbox for the sample email.
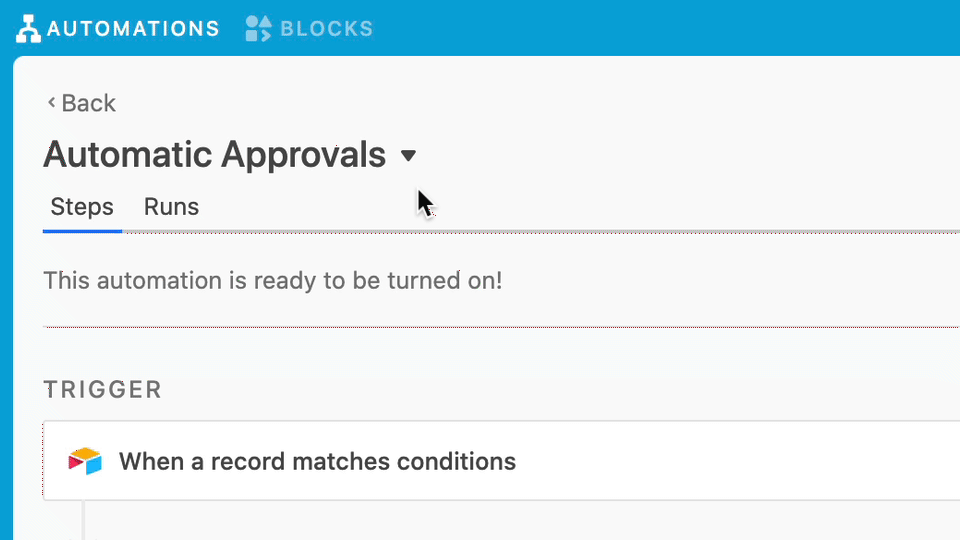
Step 4: turn it on.
If everything looks good and you’re happy with the results of your action's tests, go ahead and toggle your new automation on.
Now your automation is live and will send an email any time you set your status field to “Ready to publish” (or whatever value you chose).
If you want to create similar automations, you don’t have to go through these steps again. Instead, just click the downward-facing triangle next to this automation’s name and choose “Duplicate automation.”
This is just one of the ways in which you can use Airtable Automations to orchestrate a custom workflow. Have more Automations guides you’d like to see from us? Give us your suggestions on our community forums.
You can also sign up below to get notified by email whenever we post a new guide!