For the huge swath of businesses that are client or services-focused, there is an important next step that comes after a task or project is tracked to completion: generating invoices and billing. In this post, we're going to show you how to use the power of the page designer block to create an automatic invoice template that generates custom invoices from your client and task information.
The page designer block is an extremely flexible tool that lets you pull in all sorts of information from across your base, including images and text variables, and lay them out in whatever format you want. You can supplement information from your base with static text and images, and you can even create tables of information referencing multiple fields from linked records. This linked records functionality is at the core of the automatic invoice template.
Project and task tracking are crucial for all businesses, so it's no surprise that the Project Tracker template is one of our most popular starting points for users building their own bases. We're going to modify the original Project Tracker template to add billing information fields to the records in the Clients table, hourly rate information to the records in the Projects table, and billable hours information to the records in the Tasks table. To link it all together, we'll create a new table for Invoice records, linked to one project, one client, and multiple tasks. As completed task records get added to an Invoice for billing, their costs will be calculated based on the rate and hours—and then, these completed tasks will be added as line items in the page designer invoice template.
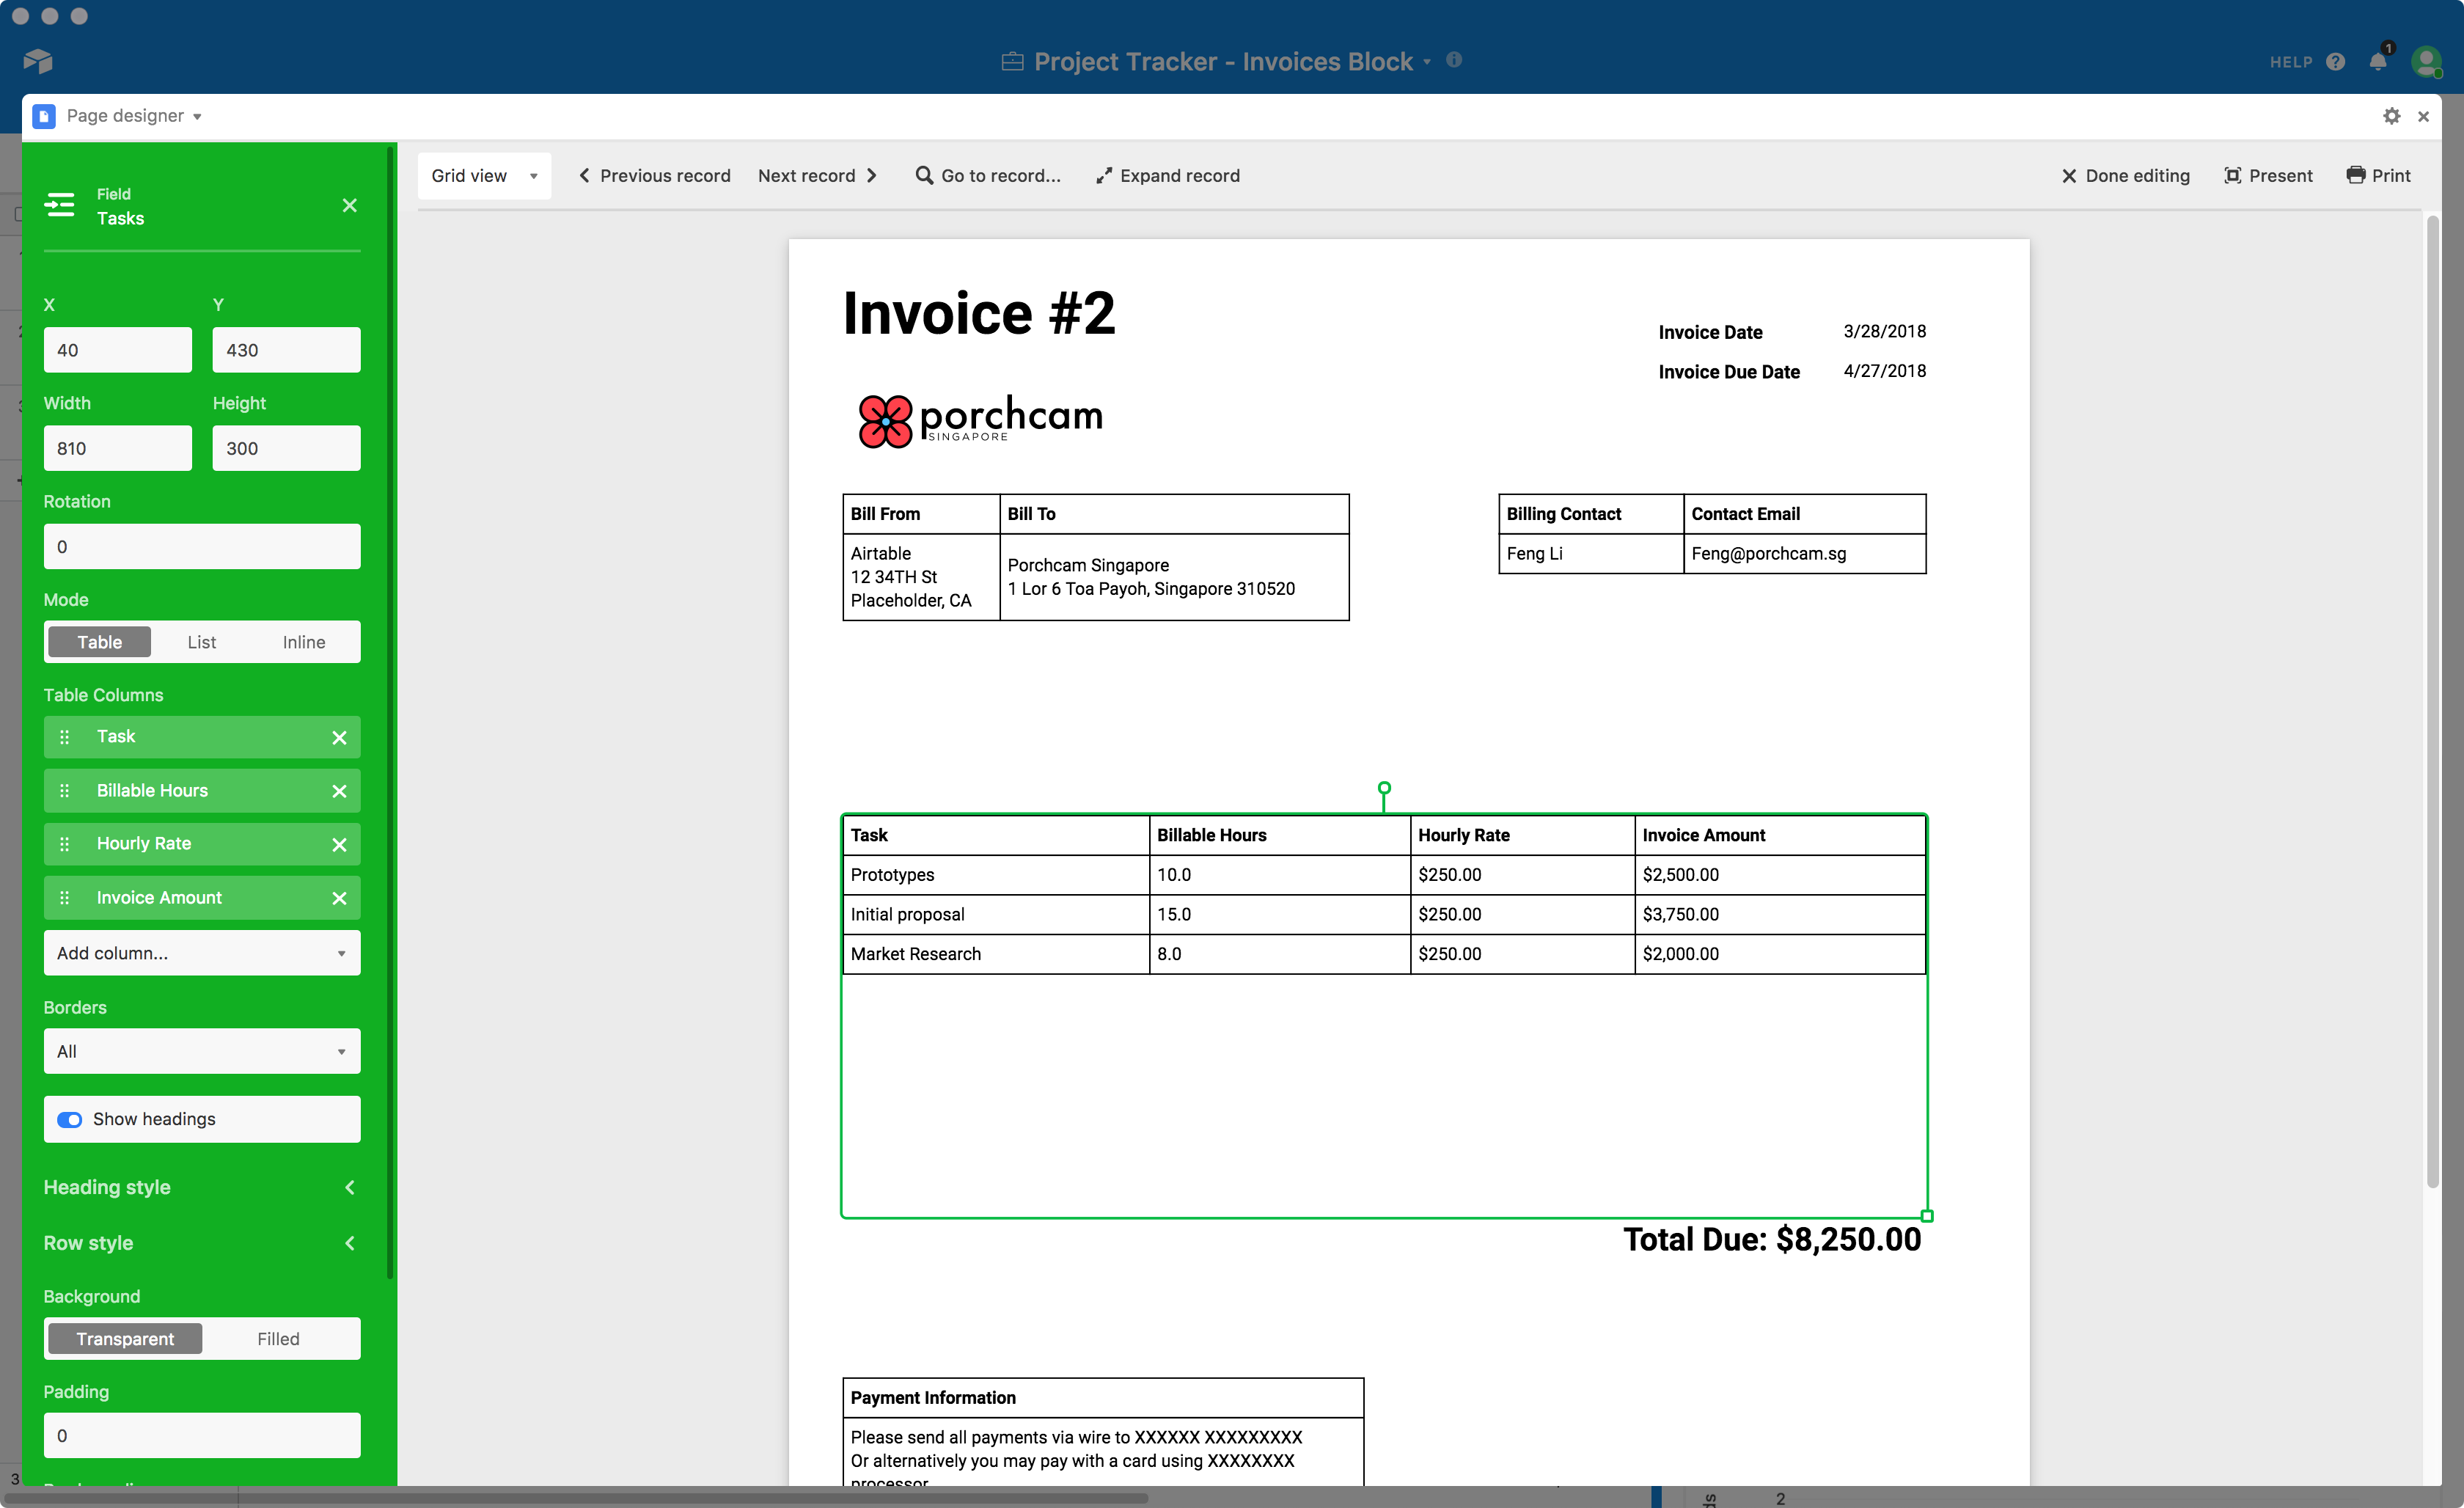
In the image above you can see what it all looks like in a complete invoice template. In the following sections, we'll walk through the modifications to the Project Tracker base, and then each step of laying out the invoice template using the page designer block. We've also included a sample base with all of the modifications already made, which you can import into your own workspace and start using if you'd like to skip right to making the Page designer invoice template.
Modifying the Project Tracker template for billing and invoice template information
There are a number of different fields that need to get added to the Project Tracker template in order to provide all the necessary information to make invoices. The following section shows each of those modifications, broken down by the tables being modified. If you'd like to learn more about working with the different types of fields referenced, check out this article on customizing field types.
Here are the additions and modifications we made to add hourly rate billing to the Project Tracker for our invoice template—if your business is structured differently, slightly different modifications may be necessary.
To begin, you'll want to create a new table named "Invoices", and then create/customize each of the fields in the following tables.
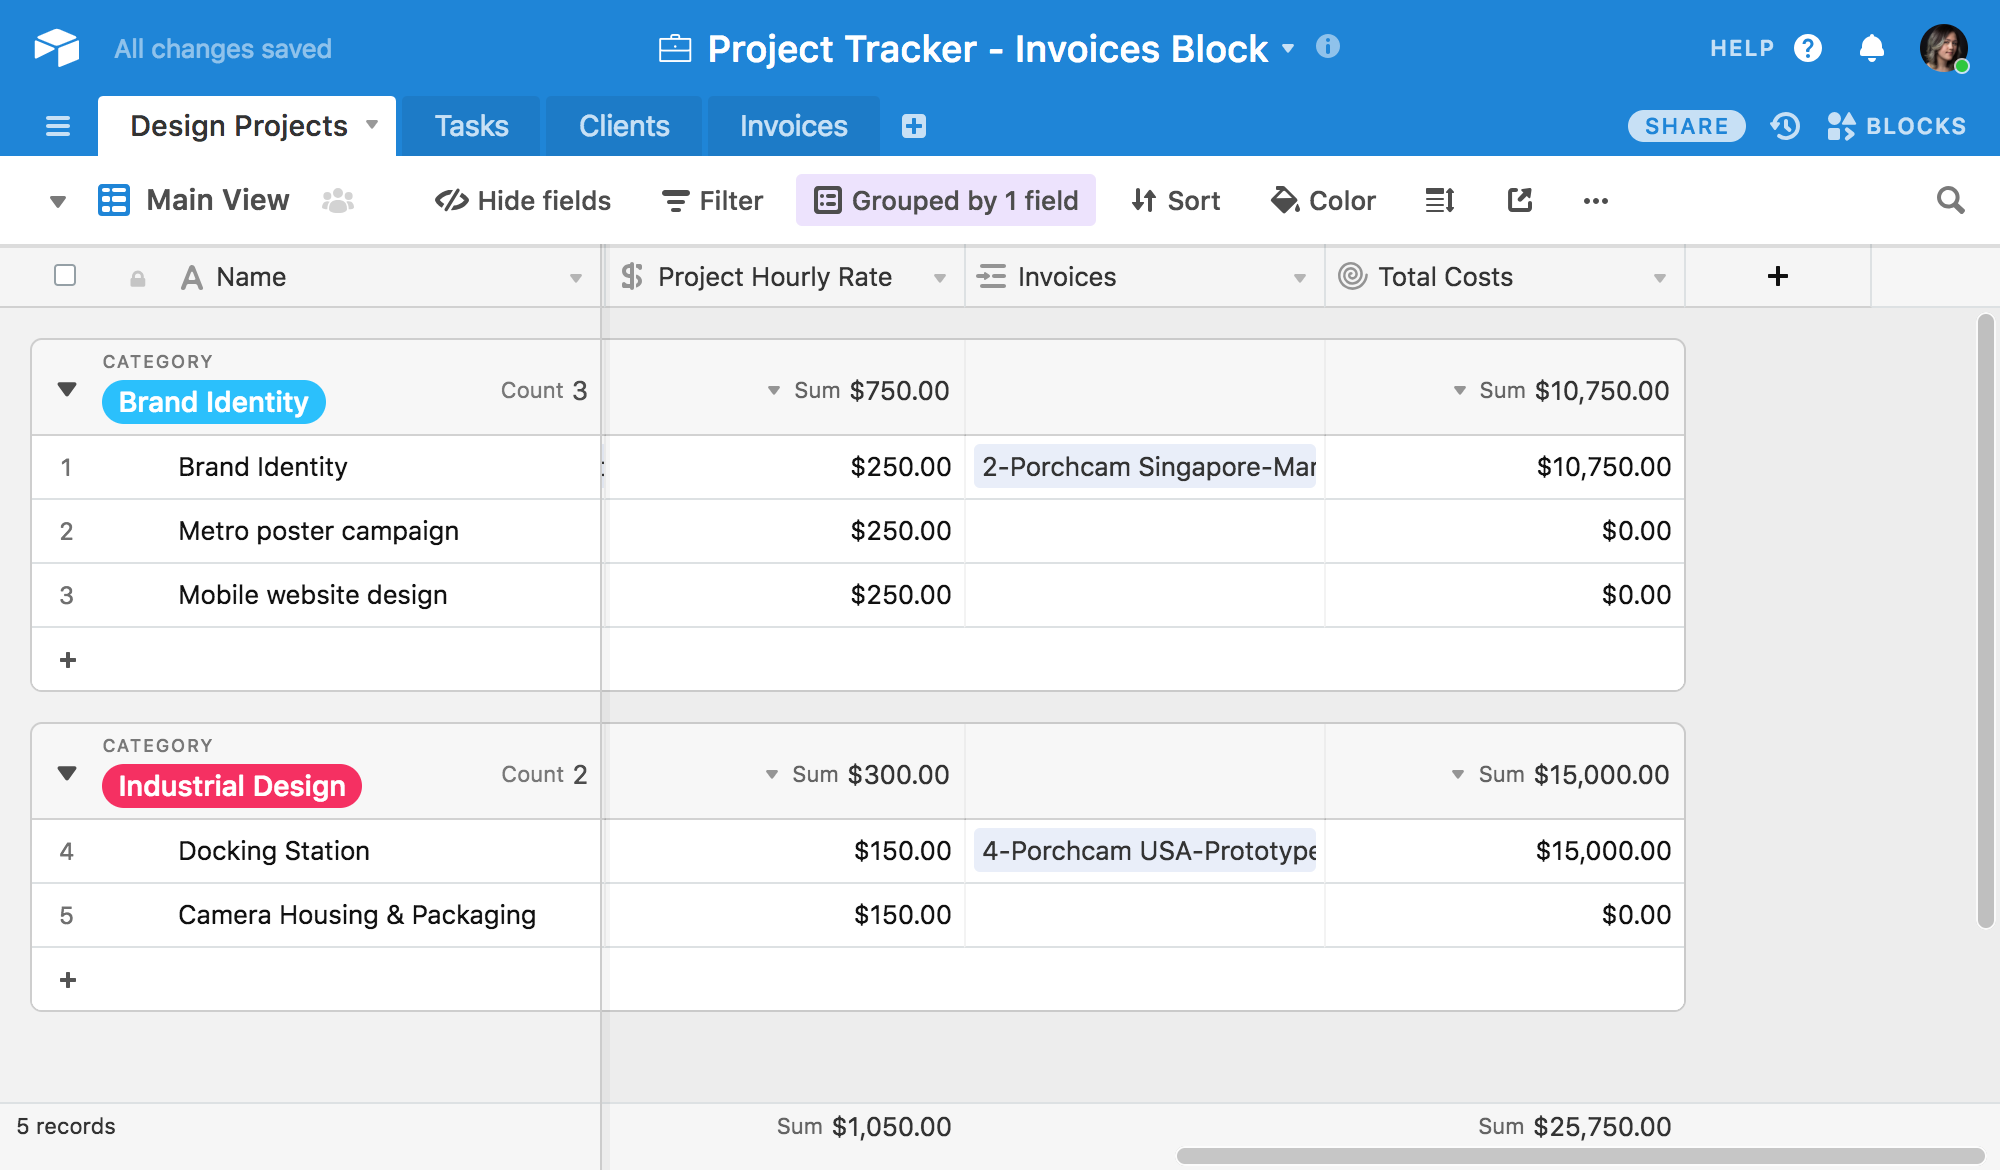
Design Projects
- Project Hourly Rate (currency field with decimals): the hourly rate that has been contracted with the client for this project.
- Invoices (linked record field, linked to the Invoices table): links to the Invoices table for cost tracking.
- Total Costs (rollup field): uses the link to the Invoices table to add up the Invoice Total $ amount on all linked invoices using the formula
SUM(values).
Tasks
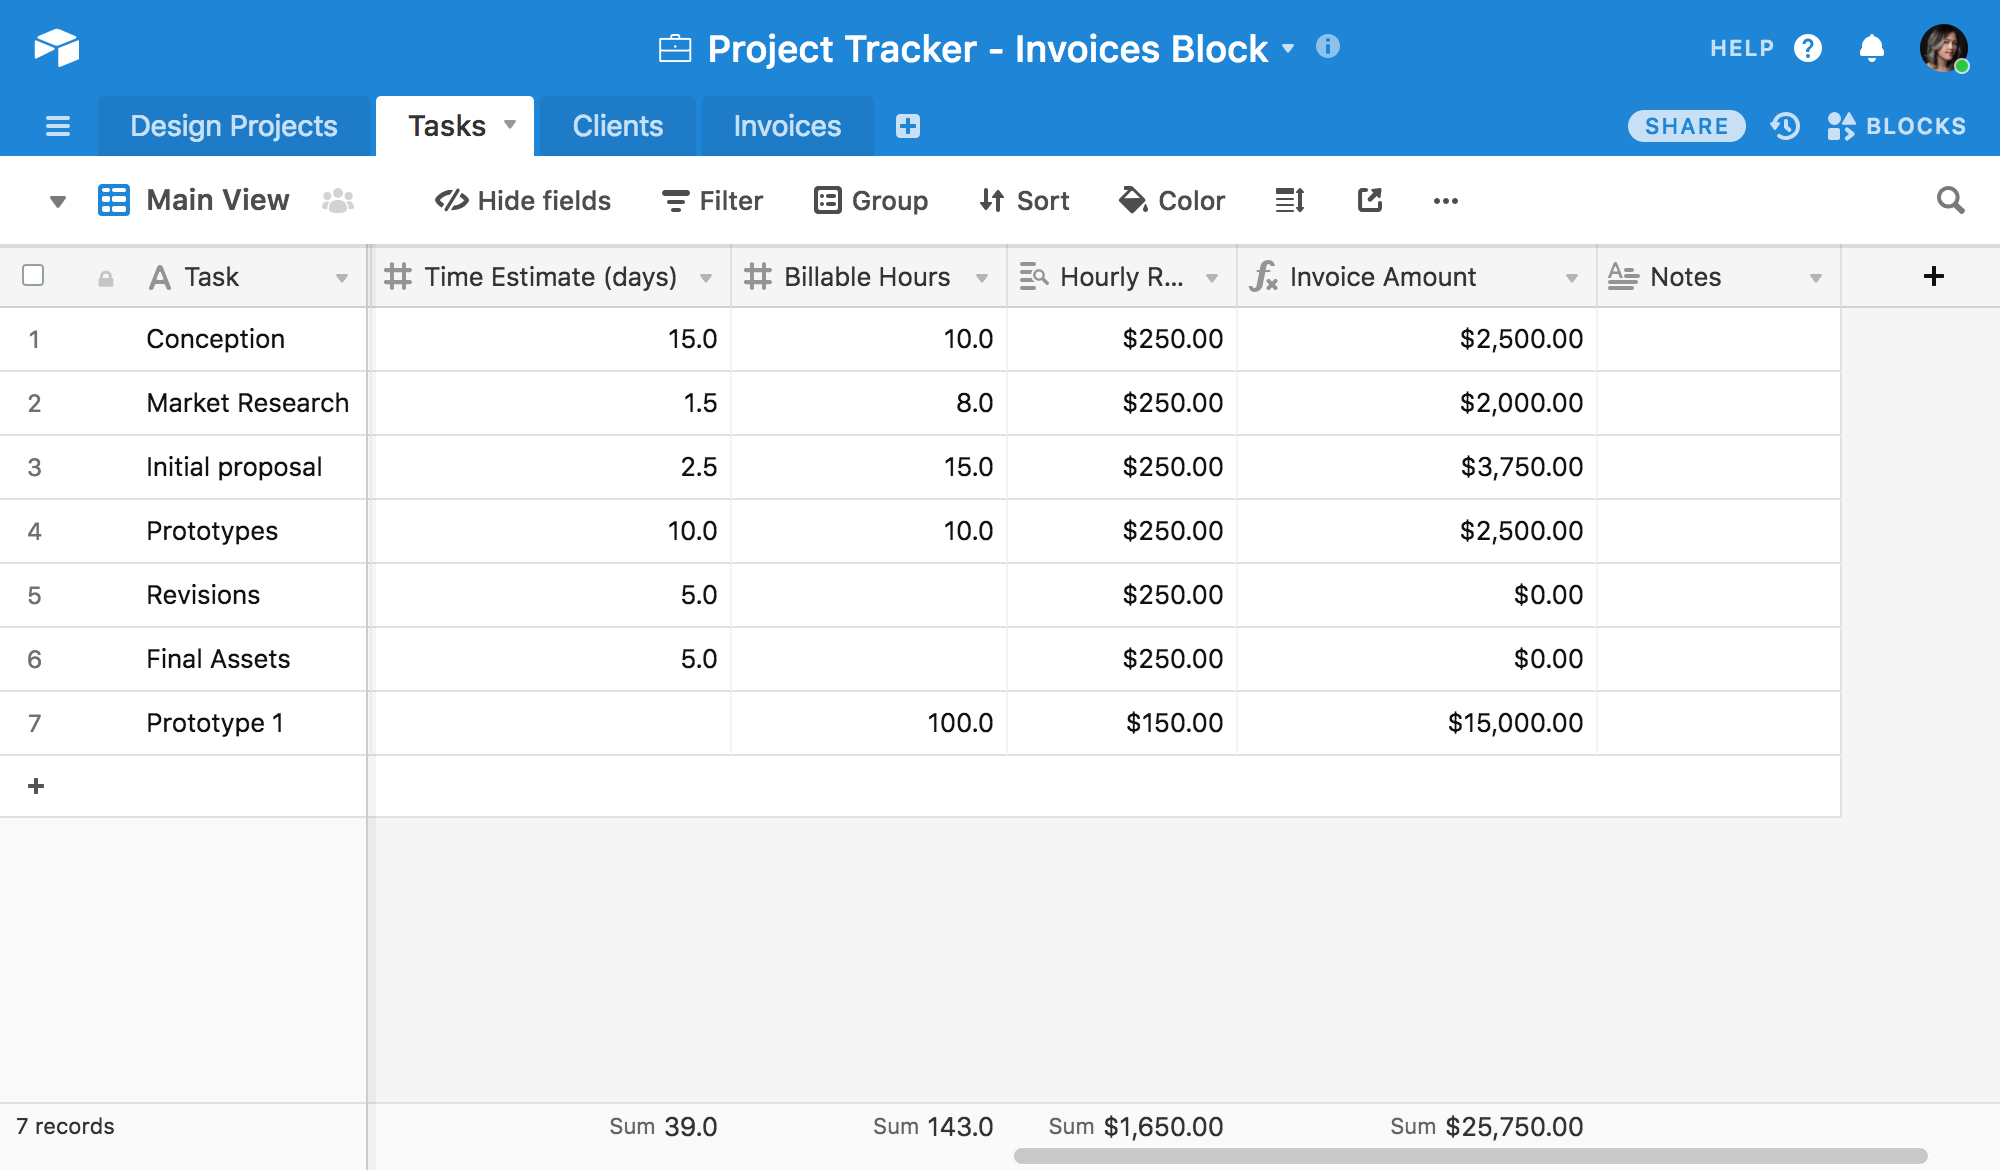
- Billable Hours (number field with decimals): the final amount of billable hours that were needed to complete the task.
- Hourly Rate (lookup field): pulls the Project Hourly Rate for the project from the Design Projects table.
- Cost (formula field): the charged price of this task's line-item on the invoice, calculated with the formula
{Billable Hours}*{Hourly Rate}. Formatted as Currency for pretty display on the invoice. - Task (single line text field, primary field: make sure to change the name of the primary field for clarity, as it will show up as a column header on the table of tasks in the invoice template.
Clients
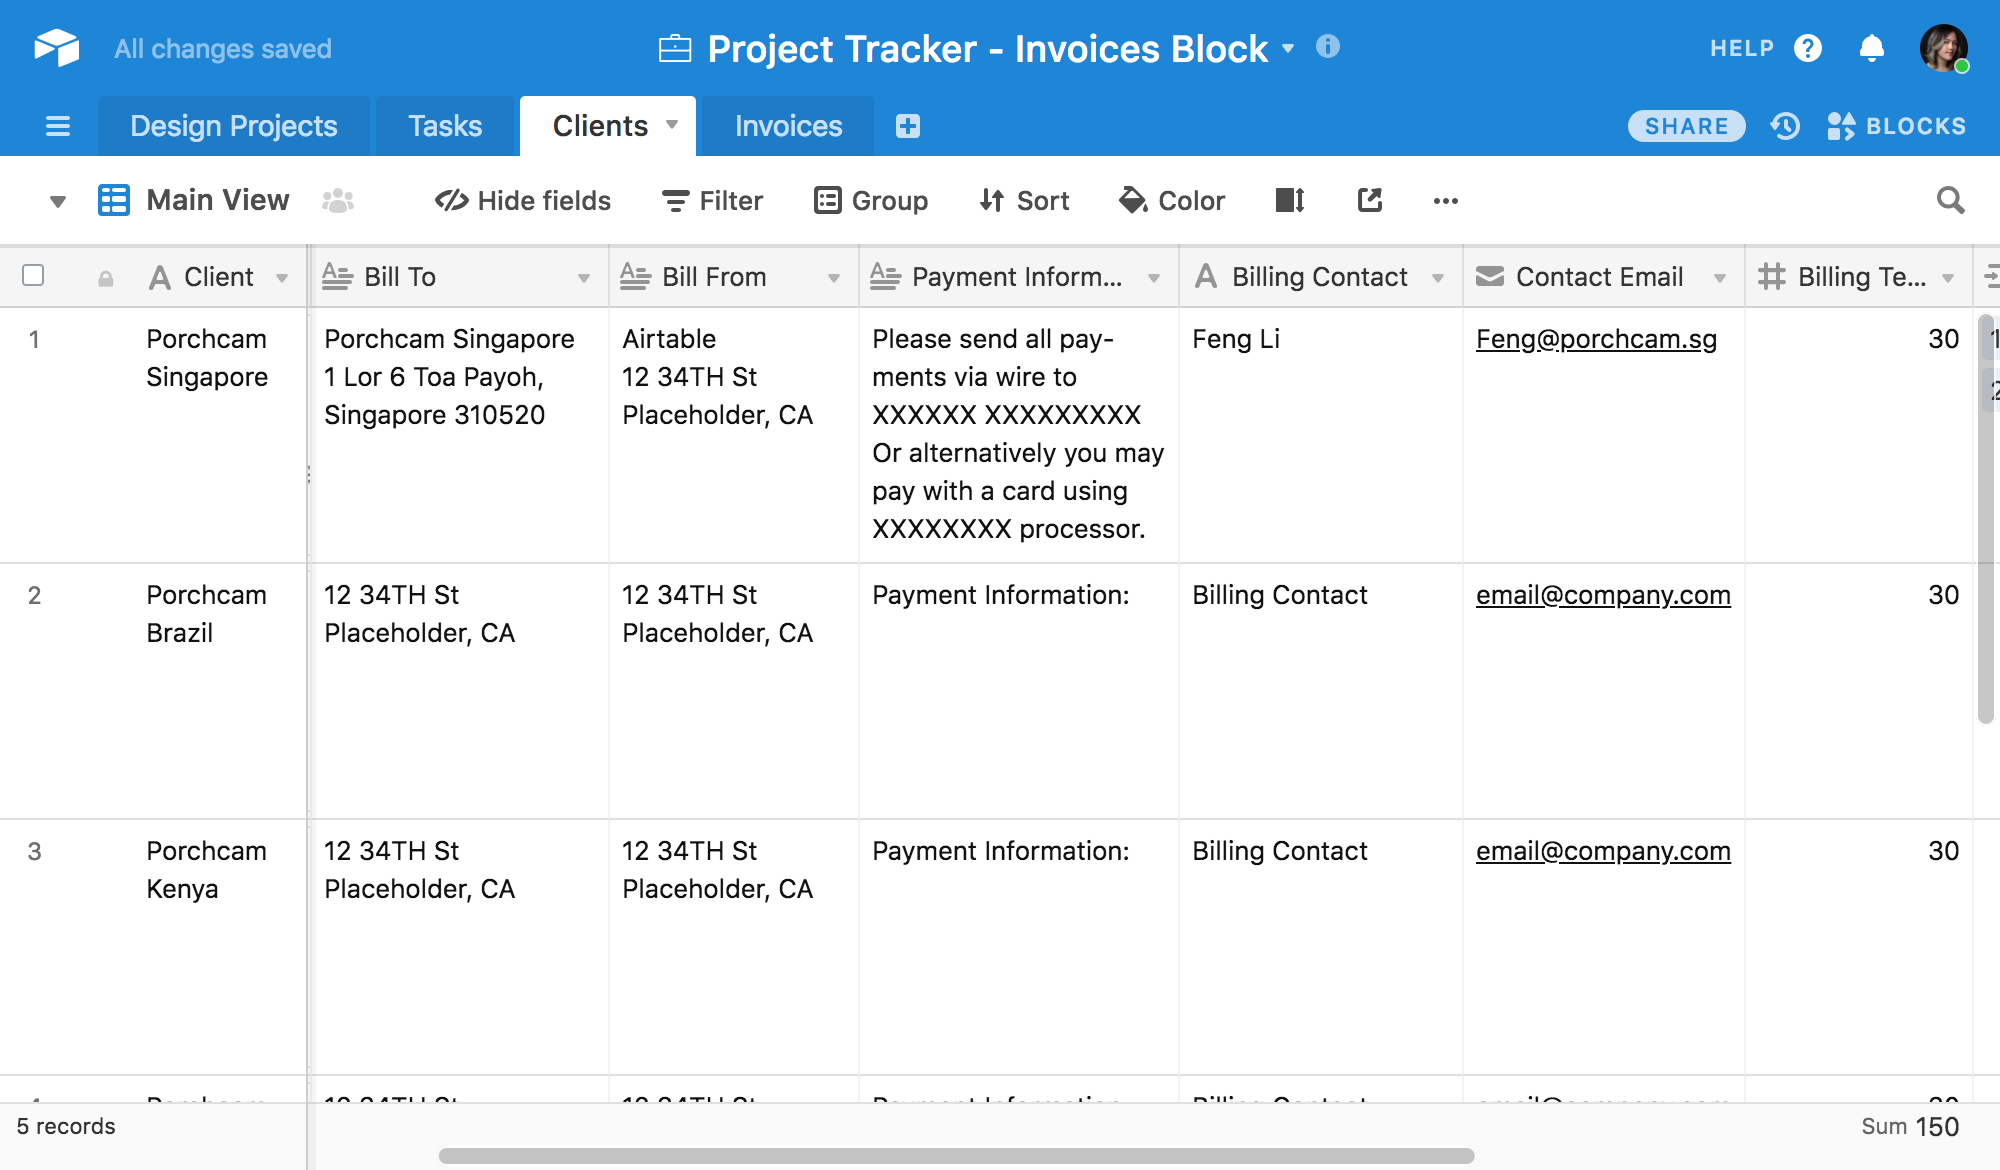
- Bill To (long text field): the company and address the invoice is being submitted to.
- Bill From (long text field): the company and address you wish to use to receive payment.
- Payment Information (long text field): information about how payment should be submitted.
- Billing Contact (single line text field): billing contact at the company.
- Email (Email field): billing contact's email.
- Billing Terms - Days (Number field with integers): number of days after invoicing that payment is due.
Invoices
- Invoice # (autonumber field): a unique incrementing number for each invoice.
- Invoice Date (date field) the date the invoice is issued.
- Client (linked record field, linked to Clients table): links to the record of the client from whom you want to pull billing information. Only a single link allowed, for consistency.
- Tasks (linked record field, linked to Tasks table): link to each of the Tasks records to be added to the invoice.
- Logo (lookup field): client's logo from Clients table.
- Invoice Total $ (rollup field): cost of each of the linked Tasks records, added together with the formula
SUM(values). - Invoice Due Date (rollup field): a more advanced rollup field—in just one field, it looks up the Billing Terms from the Clients table, then adds it to the Invoice Date field to find the future invoice due date, using the formula
DATEADD({Invoice Date},MAX(values),'day'). - Invoice ID (formula field): combine a few fields of information into the invoices' primary field for easy searching, using the formula
{Invoice #}&"-"&Client&"-"&Tasks.
Laying out an automatic invoice template using the page designer block
To make our invoice template in page designer, once you've made your modifications or loaded the sample base, head to the Invoices table, click the Blocks button in the top right to open the Blocks sidebar, and use the Add a block button. Scroll through the library of available blocks to find Page designer and click Add to base. Your new block will pop up and ask for page settings—the default Letter size and Portrait orientation will work well for us. Click Done and then the Edit layout button. The editor will launch and you'll see a list of elements and fields that you can add to the page.
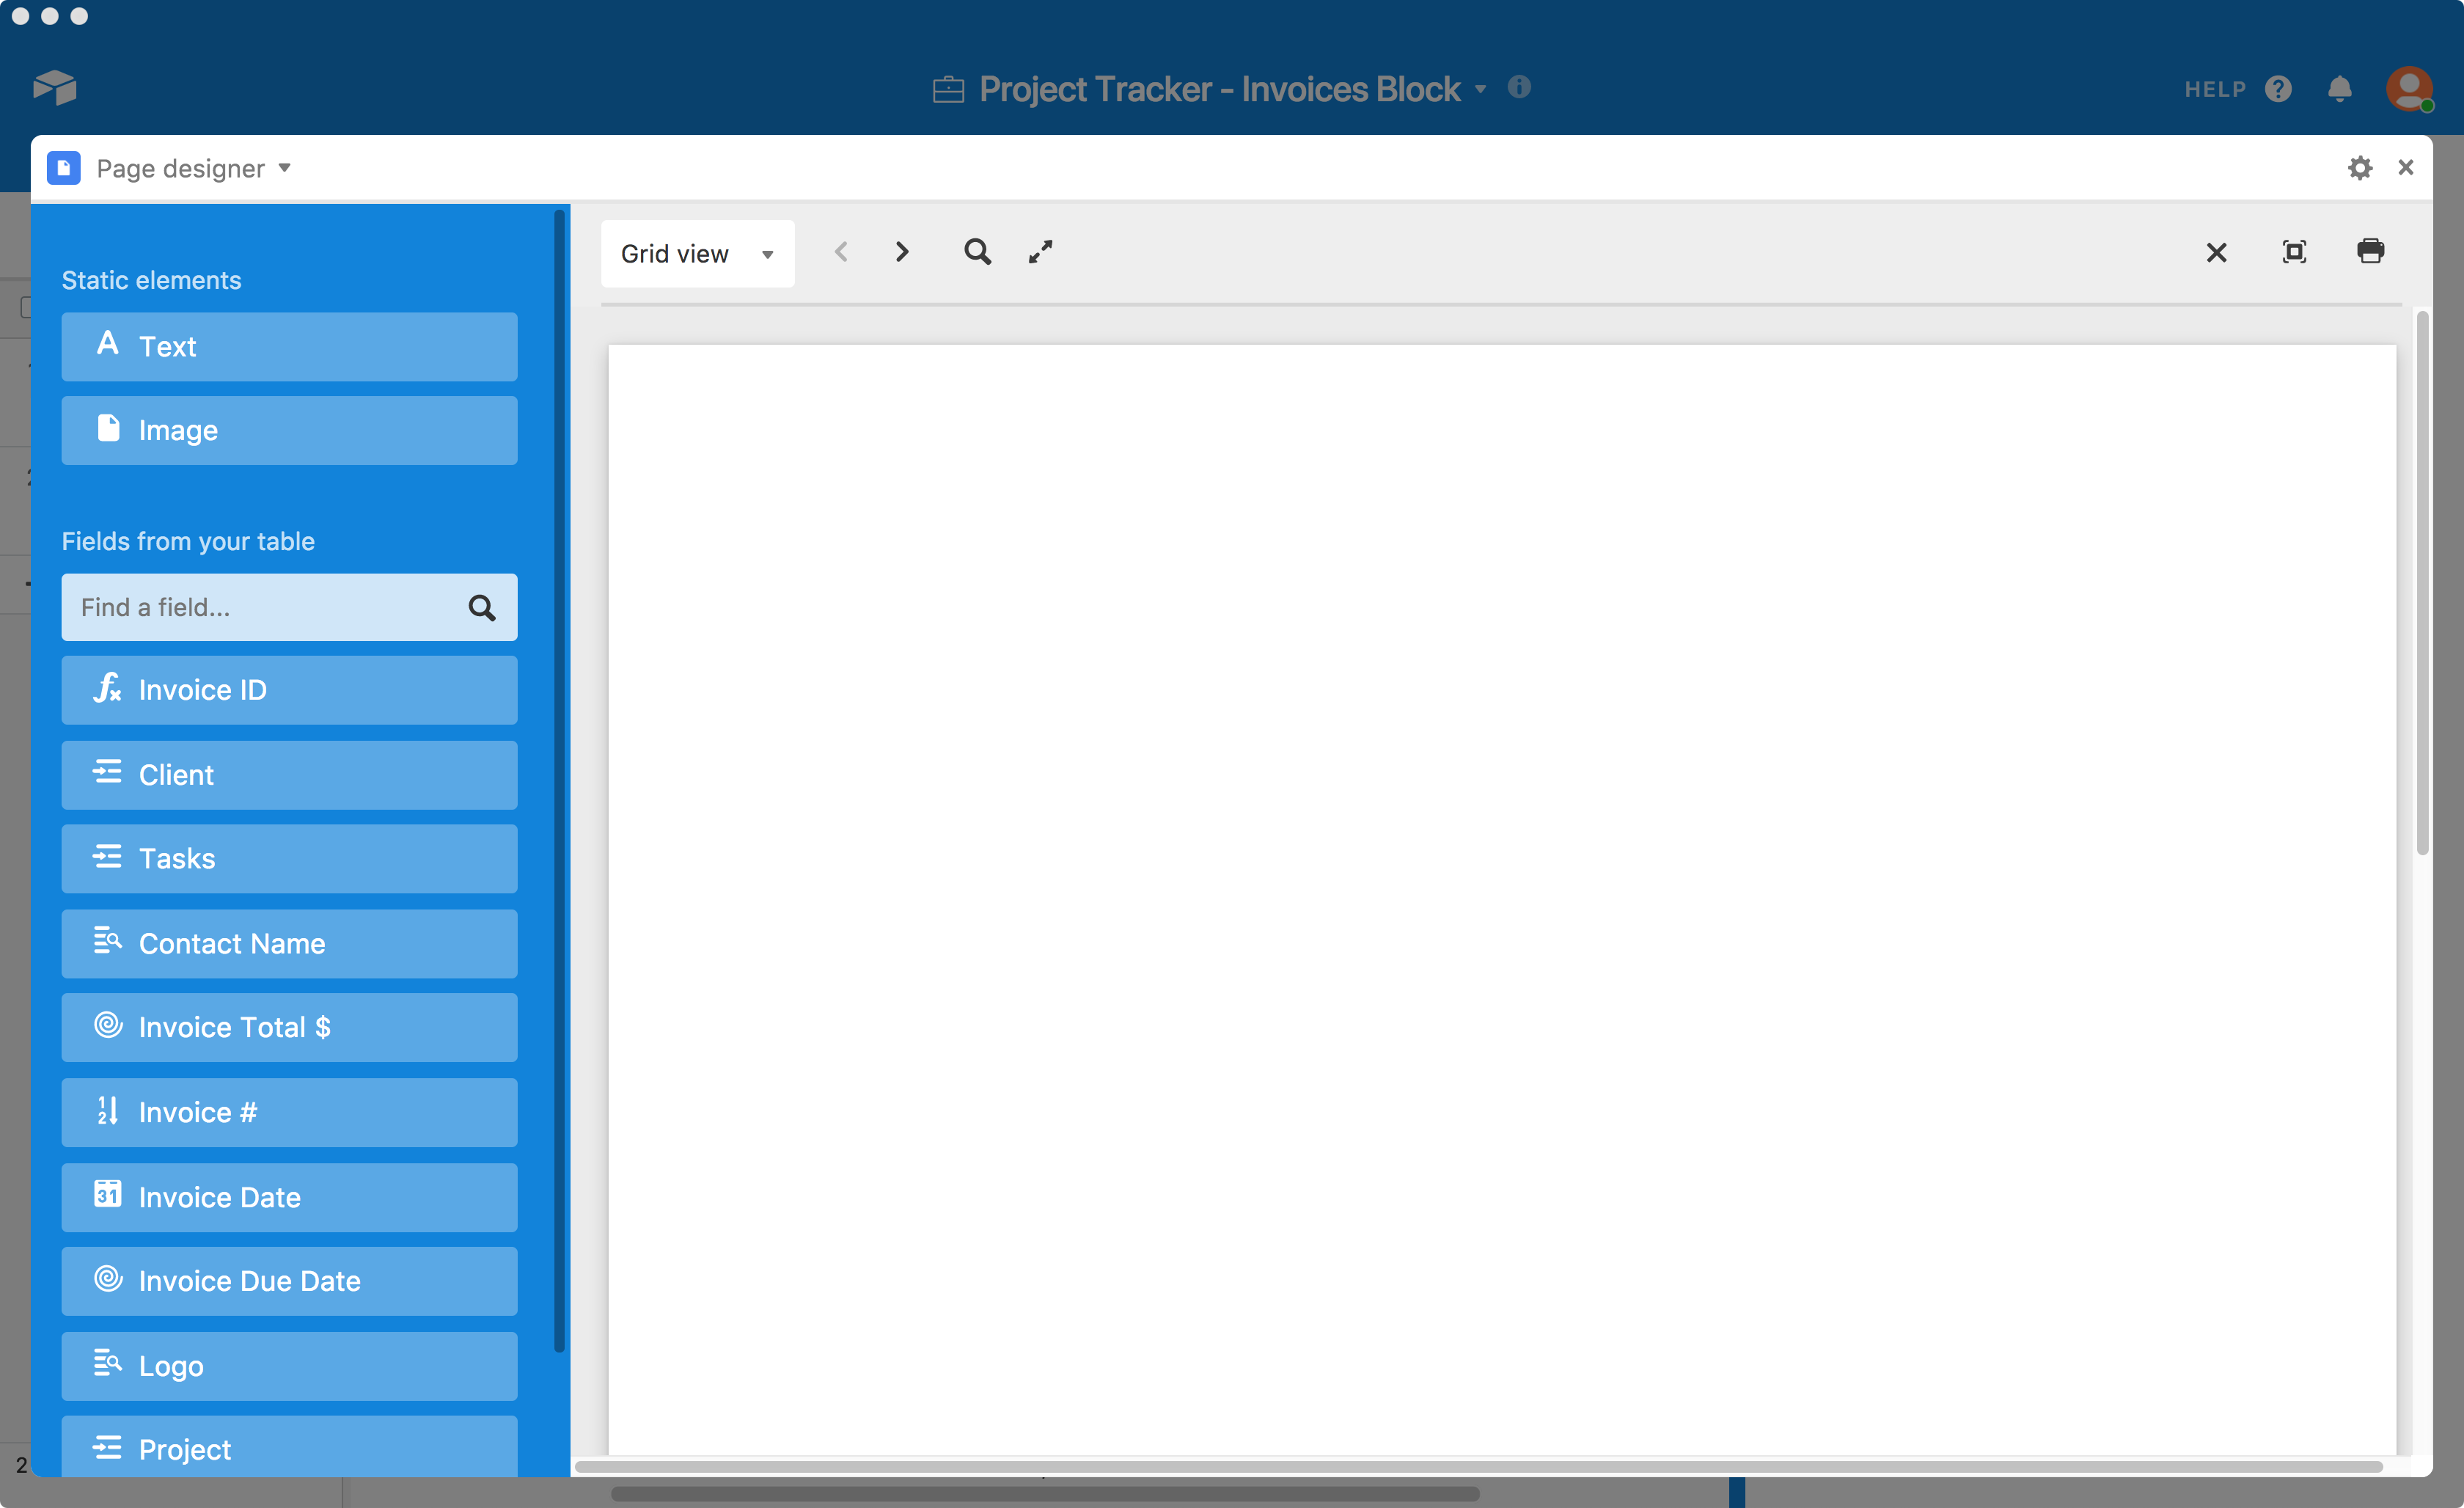
To start, choose Text under Static elements and make a large box on the top left of the page for your header. Give the font a nice big size and weight, and in the content, you can reference the Invoice number field by putting this in the content field: "Invoice #{Invoice #}". Below that box you can place the Logo field to insert the logo from your Clients records. To the right, place two static text objects in bold: "Invoice Date" and "Due Date". Next to these objects you can place the corresponding date fields in regular text, and use the Page designer's grid to line it up with horizontal text alignment set to Right.

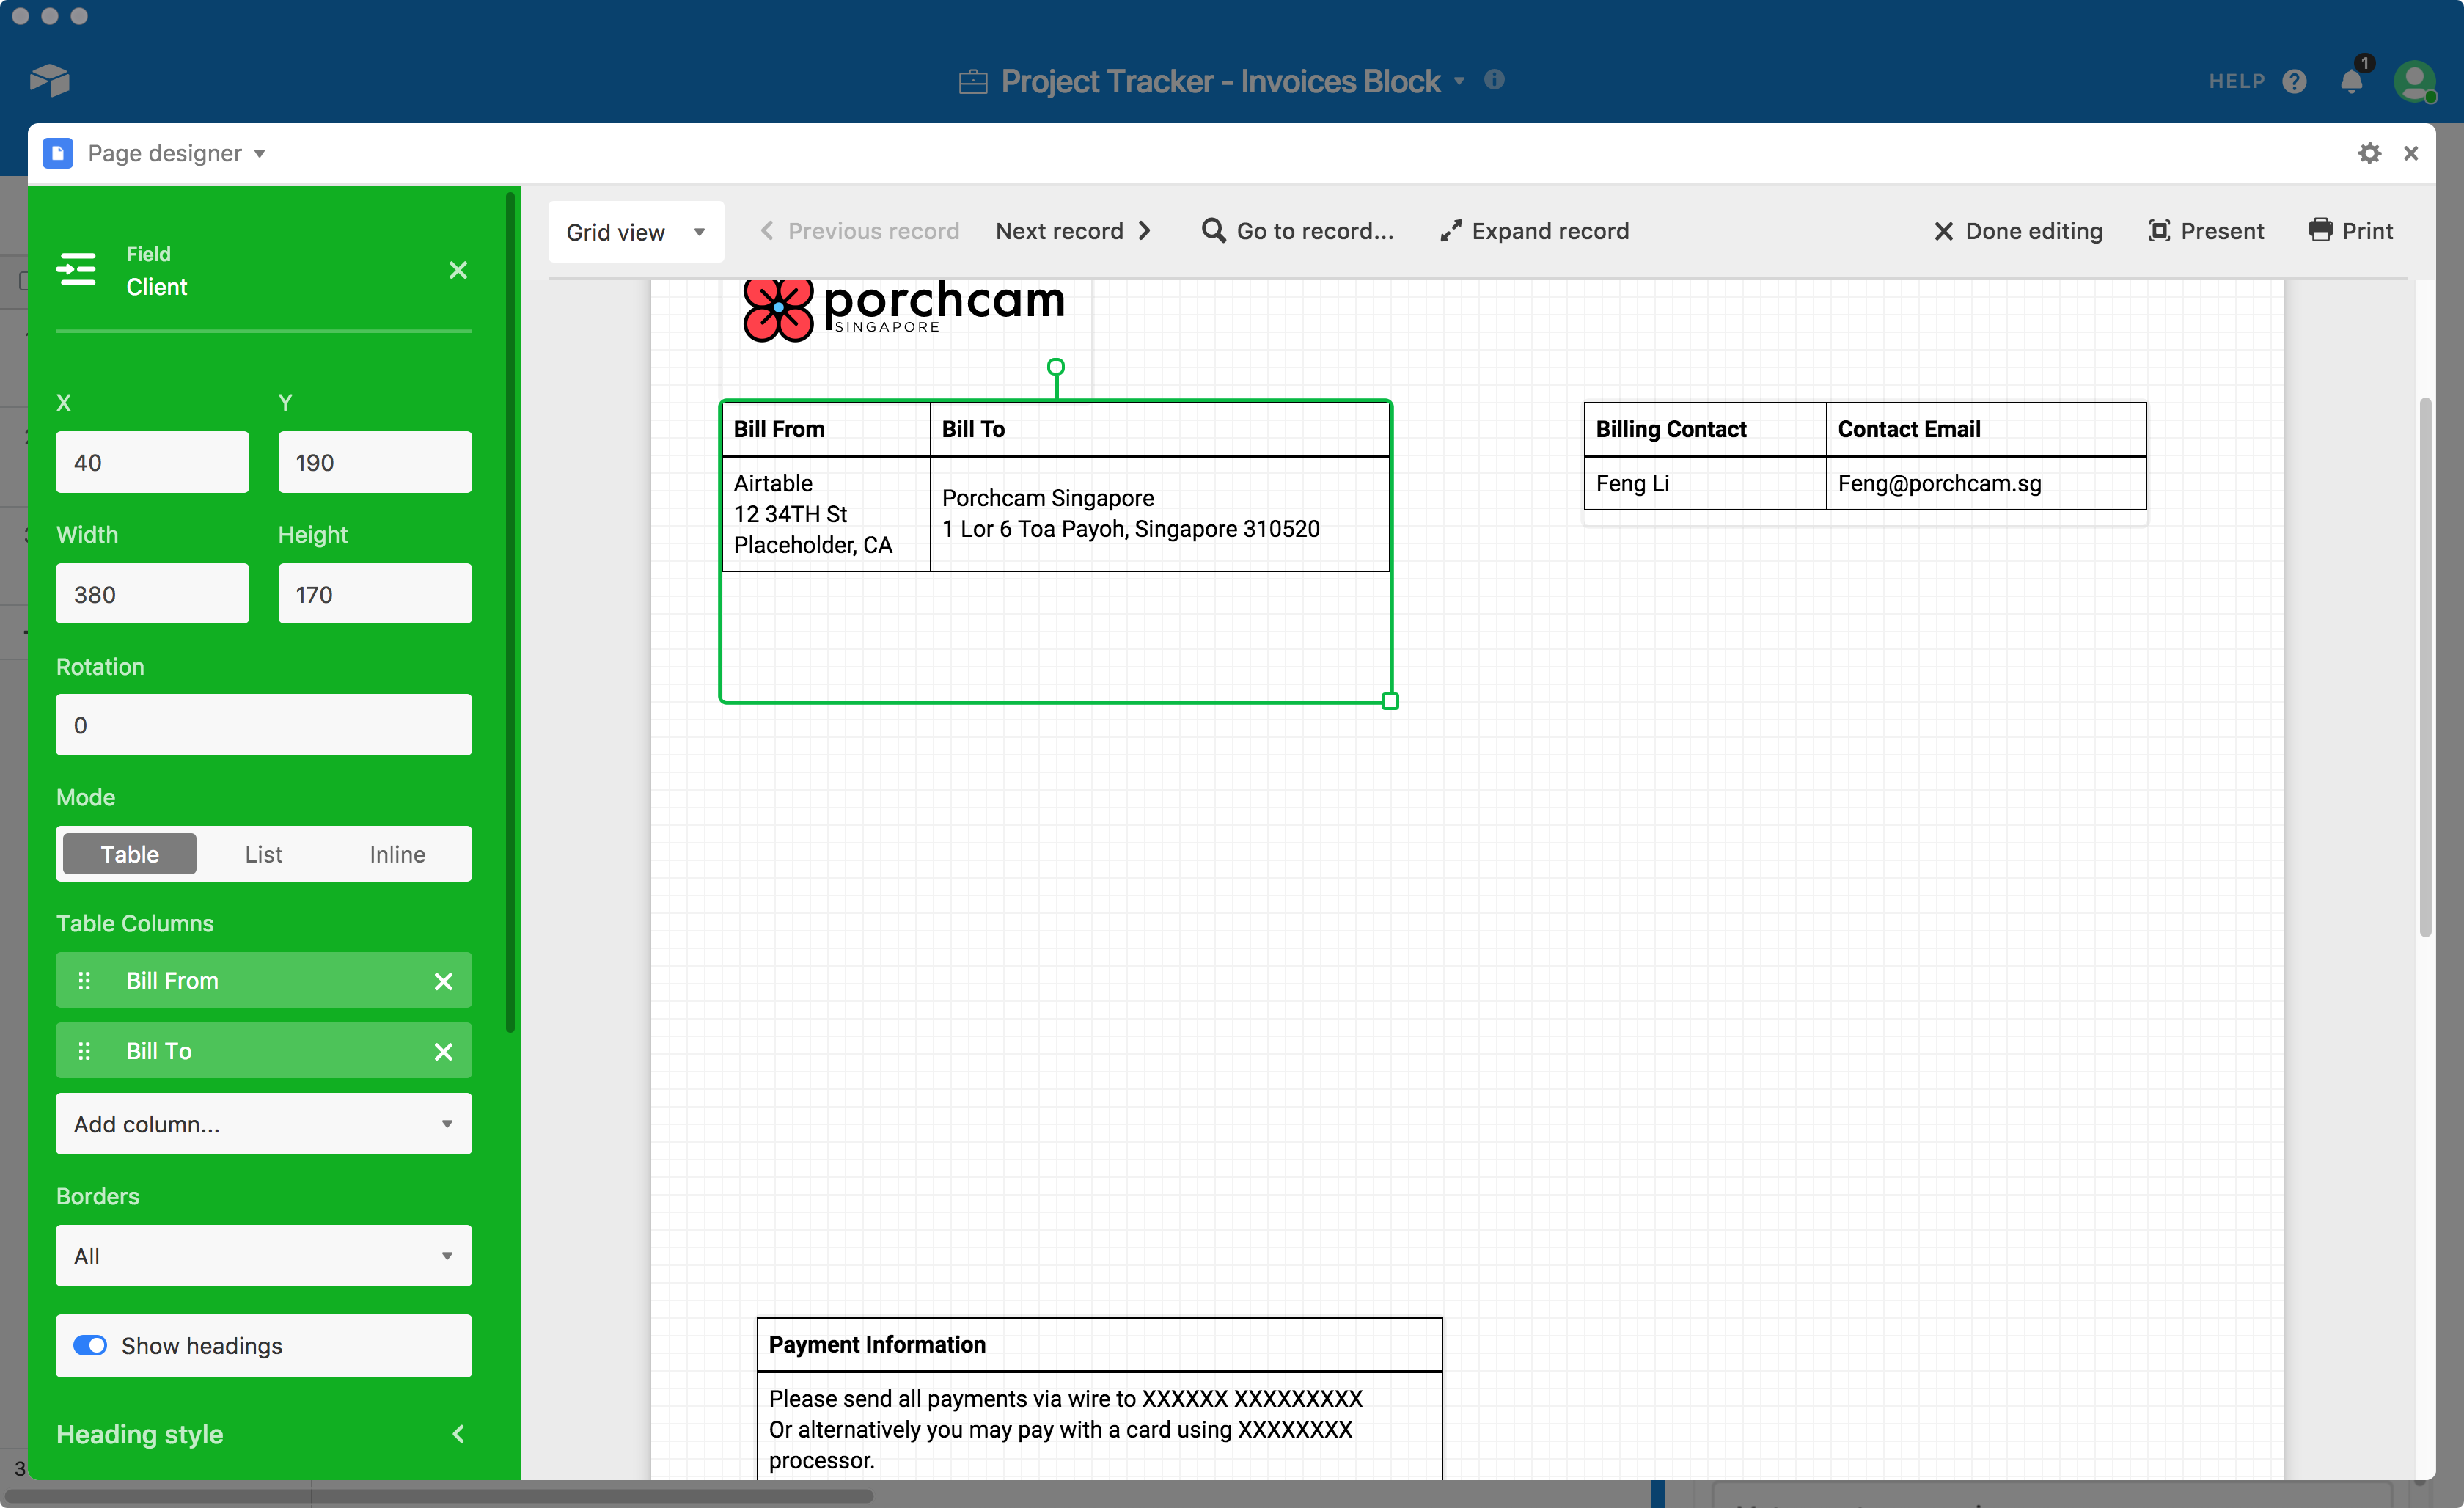
Now things are going to get a bit fancier. Choose Client from your fields, and then under Table Columns, add the Bill From and Bill To fields and remove the unnecessary Client field. You'll see that Airtable has looked up the fields on the linked Client record, without you having to explicitly include a lookup in the Invoices table. Drag the box to a bigger size to fit all the information. We'll use the same trick two more times for other client info. To the right of the billing info, you can place a Client table element with the Billing Contact and Email fields as columns; and then in the bottom left you can place a nice big Client table with just the Payment Information column.
Then we place one final table, this time using the Tasks field, with the columns Task, Billable Hours, Hourly Rate, and Cost. These are our invoice's line items. To sum it all up, add one final static text in bold under the Tasks table, referencing the Invoice Total Rollup field with the following content "Total Due: {Invoice Total $}".
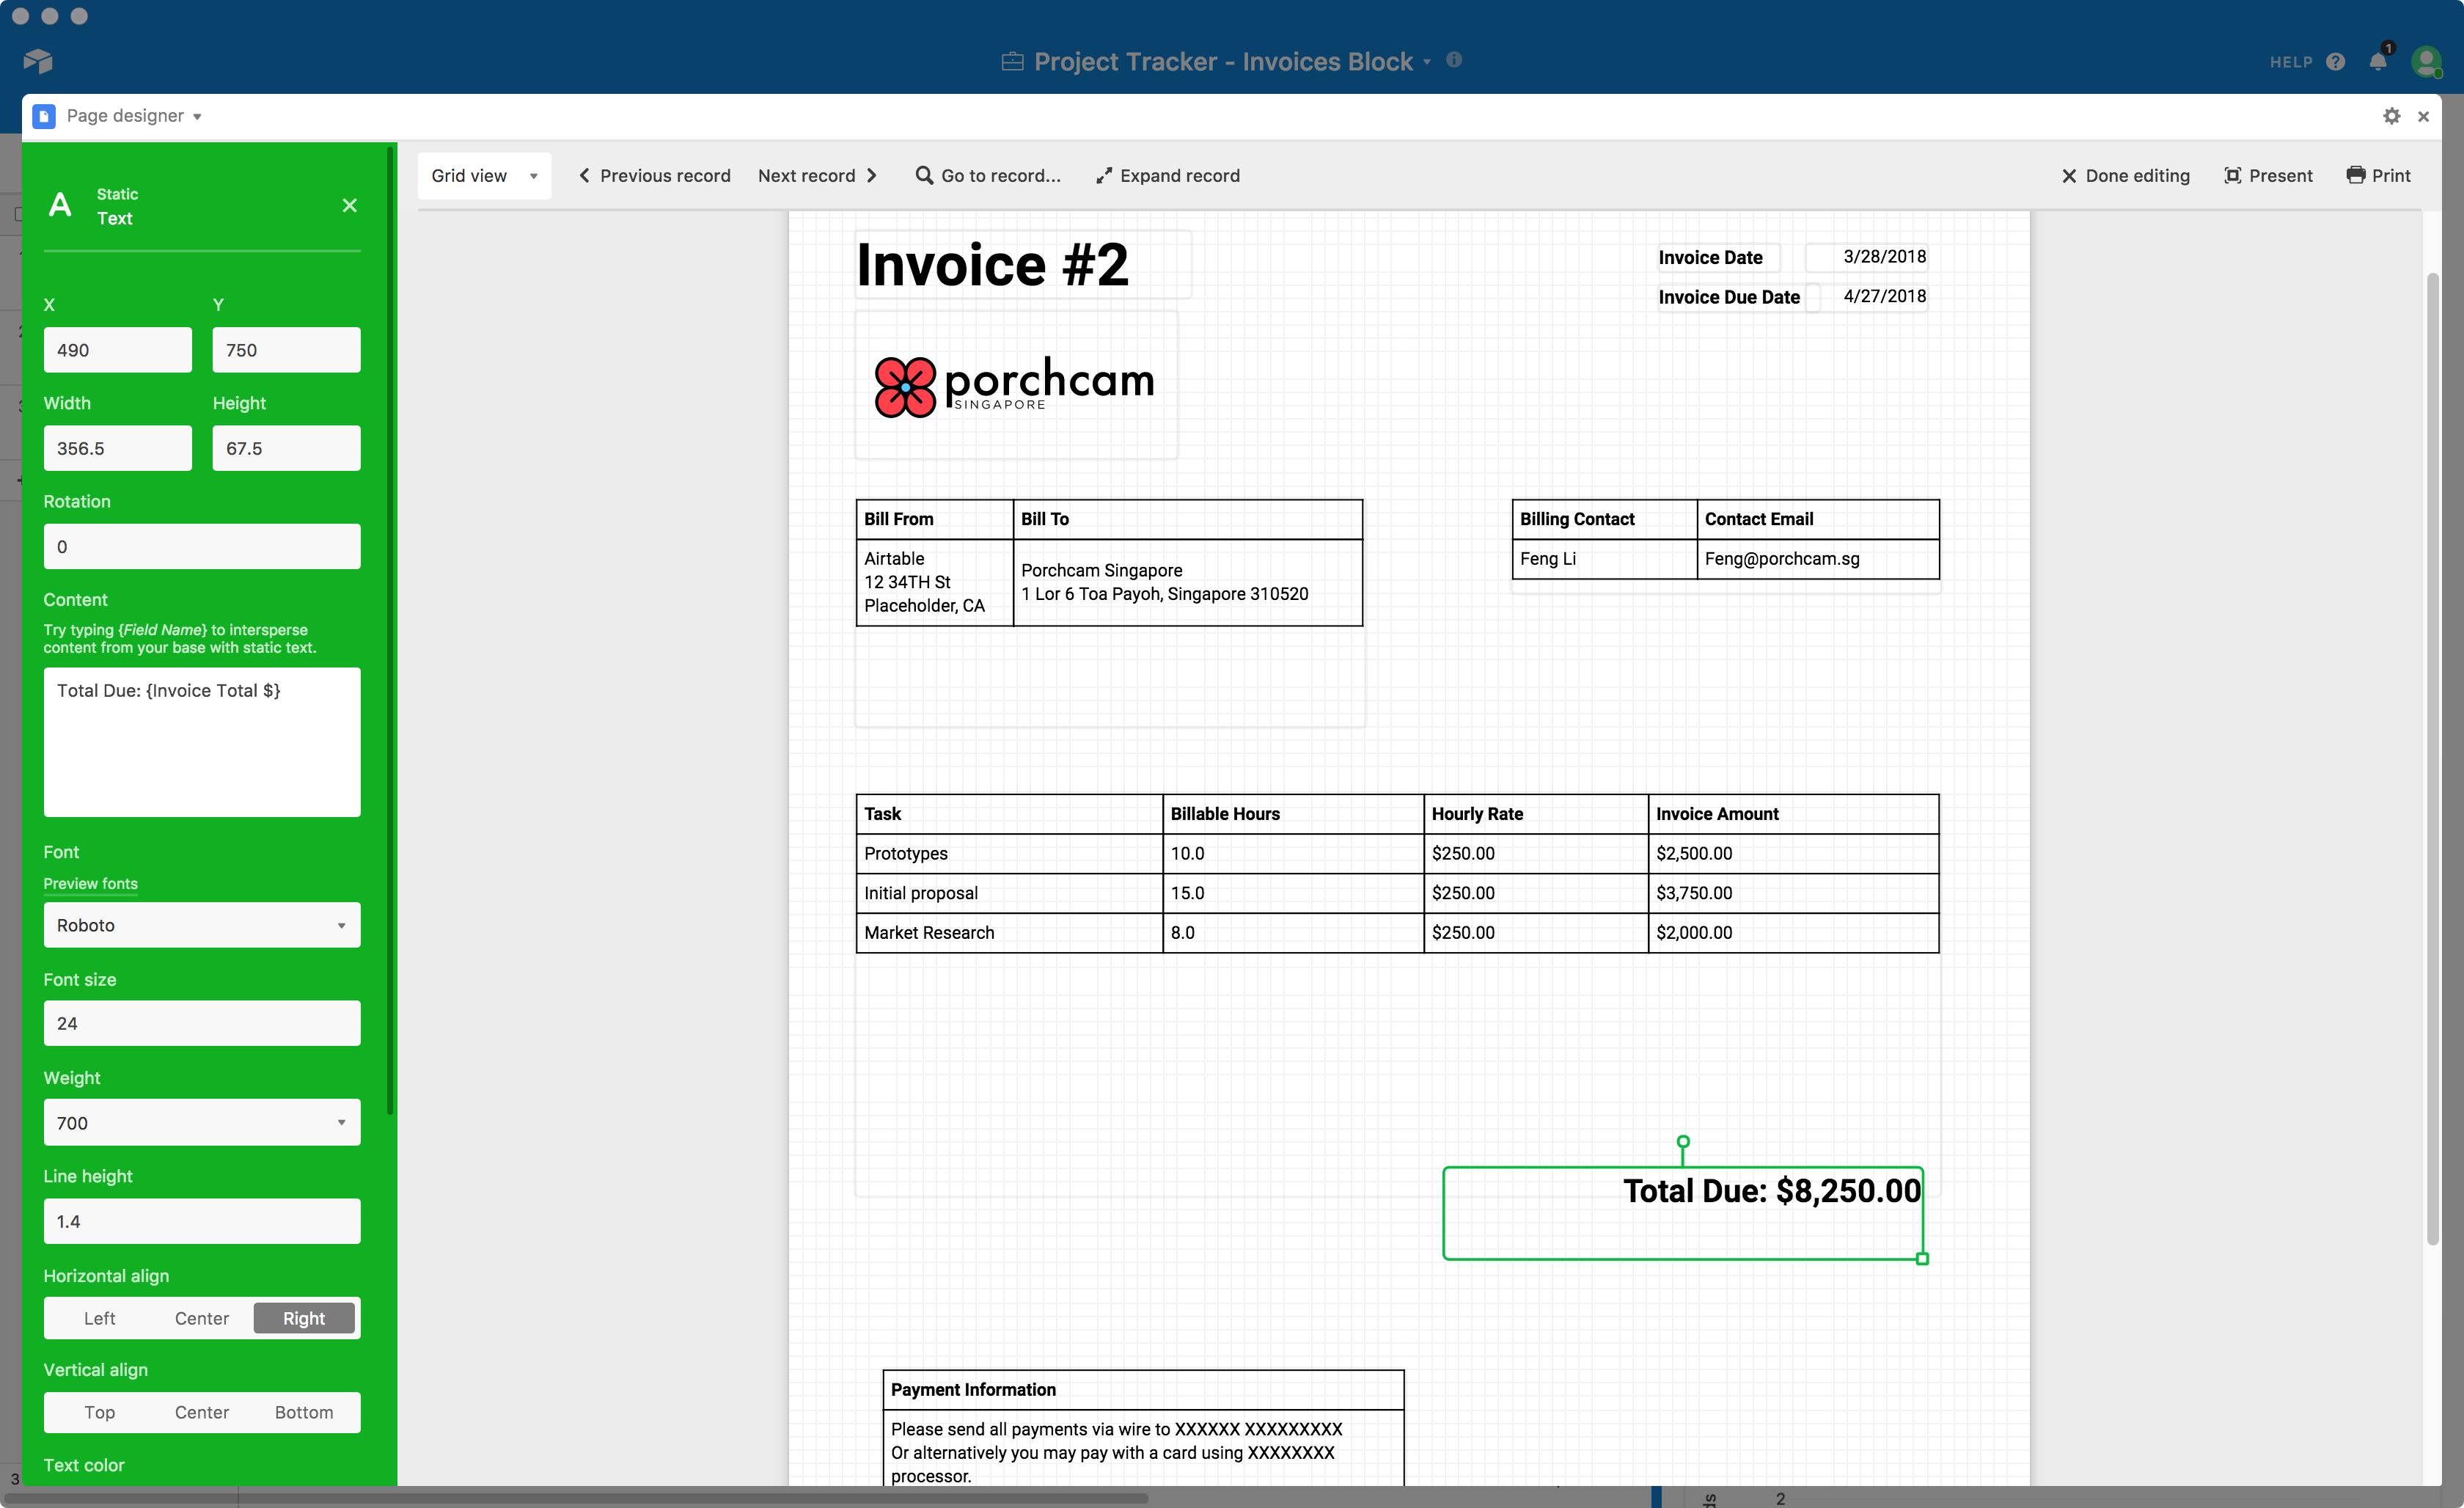
To add items to the invoice, leave the page designer editor and simply link the completed Tasks records to the invoice's record. You've now got an automatically generating and updating invoice system! Return to the page designer block and click Print in the upper right corner and you can send your invoice to a printer, or use your browser or OS's Print dialog to save it to a PDF.
That's it! Congratulations on supercharging your project tracking base with an amazing new automatic invoice generator template. For another idea on what you can do with the Page designer, take a look at how the Digital Content Calendar template automatically generates social media image assets. If you come up with other cool ways to use the page designer block, publish your base on Airtable Universe or let us know on social media!