This is a guest post courtesy of database design expert and author Tim Dietrich, an honorary Airtable MVP. To check out the second part of this post, click here.
FileMaker users who are exploring Airtable often ask me what’s involved in migrating data from FileMaker to Airtable. So I’ve created this guide to show what’s involved.
In Part 1, you’ll learn how to migrate data from FileMaker to Airtable. You’ll also learn how to configure Airtable tables with the best possible column types, so that you can get the most out of Airtable.
When migrating databases that contain multiple related tables, it’s important that you be able to “reconnect” related records. You’ll learn how to do that in Part 2.
The Sample Database
In this guide, we’ll migrate data from a simple FileMaker database. It’s a database of prospects, being used by a team of salespeople. It includes basic information about each prospect, and that data is stored in a Prospects table.
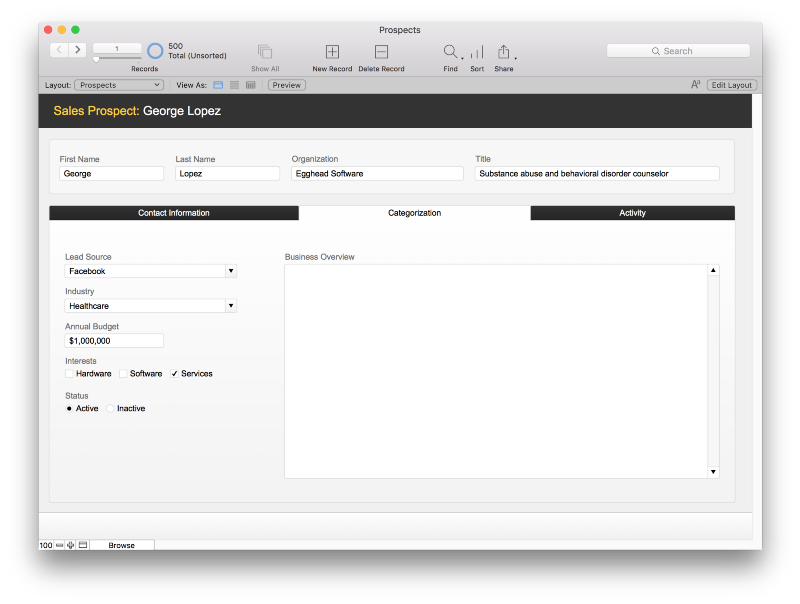
The database also contains information on prospect activity. When a salesperson interacts with a prospect, they add a record to the Activity table via a portal, indicate the type of interaction that they had (email, phone call, meeting), as well as notes or comments.
Below are a few screenshots of the database.
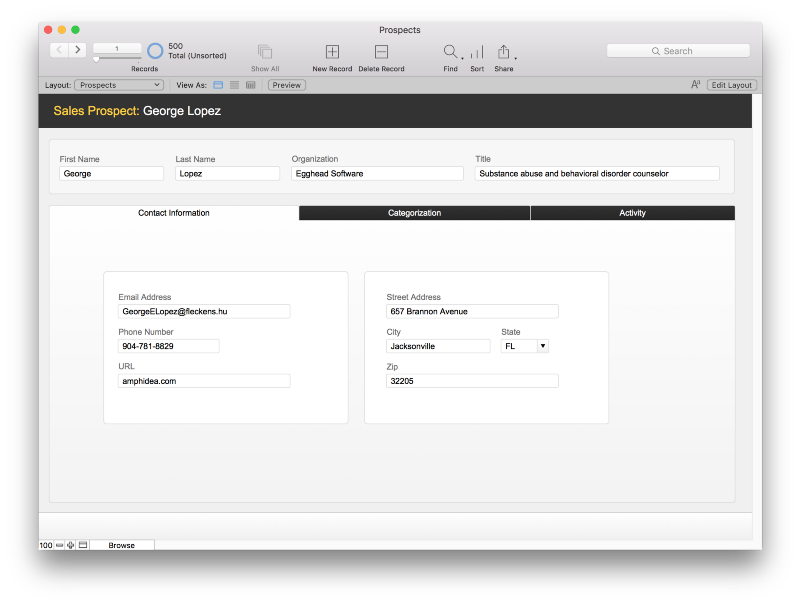

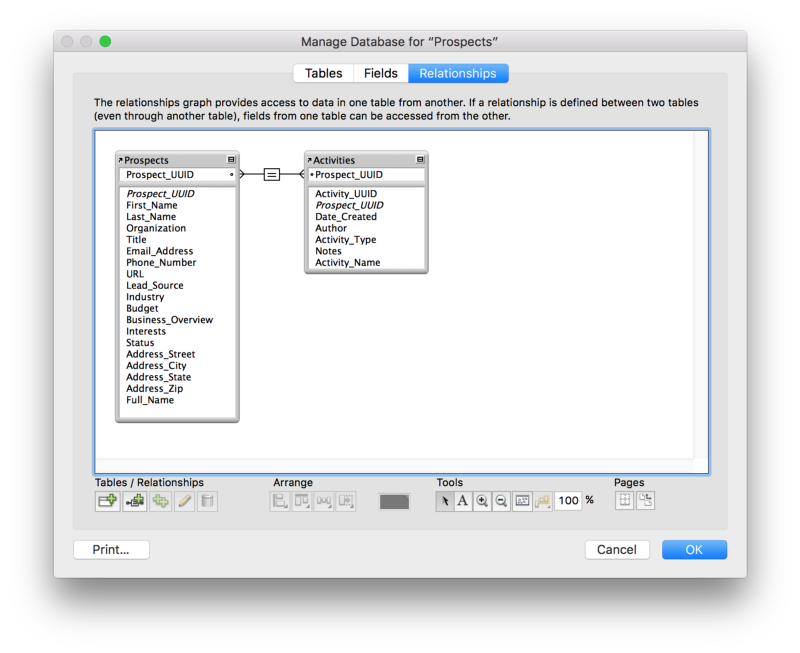
The tables are related using a Prospect_UUID field, which is the primary key of the Prospects table. A field with the same name serves as the foreign key in the Activities table.
While this is a basic FileMaker database, the steps involved in migrating data to Airtable will apply to any database, regardless of its complexity.
If you’d like to follow along, a copy of the FileMaker database is available here for you to download.
The FileMaker database includes sample (fake) data. There are 500 records in the Prospects table, and approximately 200 records in the Activities table.
Export Data From FileMaker
We have two tables to migrate from FileMaker to Airtable. Let’s start with the Prospects table.
First, make sure that you are on a layout that is based on the parent table. You also want to be sure that you have all of the table’s records in your found set. The easiest way to do that is to select Records > Show All Records.
To export the records, select File > Export Records. The “Export Records to File dialog will appear.
Next, select a location and a file name to export your data to. For the file Type, select “Merge.”
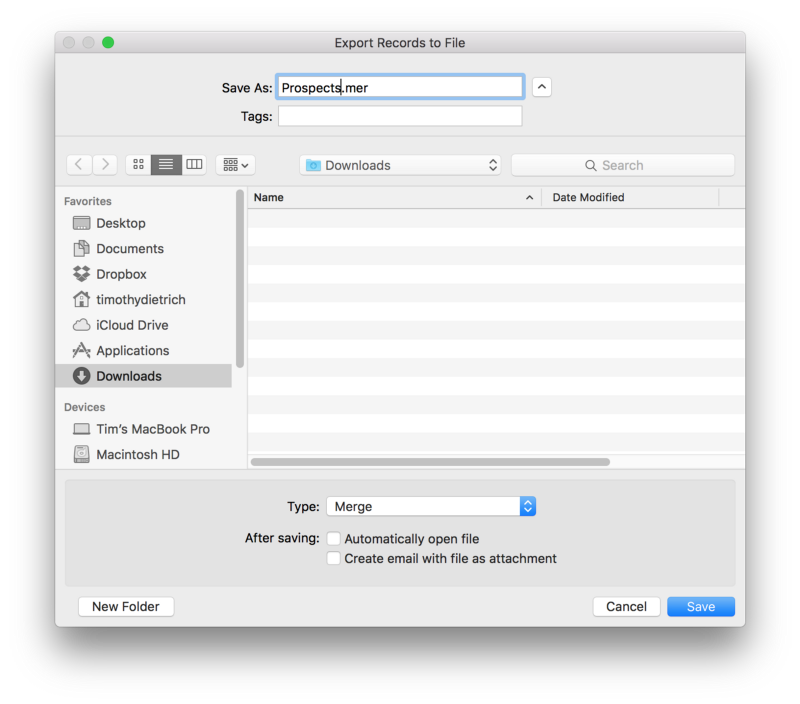
Note: Airtable supports importing CSV files. However, you’re going to use a Merge file (instead of FileMaker’s “Comma-Separated Text” option) because it is very similar to a CSV. The important difference between the two file types is that the Merge file will include a header row with the name of each field.
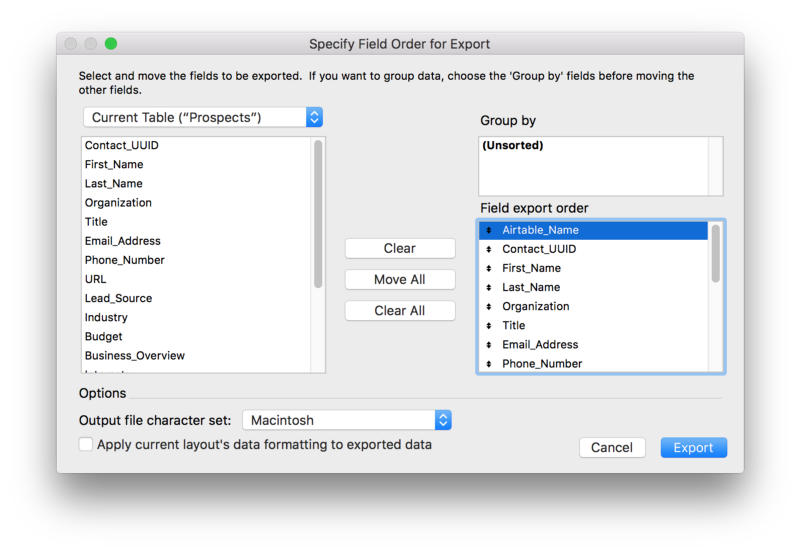
Click the Save button to continue. The “Specify Field Order for Export” dialog will appear. Be sure to select the “Current Table” option. Otherwise, only the fields that are actually on the current layout will be exported — and you might end up missing a few fields that are in the table but not actually on the layout.
Select all of the fields that are in the Current Table. You can simply click the Move All button to so.
There is one last important thing that you’ll need to do before exporting the data, and that is to set the field export order so that the “Full_Name” field is the first field in the list. Scroll down to find the field, then drag it to the top of the list. (The importance of this step will be explained shortly.)
Finally, click the Export button to export the records to the file.
Import Data Into Airtable
Now that you have the data exported from FileMaker, you’re ready to import it into Airtable. In this example, I’m going to import the data into a brand new Airtable database. Later, I’ll show you how to import a table into an existing Airtable database.
Before you continue, you need to rename the file that you created earlier. Change the file’s extension from “.mer” to “.csv.” This will make it easier for you to select the file for importing into Airtable.
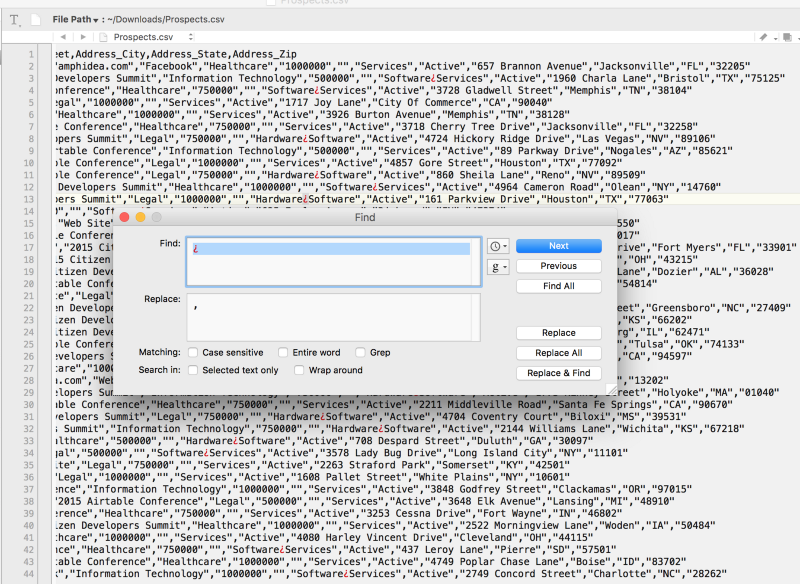
One additional change that you need to make — and this one is a little tricky — is to replace a special character that appears in the merge file. The character that you need to replace is the ¿. When creating the merge file, FileMaker substituted this character in place of the return character that you would normally find in a field that has multiple values. That’s a good thing, because had FileMaker used return characters, it would be difficult to know when one record ended and another began.
You need to replace the ¿ characters with commas. It’s a relatively easy change to make, and you should be able to make it using any text editor. (I use TextWrangler, and you can see how I’ve made the change in the screenshot below.)
Next, log into Airtable. From the Airtable home screen, click the “New Base” icon. The New Base window will appear.
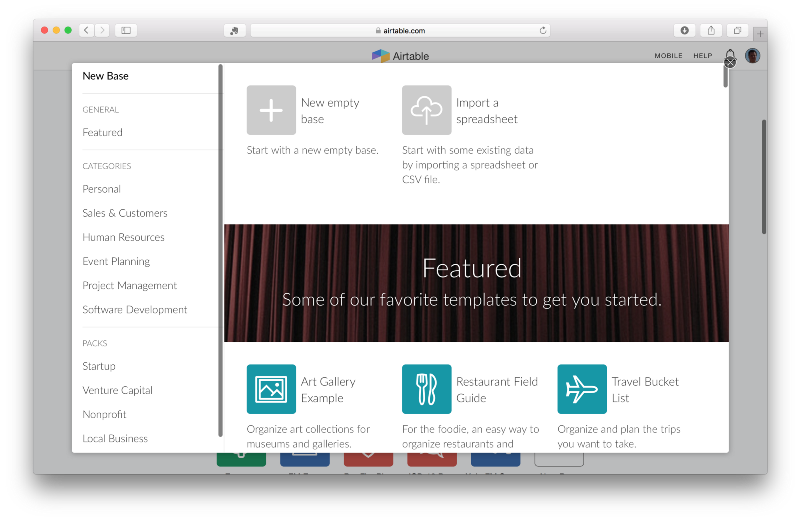
Select the “Import a spreadsheet” option. The Import Spreadsheet dialog will appear.

Click the “Choose a .CSV file” button. The Choose File dialog will appear.
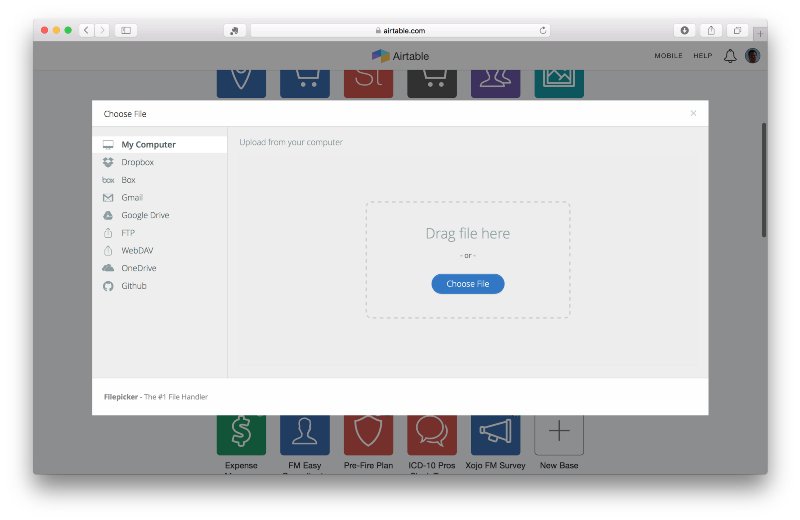
Next, either drag and drop the file that you created earlier on to the window, or click the “Choose File” to locate and select the file. Airtable will immediately create your new database, as well as a table for your data, and load the data into the table. When it is done, a new icon will appear on the Airtable Home screen.
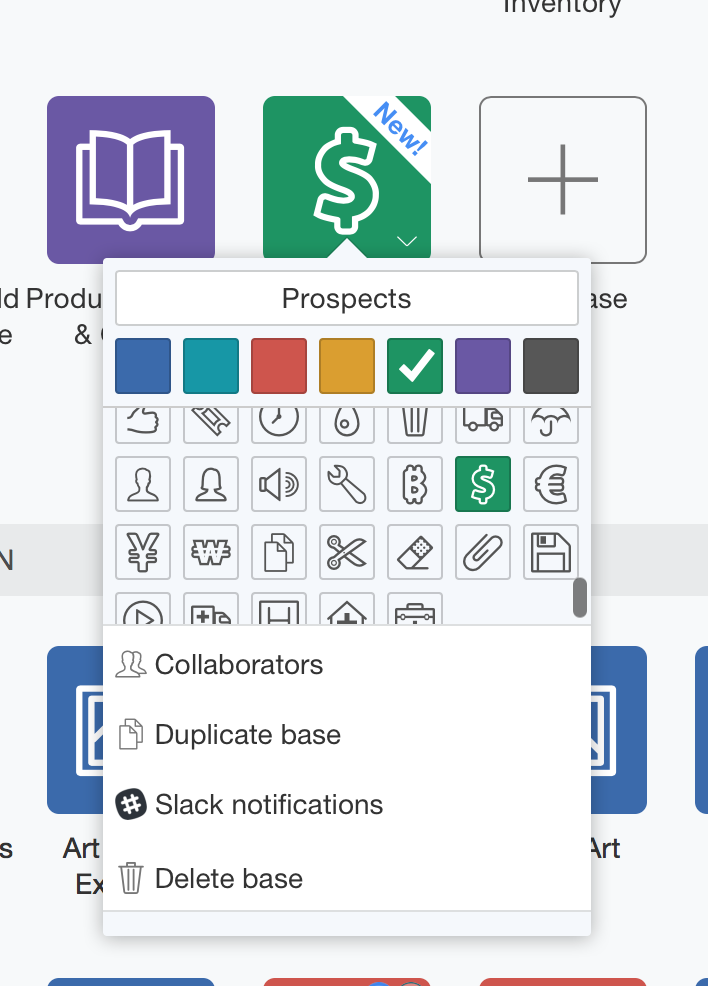
By default, the new database will be named “Imported Application.” For this example, I’m going to name it “Sales Prospects.”
You can also select an icon that represents the contents of the database. For this example, I’ll select the $ icon.
And finally, you can also change the database’s button color. I’ve chosen green for the example database.
Exploring the Airtable Database
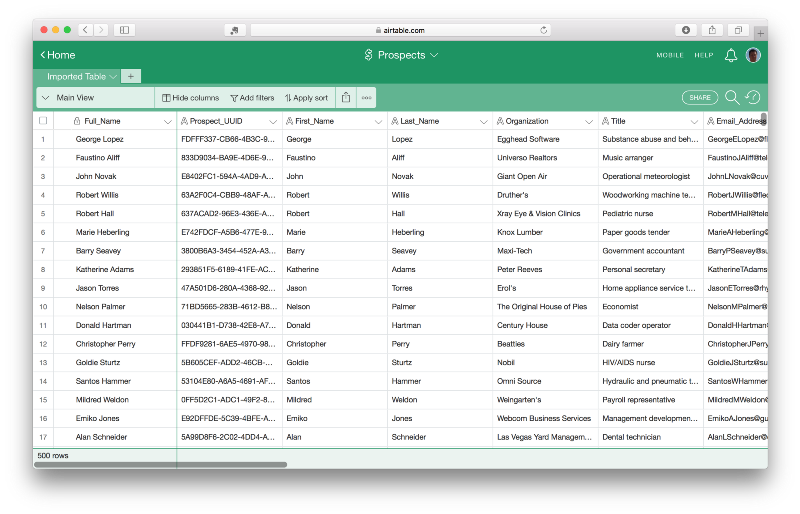
Let’s take a moment to explore the new Airtable database. To use the database, click on its icon.
As you can see, Airtable has imported the data that you had exported from FileMaker. The records are presented in a spreadsheet-like interface, with columns and rows. Take a moment to scroll through the records.
Cleaning up the Airtable Database
The data has been loaded, but there are a few things you can do to improve the new database and take full advantage of Airtable’s features.
Notice that when Airtable created the new database, it created a table to load the data into. By default, that table is named “Imported Table.” Let’s change the table name so that it is more clear.
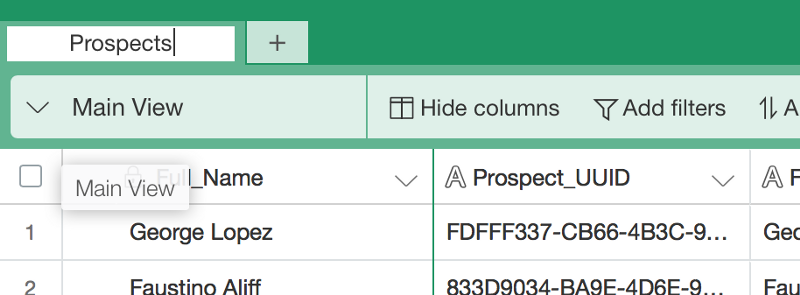
To rename the table, click on the down arrow next to the table name, and choose Rename Table. The tab for the table will change to a text field.
Enter the name for the table and click return or enter. For this example, let’s change the table’s name to “Prospects.”
Next, take a look at the columns. The column names are okay, and that’s because you imported the data from a merge file (where first row included the column names).
However, notice that all of the columns are set to Airtable’s “Single line text” type. (You can tell a column’s type by looking at the icon to the left of the column name.) That’s the default column type that Airtable uses when it imports data. And while the “Single line text” column type works, it’s not ideal for several of our columns.
For example, the example database includes a “Budget” column. It contains numeric values, and you’ll likely want to refer to those values as numbers instead of text (to get totals, for example). Similarly, the “Business_Overview” column will likely contain more than a single line of text. There are other columns that you can optimize as well. Let’s work our way through them.
Email Address
The email address column works okay as a “Single line text” column. However, Airtable supports an Email column type, and you’ll get additional functionality if you change the column to that type. To change the column’s type, click the down arrow next to the column’s name, and select Configure. Next, click on “Single line text.” A menu will appear, showing all of the column types that Airtable supports. Select “Email” from the list, and then click save. Notice that the values in the column are now underlined, indicating that they are links. If you click one, your default mail application should open, with a new message pre-addressed for you.
Phone Number
You can make a similar change to the Phone Number column. Follow the same steps that you used to change the Email Address. However, for this column, select the “Phone number” column type.
URL
Change this column’s type to “URL.” Like the Email Address column, it will act as a clickable link.
Lead_Source
While you don’t necessarily need to change the Lead Source column, you could use a “Single select” type to present a list of options instead of plain text. This is similar to Filemaker’s value list concept. This will help to streamline the entry of additional records, and help ensure that the values are consistent. To make this change, change the column to a “Single select” type. Notice that Airtable will automatically build the list of options (again, the “value list” in FileMaker terms) based on the values that are already in the records. This is another convenient feature of Airtable — it’s done all of the work of setting up the value list for you!
Industry
Like the Lead Source column, the Industry column would also work best as a “Single select” column type.
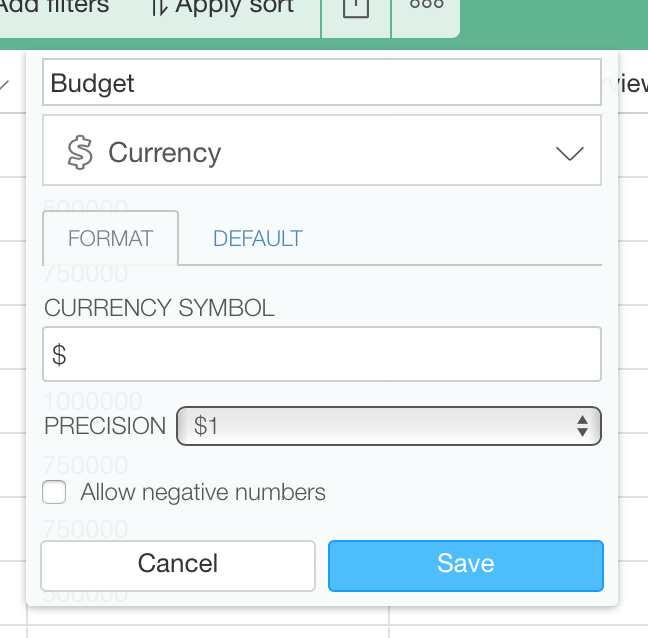
Budget
Change the Budget column to a Currency column, and select one of the precision options. I’m going to select the precision that does not include a decimal value. Notice that when you change this column’s type, Airtable automatically displays the sum of the column’s value in the footer area. You can click on that value to get other summary values as well, such as the column’s average, median, min, max, and so on. A very cool feature!
Business Overview
While the content in the Business Overview column is text and the “Single line text” column type works, it’s less than ideal. You really want to be able to see and work with values that potentially contain a great deal of text. So let’s change this column to a “Long text” type. Notice that the cells in the column behave a little differently now. If you click on one, an Expand cell icon will appear. Click on it, and the cell expands into its own modal window.
Interests
Several of the records contain multiple “Interests” values. For example, some contain Services and Software, others contain Software and Hardware, and so on. So for this column, instead of changing it to a “Single select” column, you’ll change it to a “Multiple Options” type instead. (This is similar to configuring a field in FileMaker so that it uses a “Checkbox set” control style.) Once again, Airtable will do most of the work for you. It will automatically build the list of options to present to the user (based on existing values in the column), and automatically update the column, selecting the correct options for each record.

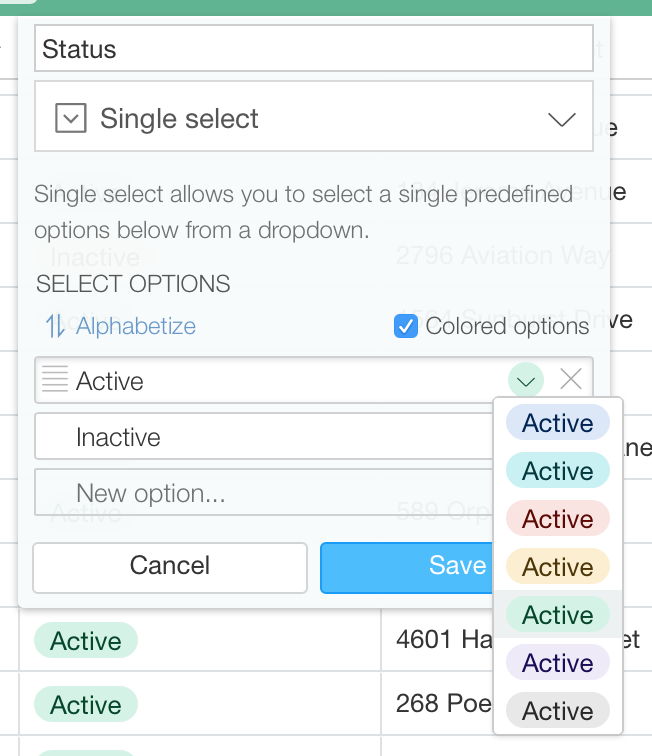
Status
A prospect will only ever have one Status value (Active or Inactive). Therefore, you can configure the column as “Single select” type. However, it might be nice to color-code these values to make it a little easier to identify inactive prospects. Notice that when you configure the options for a “Single select” column, you can indicate the background color to be used for each option. (This feature also applies to the “Multiple Options” column type.) You can set the color of “Active” to green, and the color of “Inactive” to red. This is another convenient and helpful feature of Airtable.
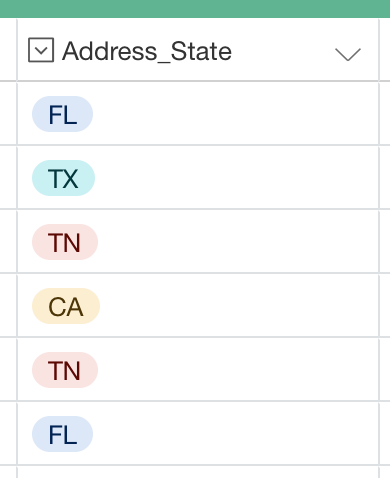
Address State
Finally, the State column should also be configured to be a “Single select” type.
Airtable’s Primary Column
Airtable’s primary column is a concept that many FileMaker users struggle with. There’s nothing quite like it in the FileMaker world.
Every Airtable table includes a single primary column. Its purpose is to give users a way to identify a record in the table. This becomes particularly important when relating records.
To learn more about the primary column, click here.
Earlier, when you exported the data from FileMaker, I stressed the importance of setting the export field order so that the Full_Name column was the first field in the list. The reason that this is so important is that, when importing a file into Airtable, the first column in the file is used as the primary column. So you want to be particularly careful when you exporting data from FileMaker. You want the first field to be something that will serve well as the primary column.
Wrapping Up
In this guide, you’ve learned how to:
-
Migrate data from FileMaker to Airtable.
-
Configure an Airtable table with the best possible column types.
And you also have a good understanding of the Airtable primary column.
[Note: In this version of the post, instances of “Name column” have been replaced with “Primary column.”]