Getting input is a crucial part of team growth, but let’s be real: not everyone is comfortable with sharing how they feel face-to-face. Sending an anonymous survey that keeps respondents’ identities private can capture all of the candid responses you need to make improvements and move forward with your project, idea, or initiative.
Forms are a convenient way to anonymously gather responses, and Airtable goes one step further by automatically feeding each submission into one organized, categorized record in an existing base. With our form view, you can collect the details that matter and plug the data directly into your workflow.
Forms can be used to collect nearly any type of information, which is why its use cases are endless. Some common form examples include:
- Blog and content pitches
- Customer information
- Expense logs
- Quick polls and surveys
- Quizzes
- RSVPs
- Team member feedback
- Job and volunteer applications
How to create an anonymous survey in Airtable
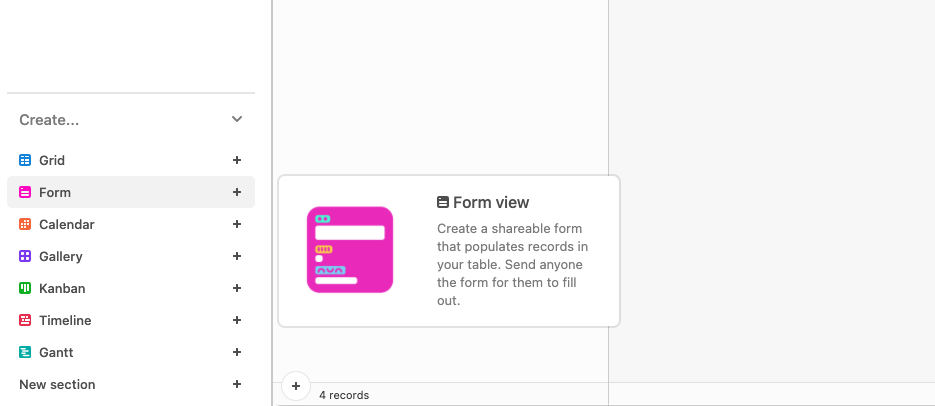
Let’s say you need to create an anonymous survey. Forms are a type of view in Airtable; you can create a new form by opening the view sidebar on the left and finding the “form” option.
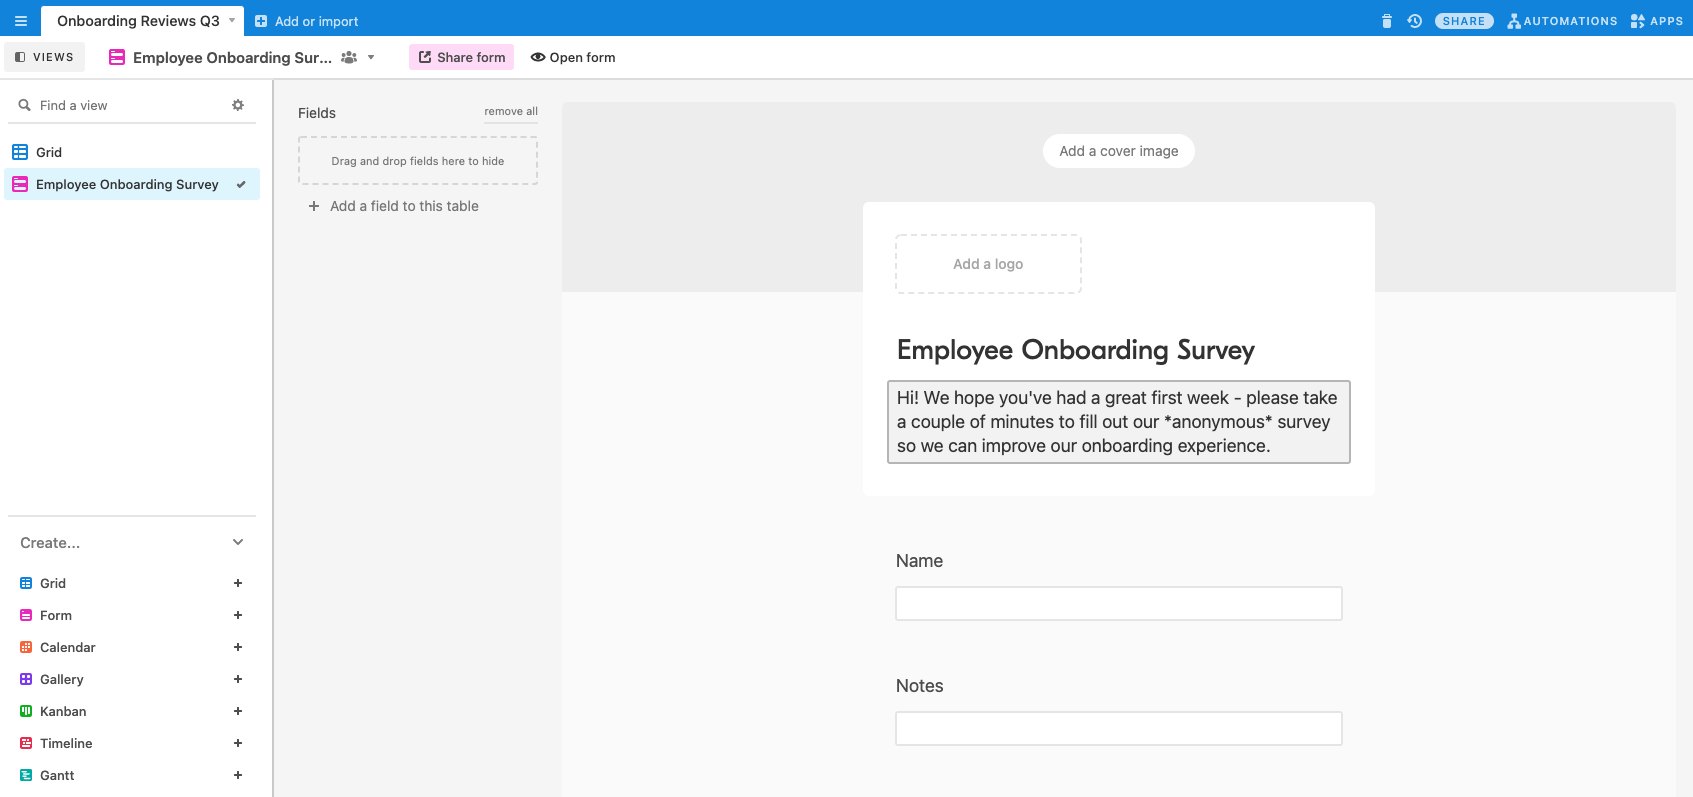
Now that the form builder is open, you can start customizing your form before sharing it with others. Giving your form a title and description by clicking the header section is a great place to start!
Visual tip: If you’re on Airtable’s Pro plan, you can customize your form even further by adding a logo and cover image—just click “add” and upload your desired image. Cover images are always 240px tall and as wide as your browser window. We recommend using the cover photo feature to add flair to your form, and not as a space to relay important information (it might get cut off!)
How to add form fields to your anonymous survey
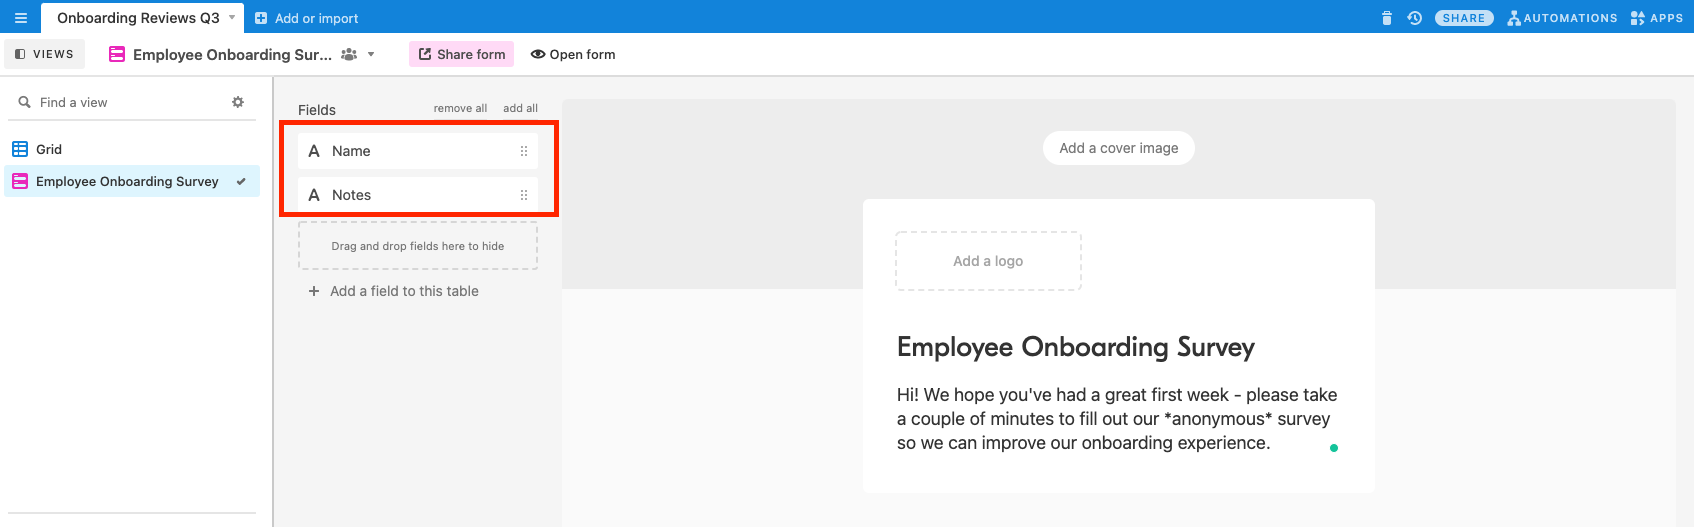
Now you’re ready to add and order your form fields. The fields on your form will automatically populate based on the fields that exist in your grid view, but you’ll have the opportunity to hide those fields from your form, or add additional questions. And don’t worry if they’re out of order—you can easily move them around by clicking and dragging.
Let’s say you have a field for your personal notes in your grid view—you’ll want to hide that field on your form before you share it. Hide unwanted fields by clicking and dragging them to the gray field bar to the left of your form, where they’ll stack on top of one another. If you don’t want that field at all, can also just delete the field altogether...but deleting the field from the form view will also delete it from all other views in the table.
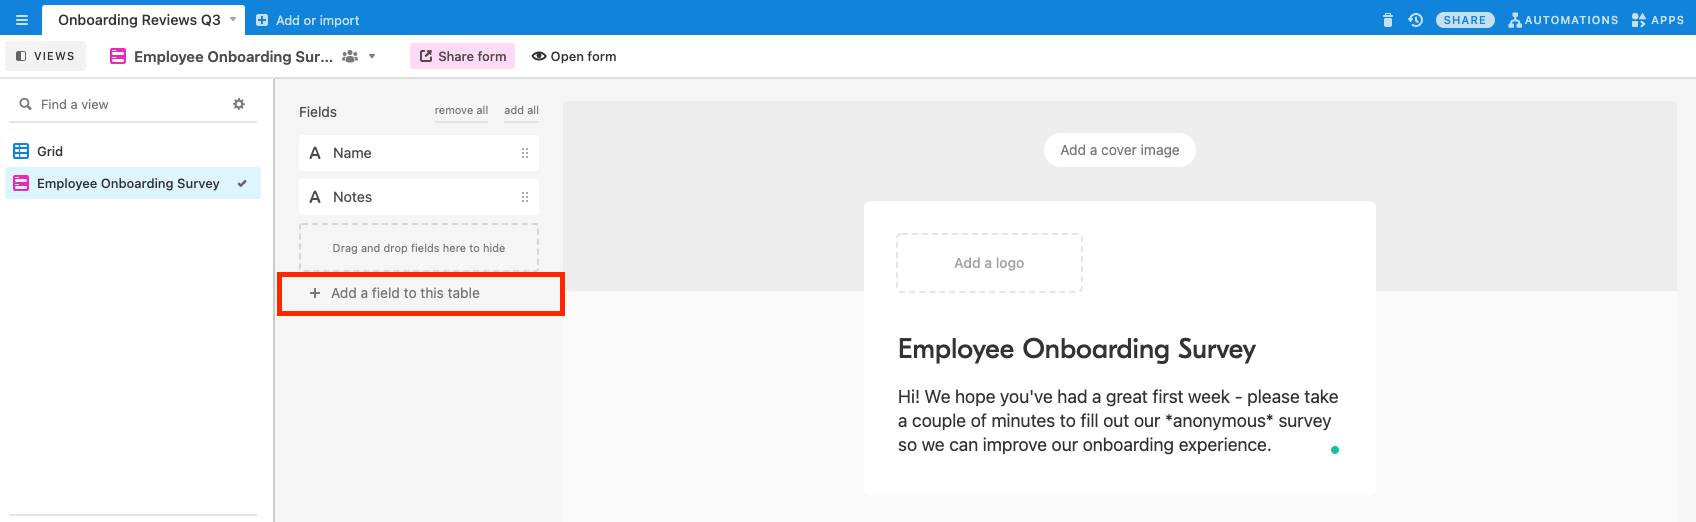
If you want to add a brand new field, click “add a new field to this table” in the same field bar.
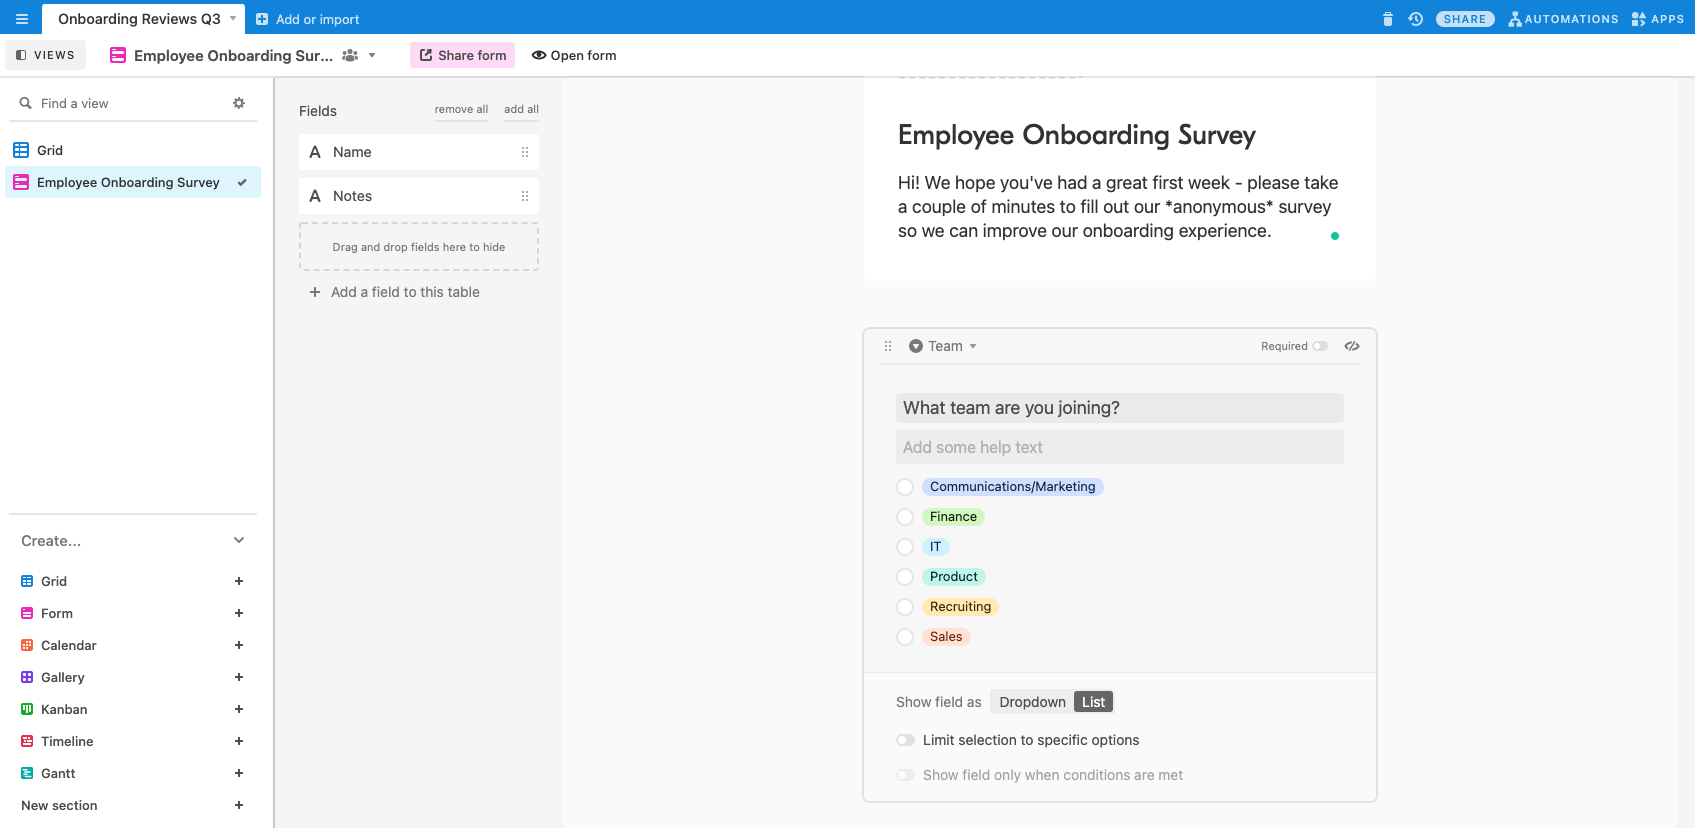
When you add a new field, a block will appear in your form, which allows you to select from our long list of field types, from single select to checkbox to number. Adding a block will also add a new field to the grid view. Let’s add a single select field type to this anonymous survey so you can ask respondents which team they’ve joined.
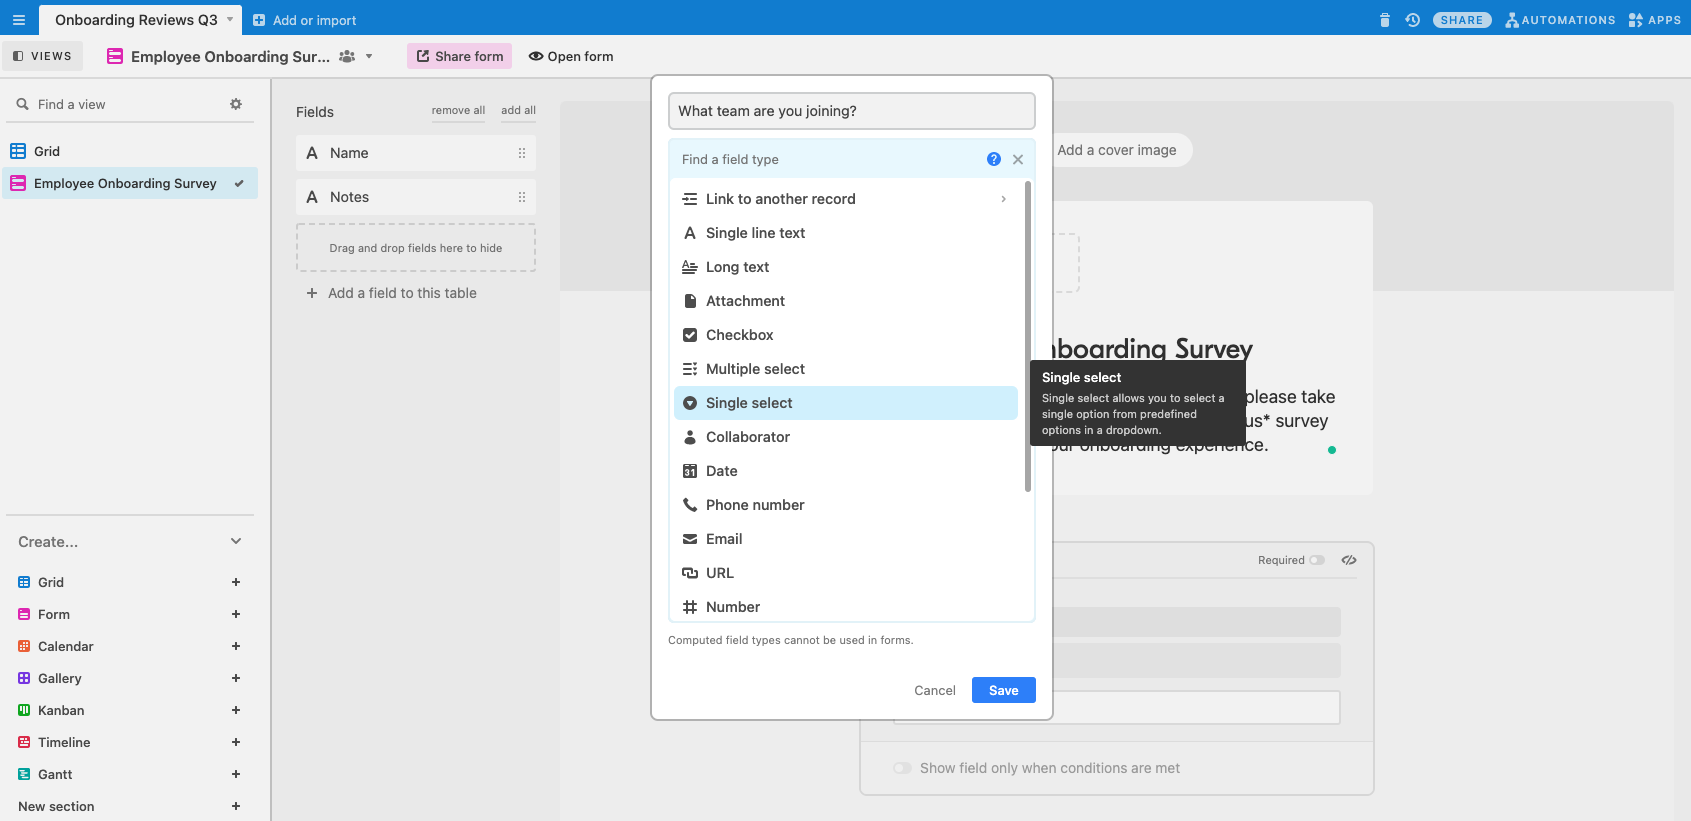
From there, you can customize your predefined options and add colors, then change the main text and add help text if you’d like to provide more instructions or clarification.
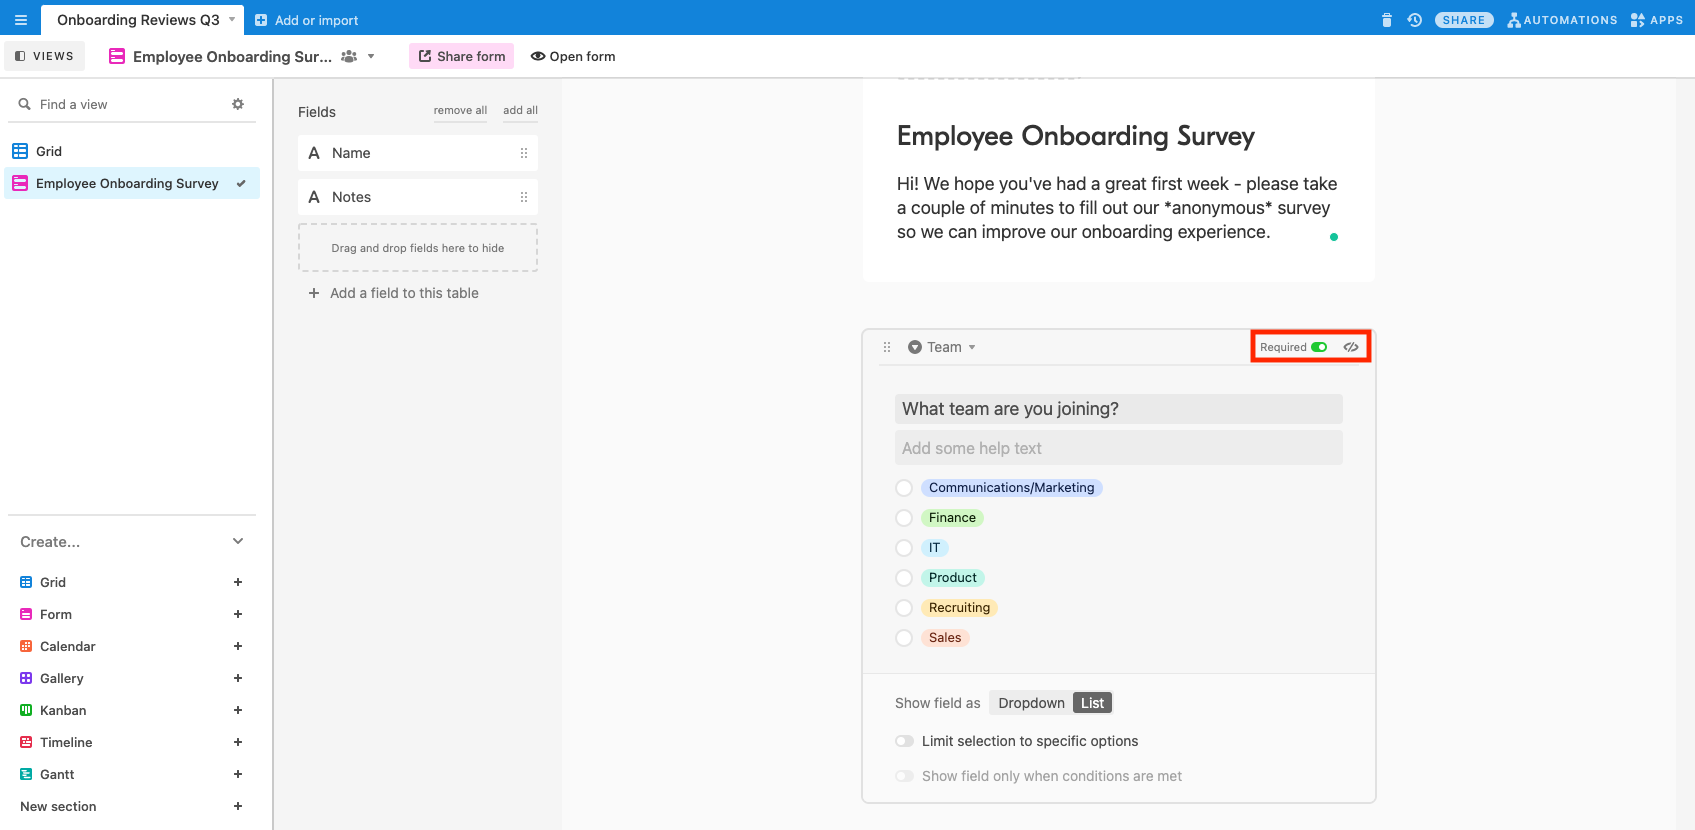
There’s one last important step before you move on to the rest of your form, and that’s to specify if your field requires a response. It’s a small distinction that can make a world of difference—you don’t want to put in all that hard work, only to open your base and find a bunch of blank fields where you’d hoped for responses.
Clicking the toggle in the upper right corner of your field block will mark the field as required, so respondents won’t be able to submit the form until they’ve filled it out. In this case, you need each of your respondents to identify their teams, so mark this as required.
Repeat this process for the rest of your form and add additional relevant fields. Asking respondents for specific feedback is important, but remember to avoid asking questions that might reveal someone’s identity.
How to use the conditional question option
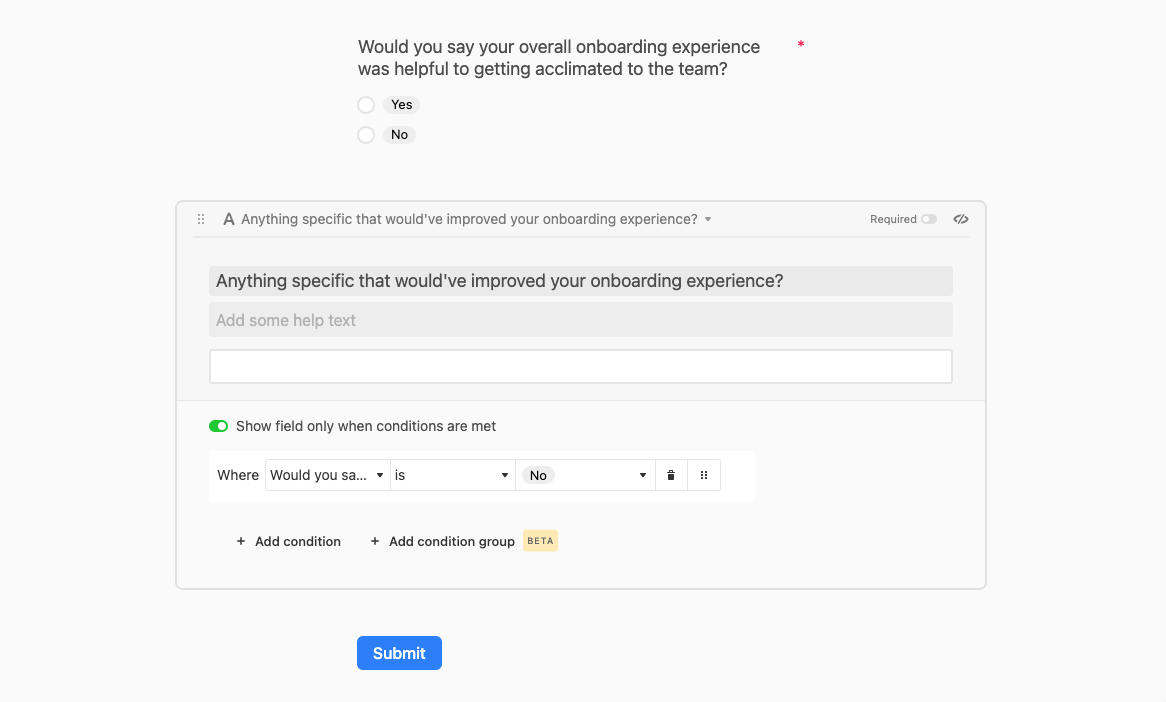
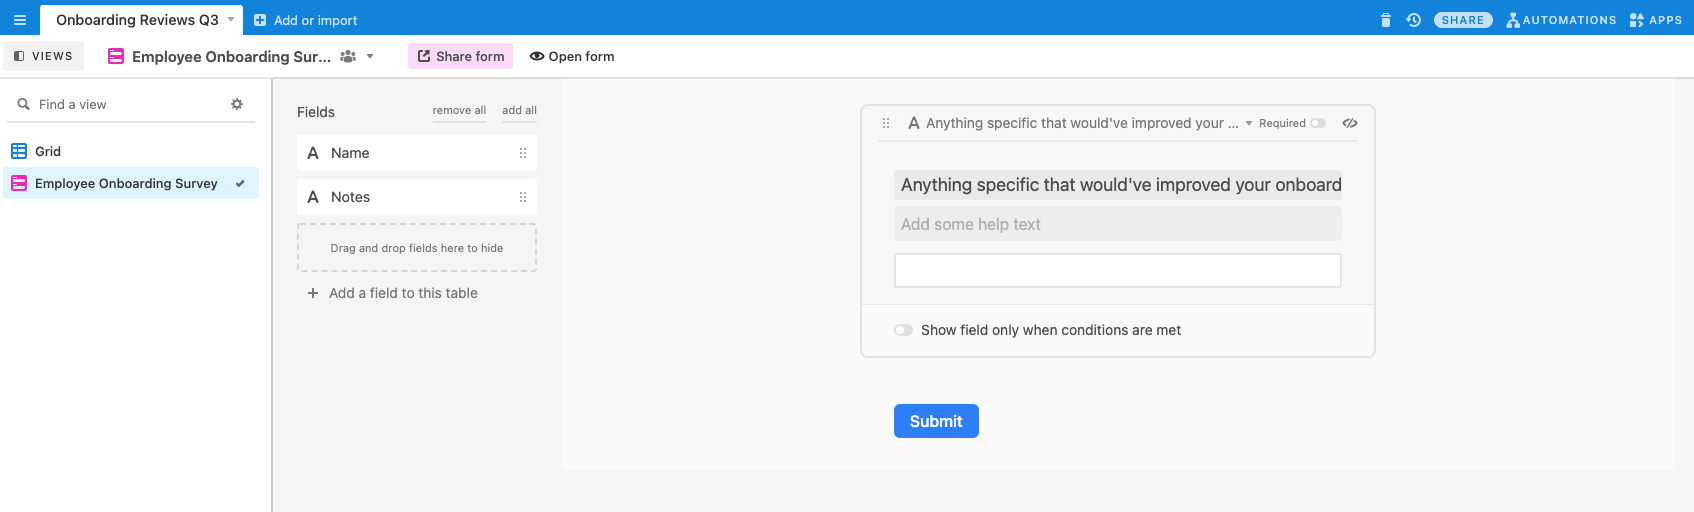
Another key form feature is the conditional question. The “show field only when conditions are met” toggle at the bottom of each field block can trigger whether a question is asked or not based on someone’s answer to another question.
So, if a respondent is asked “would you say your overall onboarding experience was helpful to getting acclimated to the team?” and they answer “no,” toggling a conditional question prompts them to write anything specific that would’ve improved their experience.
How to select field types in your anonymous survey
Choose the field type that makes the most sense for the information you wish to collect. For example, you can choose the single select field type if you wish to know which of the onboarding sessions was the most valuable. Or, select the single line text field type for respondents to write anything specific that would’ve improved their onboarding experience.
Some other field types you can add to an anonymous survey include:
- Date: Adding the date field type is helpful if you want to know which days respondents attended your conference, or some other event.
- Multiple select: This field type allows respondents to select multiple options at once. Want honest peer feedback? Your coworkers can highlight all of your strengths (and areas of improvement) from a list.
- Rating: How would respondents rate that keynote speech out of five stars? Find out with the customizable rating field type.
Visual tip: Single select, multiple select, and collaborator fields can display options as a dropdown or a list.
How to customize your form completion message
But wait, there’s more! Before you’re ready to share, customize what happens after the form is submitted. You may want to create a “thank you” message, outline next steps from your team, or give people the option to submit another response.

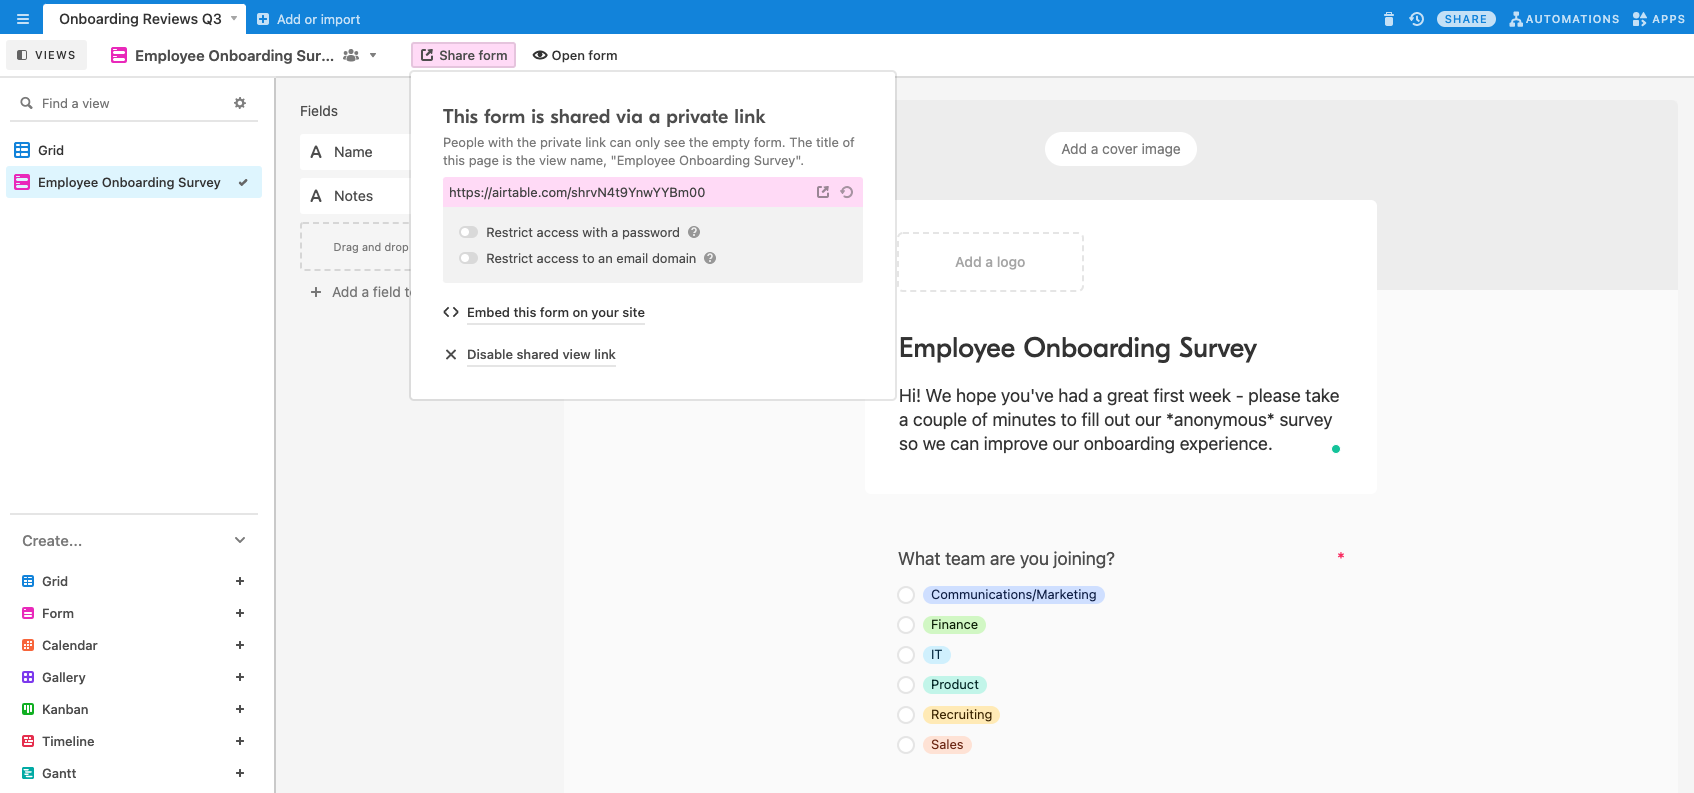
Once you’ve put the finishing touches on your form, you can preview before sharing by clicking the “open form” button. Then head to the “share form” button in the view bar, which will give you a link you can copy, paste, and send for anyone to access. Pro users can restrict access to forms by password or email domain.
Now for the big question: where does all of that important information go when a user submits a form?
How to access and interpret your anonymous survey responses
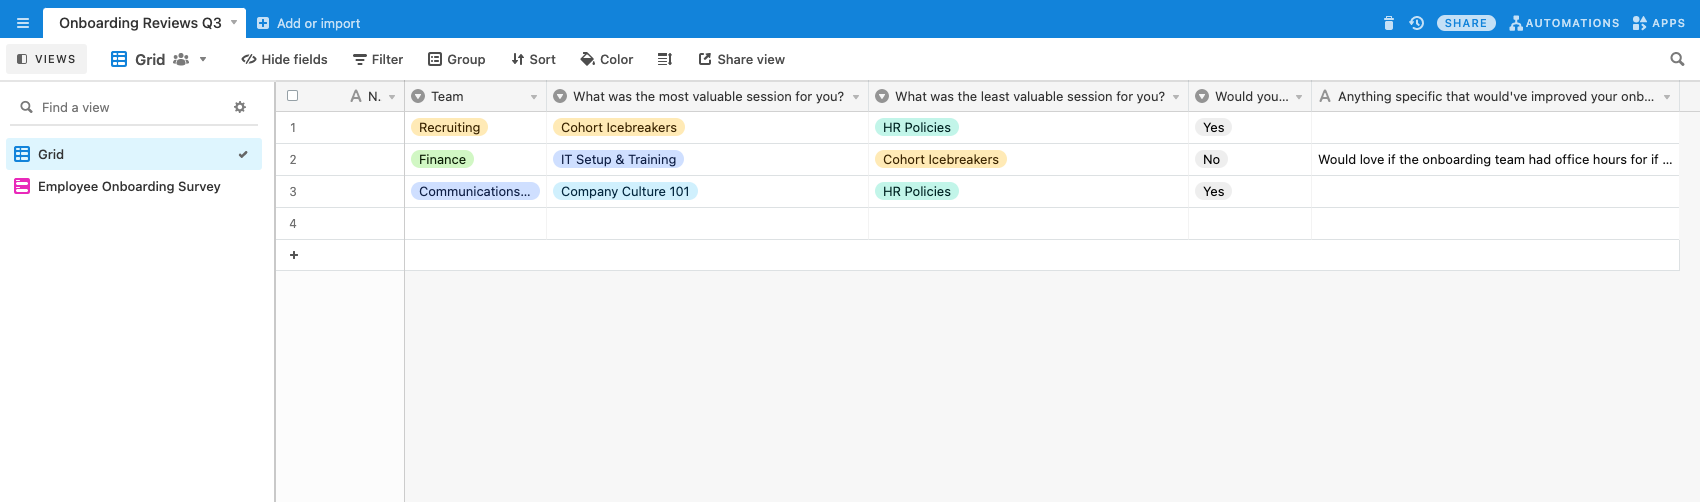
All information from completed and submitted forms will automatically appear as a new record in your grid view.
There are countless ways you can interpret your survey data from here, such as grouping by answer. Grouping by the team field, for example, can help you tailor onboarding sessions if you notice individuals on the communications team aren't getting enough support. Or, you can better visualize responses by adding a chart app.
Ta-da! You now have a customized, anonymous survey that can gather the information you need—sans sugarcoating—and deliver it to you in one organized place.
Watch our video for a quick recap on creating forms in Airtable, then start customizing. Note that only users on Pro and Enterprise plans can use form features like adding a cover image and logo, removing Airtable branding on the form, and customizing the form submission button—learn more about how you can upgrade today.