Weekly presentations are helpful for bringing teams up to speed on campaigns and projects, but creating individual slides can take up precious time.
Fortunately, there’s a way you can automate slides from the data already sitting in your base. One of the most useful tools that Airtable Pro users have access to is page designer, a handy app for automatically filling custom layouts from any record.
With page designer, you have the power to build product catalogs, create invoices, make a cookbook, or, in this case, generate slide decks for weekly marketing meetings—so that you don’t have to do it manually every time.
Watch our Tool Tips video above, or keep reading for step-by-step instructions on creating slide decks.
Prepare your base
First, make sure your base can play well with page designer and show the information you want. When building with page designer, it’s important to know that each page is connected to a single record in your base.
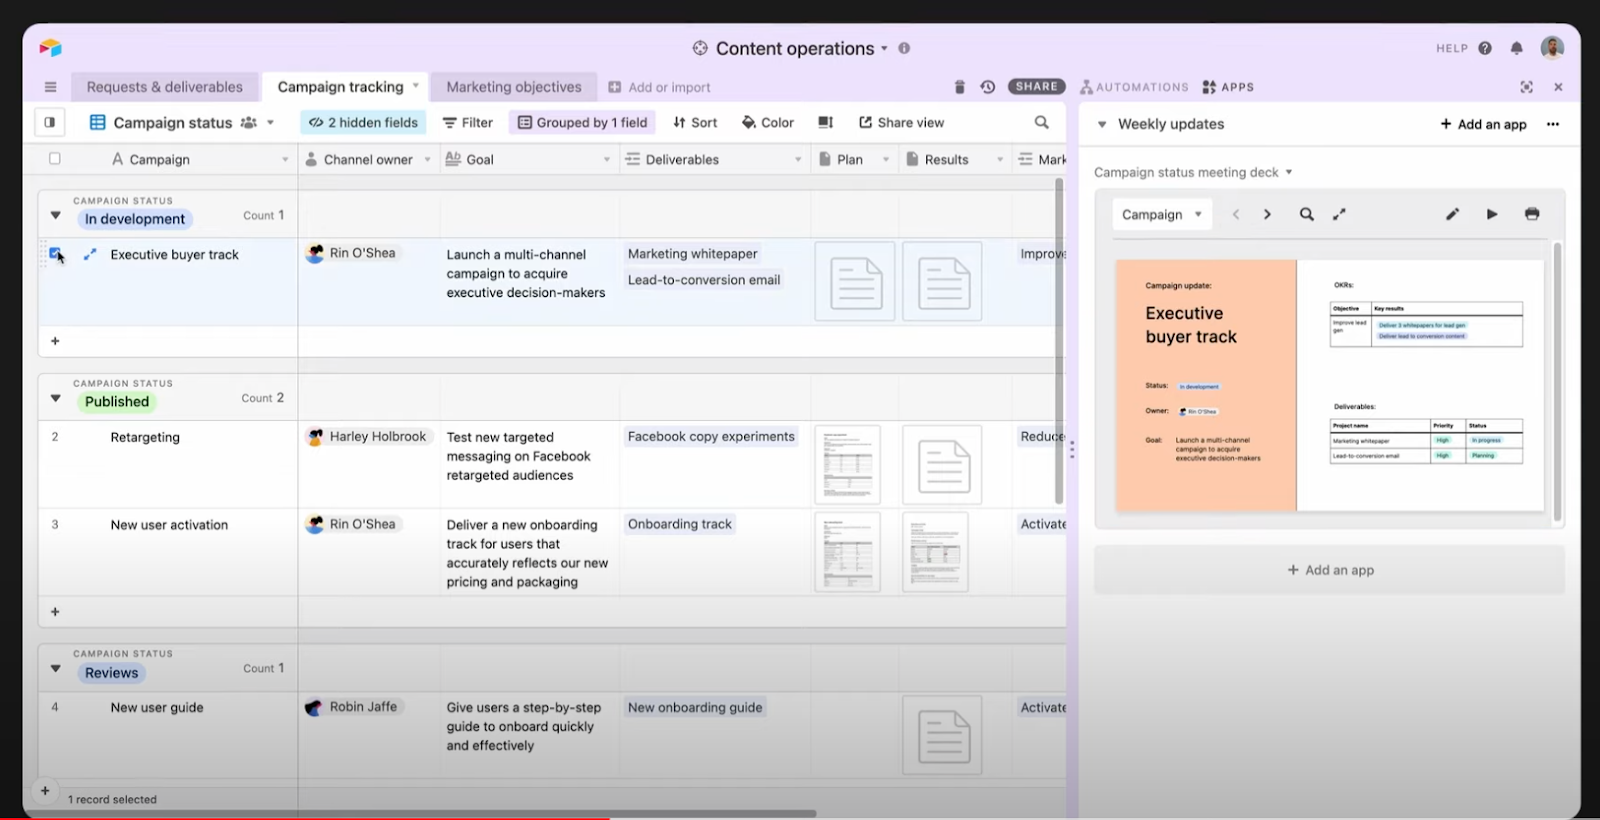
For example, each of our campaigns in the “campaign tracking” table is a record, meaning they’ll each get a page.
Set up your page with page designer
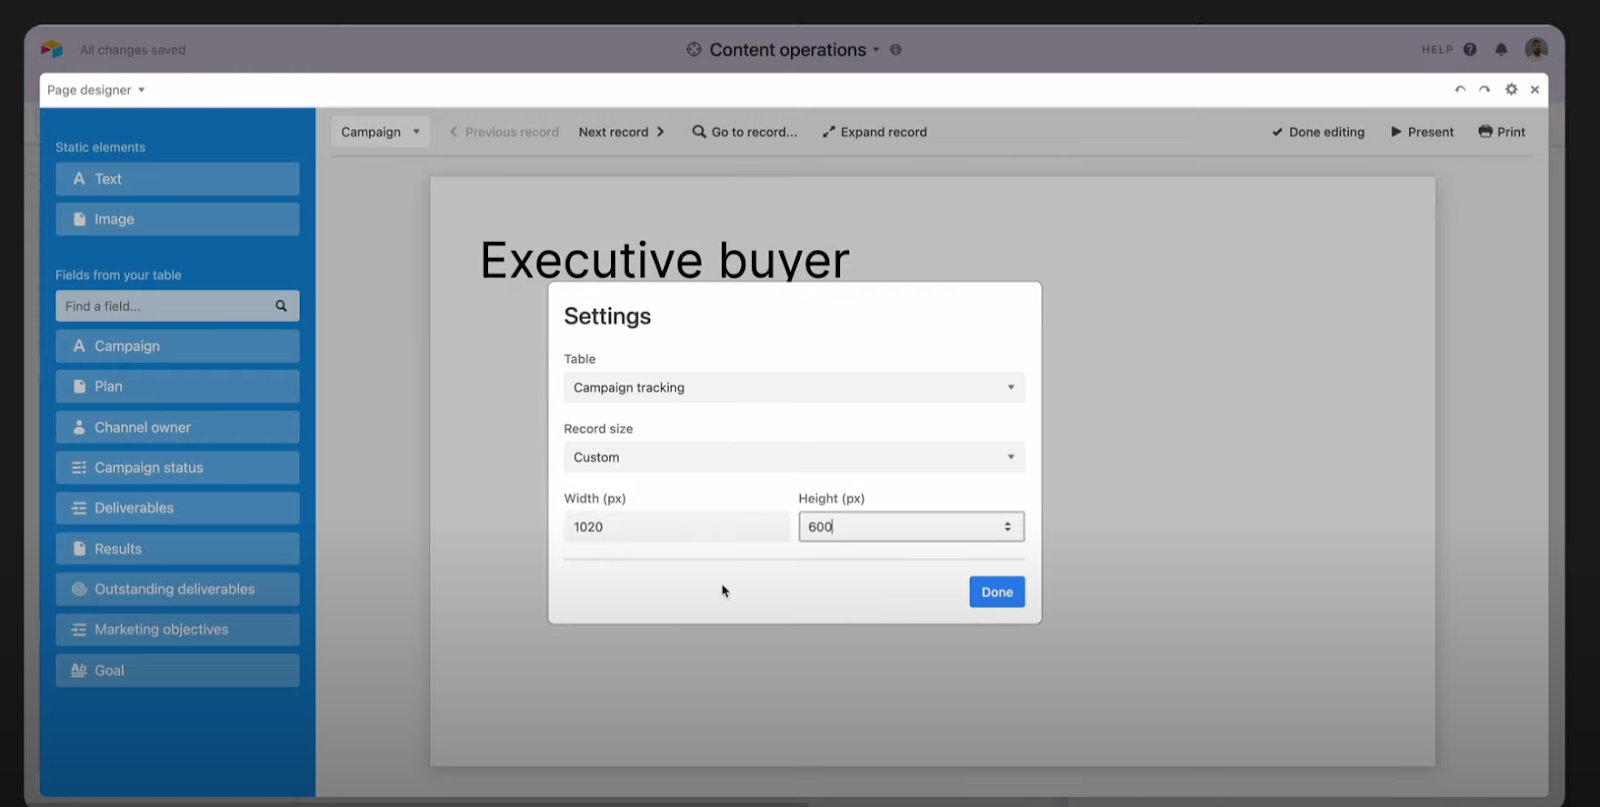
After you install the page designer app, you can start by customizing the size of each slide, page, or whatever it is you’re trying to make. Page designer defaults to US letter, but since we’re looking to create slide decks, we’re going to go with the more display-friendly 1020x600.
Next, drag and drop the fields you want to show in each slide, and Airtable will automatically display the entry from that record. For this example, we’ll add the campaign name, status, owner, and goal fields to the deck, and rearrange them into a layout we like.
For a marketing meeting, you might consider pulling fields like “campaign status” to update your team, “channel owner” so everyone is familiar with the campaign driver, and “marketing objectives” to keep everyone’s eyes on the prize.
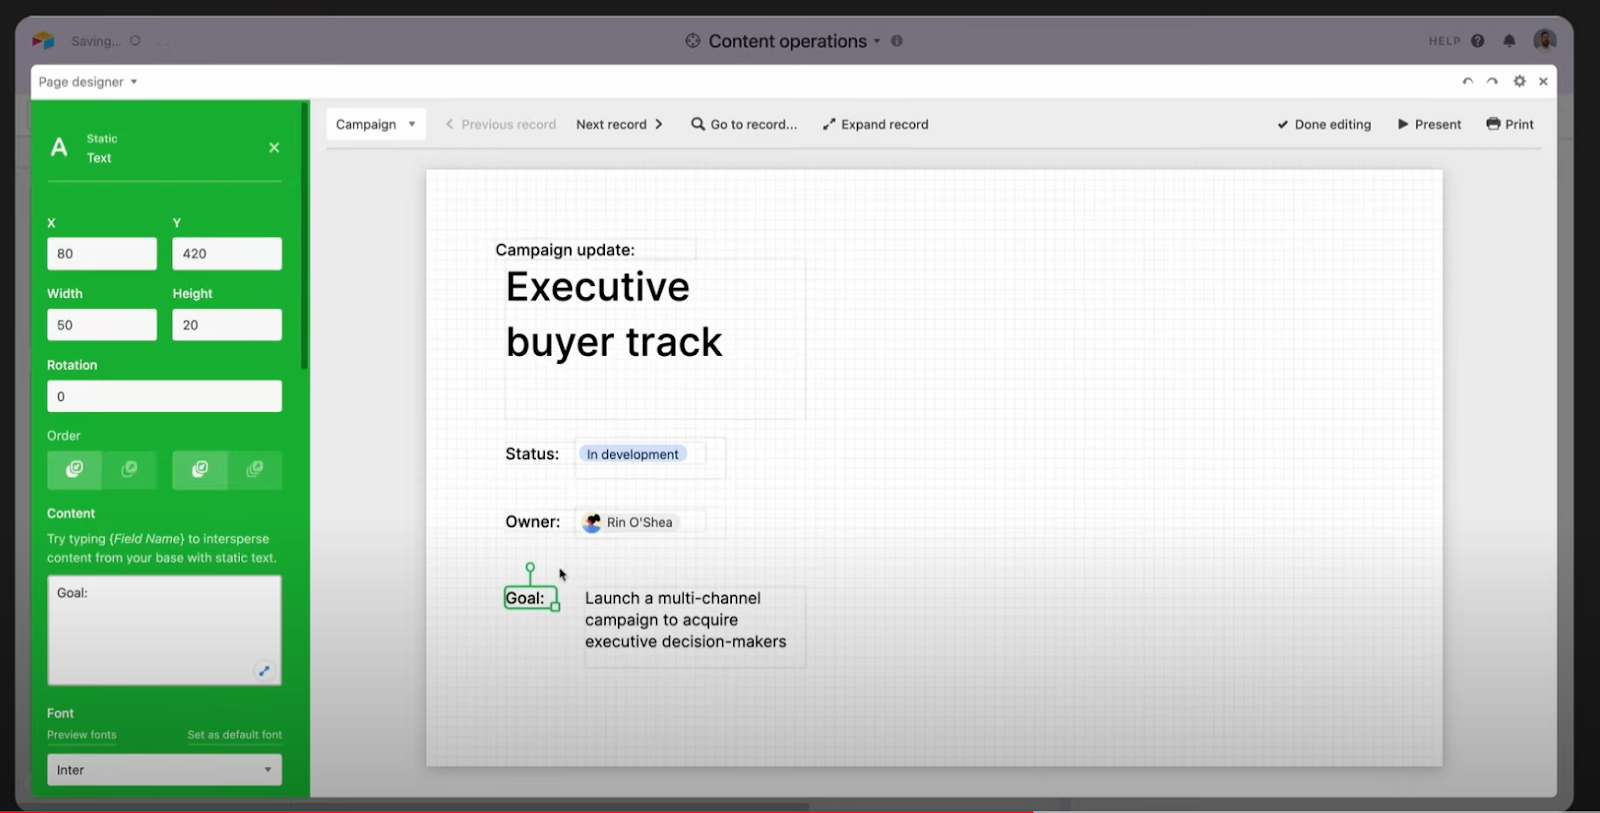
One quick note: Since page designer doesn’t label fields automatically, you’ll have to add those labels back in with text elements. Don’t forget to make them bold so they stand out nicely.
When you add a linked record to the page, it’ll look a bit different from other elements.
Linking records within Airtable allows one table and its records to pull information from another table and its records. For example, you could have one table listing the events at a conference, and another containing the information of all the attendees; by linking the records together, you can keep track of which attendees are going to which event.
In our case, we’re going to grab a linked record of our “marketing objectives” table, and then display the objectives and key results from that linked record as columns in a customizable table.
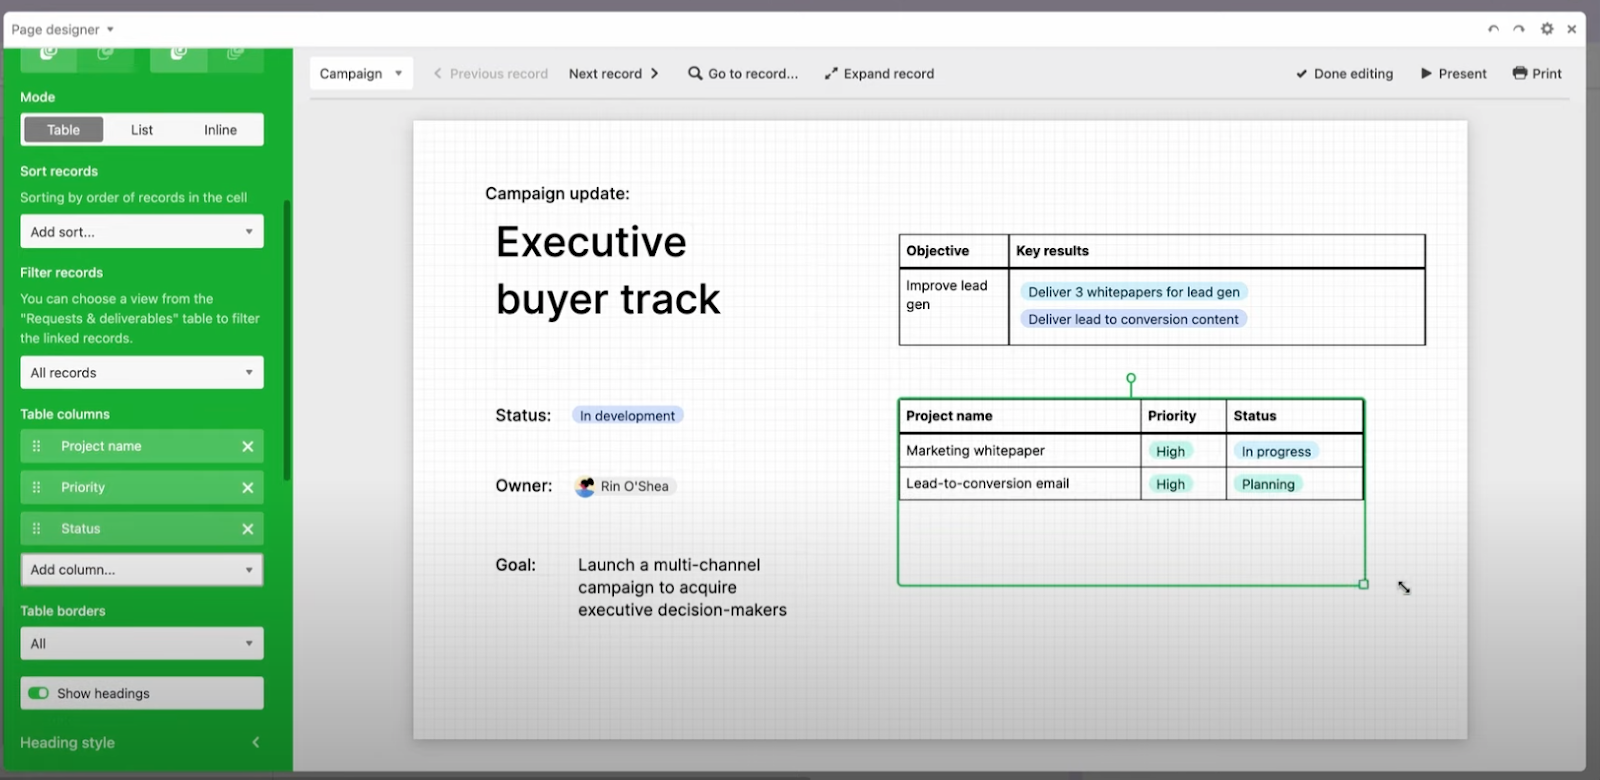
We’ll also add a linked record to the “objectives” table, and pull in the project name, priority, and status. Once you have all of this in place and present each slide, all of the details will be automatically pulled together for each individual record, making a custom campaign slide that’s always up to date.
Make your layout pop
An easy way to make your page designer layout look more striking is to add some color. Just add in a new image element and fill it with any color you like. Resize it, drop it where you want, and move it to the background by clicking “send backward” so it doesn’t obscure everything.
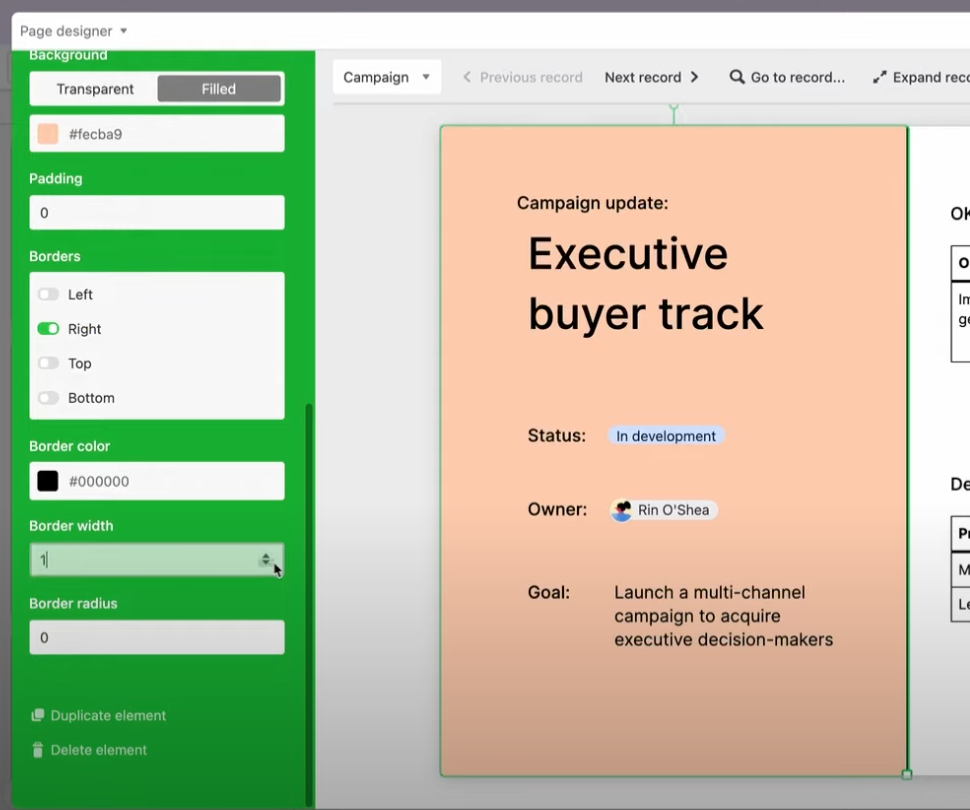
Adding a simple border also helps visually delineate the OKRs and deliverable sections even further.
The power of page designer lies in its ability to take the dense data of a table and present it in a way that’s visually appealing. You can create a catalog from a list inventory, take a staff database and print out business cards, or—as we’ve shown—make documents ready to share at a regular check-in meeting, just by clicking the “present” button.
By automating these processes you’ll save yourself time—without having to compromise on quality.