At Airtable, we make it possible for anyone—not just developers—to create the tools they need in order to do the work that matters to them. You don't need to know any code to build a CMS that works exactly how your team wants.
For those who do want to add some custom code to their bases, the Airtable API gives you plenty of options for creating exciting tools. In this technical post, we'll show you how to use GatsbyJS and Airtable to build a custom CMS for your blog.
Introduction to static site generators
Modern JavaScript frameworks like Node.js and React.js let you build just about any kind of web site or app you can imagine, but getting started can often take a lot of boilerplate and backend configuration. If you want to leverage these frameworks for site design without the backend hassle, you can use static site generators like GatsbyJS, which compile your data and scripts together into a single package of assets that can be easily served from any web host, without a supporting database or server app.
The "static" in static site generator does, however, mean you have to rebuild the site when content changes. This makes status tracking your content extra important, so most static site generators talk to some sort of content management system (CMS) to retrieve content at build time.
In this guide, we'll show you how you can make a GatsbyJS blog with an Airtable CMS backend, using the gatsby-source-airtable plugin developed by Kev Zettler to access the Airtable API. In the process, we'll learn more about GraphQL, a structured query language at the heart of GatsbyJS.
Getting started with the GatsbyJS static site generator
GatsbyJS builds progressive web apps—sites that have the smooth experience of a "native" app—using Node.js, React.js, React-Router, Webpack, and a variety of plugins. The build process also makes it easy to add in other libraries like Styled-Components, Emotion.js, Bootstrap, Grommet, and Typography.js.
To generate pages, GatsbyJS applies layout templates to content that is retrieved via GraphQL queries. The standard content source for queries is markdown saved in local files, but there are many official and community-developed content plugins. There are also many starters—collections of pre-made page templates with already configured extensions and content plugins. Today, we're going to modify a starter called gatsby-hampton-theme to use Airtable in place of the markdown file source plugin. To show the power of Airtable attachment fields, we'll also extend the template with post header images.
To install GatsbyJS, you'll first need to make sure that you have a working install of Node.js, as well as the yarn package manager, which has platform-specific installation information here. The GatsbyJS project also has great general tutorials and documentation if you want to explore more.
Installing yarn will install Node.js as well, and once that's done you can install GatsbyJS by executing the following command:
yarn global add gatsby-cli
Next, create a new GatsbyJS project with the hampton starter:
gatsby new airtable-blog https://github.com/davad/gatsby-hampton-theme
Once the template and necessary dependencies are fetched, it's time to build the template site with:
cd airtable-blog
gatsby develop
This will compile the content and templates, and then spawn a web server with the site, reachable at http://localhost:8000/. The hampton starter presents a minimal front page with a blog and other pages accessible via the sidebar menu.
To use Airtable post data we will need to modify the GraphQL queries feeding the blog page. The GraphQL project has in-depth docs and tutorials you can read, but GatsbyJS makes it super easy to explore hands on. With your GatsbyJS development site running, head to http://localhost:8000/___graphql for a live query interface for all site data. To see this in action, enter the following query into the left pane and run it by pressing Ctrl+Enter:
{allMarkdownRemark(sort: { order: DESC, fields: [frontmatter___date] }) {
    edges {
      node {
        excerpt(pruneLength: 250)
        id
        frontmatter {
          title
          date(formatString: "MMMM DD, YYYY")
        }
        fields {
          slug
        }
      }
    }
  }
}
This GraphQL query feeds the blog/index.js file which produces the list of blog posts. GraphQL queries process linked data objects in a hierarchical map and key:value system that may be familiar if you've worked with JSON or other other API structures before. The allMarkdownRemark object in this query is connected via edges to all the nodes of data processed from markdown files, with the query returning fields of information about each connected node.
To make it easy to replace the markdown files as a data source in queries, in the next section we'll set up an Airtable base with field names similar to the ones already used in the hampton starter.
Building an Airtable CMS
Create a new base for your Airtable CMS with a descriptive name like airtable-blog, and give the table a name like CMS, with the fields (columns) set up with the following names and data types.
-
title — single line text field — The title of the piece is a good identifier for the primary field of the table.
-
slug — single line text field — The unique component of each post's url.
-
author — single line text field — The publicly displayed author string.
-
image — attachment field — The image to use as a feature header.
-
PostMarkdown — long text field — The written content of the post, formatted in markdown.
-
date — date field — The publicly displayed published date.
-
publishing status — single select field — Controls what posts get published.
To help you get started, we've put together a sample base here:
Make sure your base has a couple of records (rows with placeholder information for sample posts, and set at least one record to the status of "publish." The last step is making a new grid view in your base with a name like published, with a filter added to only show records set to "publish."
Once the base is set up, it's time to use one of Airtable's handiest features: the API reference, which you can find by going to the help menu in the top right of your base and choosing API documentation:
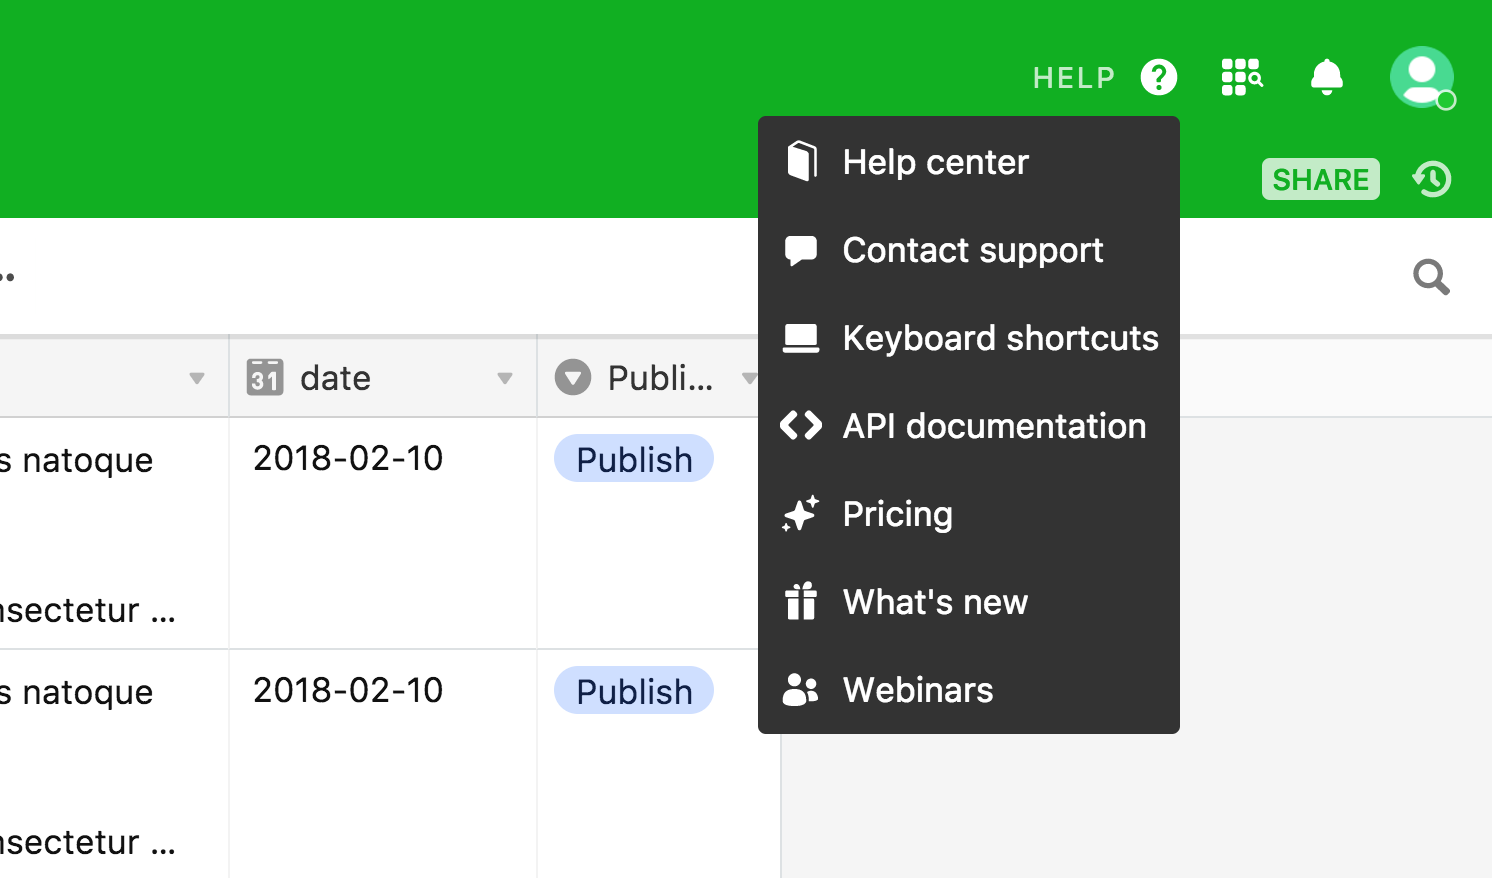
The API documentation is automatically customized to your base structure! It's got everything you need, including the API key necessary for connecting from GatsbyJS. To get your key, click the "show API key" checkbox and then choose the "Node.js" tab. In the "Authentication" section you'll see two crucial lines:
apiKey: 'YOUR_API_KEY'
and:
var base = Airtable.base('YOUR_BASE_ID');
We'll use these two values to configure the gatsby-source-airtable plugin, which you can install along with a markdown processing plugin using the following command in your project folder:
yarn add gatsby-source-airtable unified remark-html
When that completes, open up gatsby-config.js and add this stanza (with your own information) at the beginning of the plugin list on line 10:
{
  resolve: 'gatsby-source-airtable',
  options: {
    apiKey: 'YOUR_API_KEY',
    baseId: 'YOUR_BASE_ID',
    tableName: 'CMS',
    tableView: 'published',
    queryName: ''
  }
},
Copy and paste the apiKey and BaseId from above, and if you've been following along with the demo base, your tableName is 'CMS' and your tableView is 'published'.
Modifying gatsby-hampton-theme to query Airtable data
To use the Airtable CMS data, we first need to modify gatsby-node.js, which turns API records into post nodes based on the slug field. At line 39, replace the allMarkdownRemark GraphQL query:
`
  {
    allMarkdownRemark {
      edges {
        node {
        fields {
            slug
          }
        }
      }
    }
  }
`
with a new allAirtable object query:
`
  {
   allAirtable {
    edges {
       node {
         slug
       }
      }
   }
  }
`
The data object and variables also need to be updated in the page creation function at line 53:
result.data.allMarkdownRemark.edges.forEach(edge => {
  createPage({
    path: `${edge.node.fields.slug}`,
   component: slash(blogPostTemplate),
    context: {
      slug: edge.node.fields.slug
    }
  });
});
GraphQL feeds data fields into JavaScript object properties, accessible via dot notation like so: edge.node.fields.slug. This means we need to replace the above code at line 53 with the following lines which use the new allAirtable object and remove the .fields. level which is unnecessary in our base's hierarchy:
result.data.allAirtable.edges.forEach(edge => {
  createPage({
    path: `${edge.node.slug}`,
    component: slash(blogPostTemplate),
    context: {
      slug: edge.node.slug
    }
  });
});
Save this file when you're done, but go onto the next step before reloading your site.
Using Airtable fields in the blog post template
To use Airtable fields in the posts themselves, we need to modify src/templates/blog-post-template.js. For clarity's sake we'll go in the same order as above, starting with replacing the GraphQL query at line 38:
markdownRemark(fields: { slug: { eq: $slug } }) {
  html
  timeToRead
  frontmatter {
    date(formatString: "MMMM DD, YYYY")
    title
    author {
      id
    }
}
Our new query searches airtable data node by slug and returns all necessary post information:
airtable(slug: { eq: $slug }) {
  slug
  title
  author
  PostMarkdown
  image {
    url
  }
  date
}
The markdownRemark data object at line 18:
const { markdownRemark: post } = data;
also needs to get switched to airtable like so:
const { airtable: post } = data;
The markdownRemark object had a html field that was auto-generated from the markdown files. Because gatsby-source-airtable is agnostic about the format of the text being pulled from Airtable fields, we'll need to separately process markdown to html in our layout.
We can do this using the unified processor, starting by inserting the following on line 2:
import unified from 'unified';
import markdown from 'remark-parse';
import html from 'remark-html';
The actual layout of the page begins at line 17 with a series of React.js components, with lines 30-33 referencing {post.X} data properties, which we need to update similarly to the gatsby-node.js changes.
<h1>{post.frontmatter.title}</h1>
<Timestamp>{post.frontmatter.date}</Timestamp>
<h5>Written by {post.frontmatter.author.id}</h5>
<div dangerouslySetInnerHTML={{ __html: post.html }} />
To place our header image, we'll also need to add an <img /> tag with the image URL, accessible with a post.image[0].url reference, since Airtable returns an array of information for both the source and various preview sizes, with the source in position .[0]. To generate the blob of html for injection in the <div ... /> section, unified will need to be invoked to synchronously process the post.PostMarkdown from Airtable.
Putting it all together looks like:
<h1>{post.title}</h1>
<Timestamp>{post.date}</Timestamp>
<h5>Written by {post.author}</h5>
<img
  src={post.image[0].url}
  style={{
    display: 'block',
    marginBottom: '1rem',
    marginTop: '1rem',
    width: '100%',
    height: 'auto'
  }}
  alt=""
/>
<div
  dangerouslySetInnerHTML={{
    __html: unified()
      .use(markdown)
      .use(html)
      .processSync(post.PostMarkdown)
  }}
/>
If you save the modifications, GatsbyJS in development mode will hot reload and you should now be able to access your Airtable posts directly using http://localhost:8000/slug in your browser:
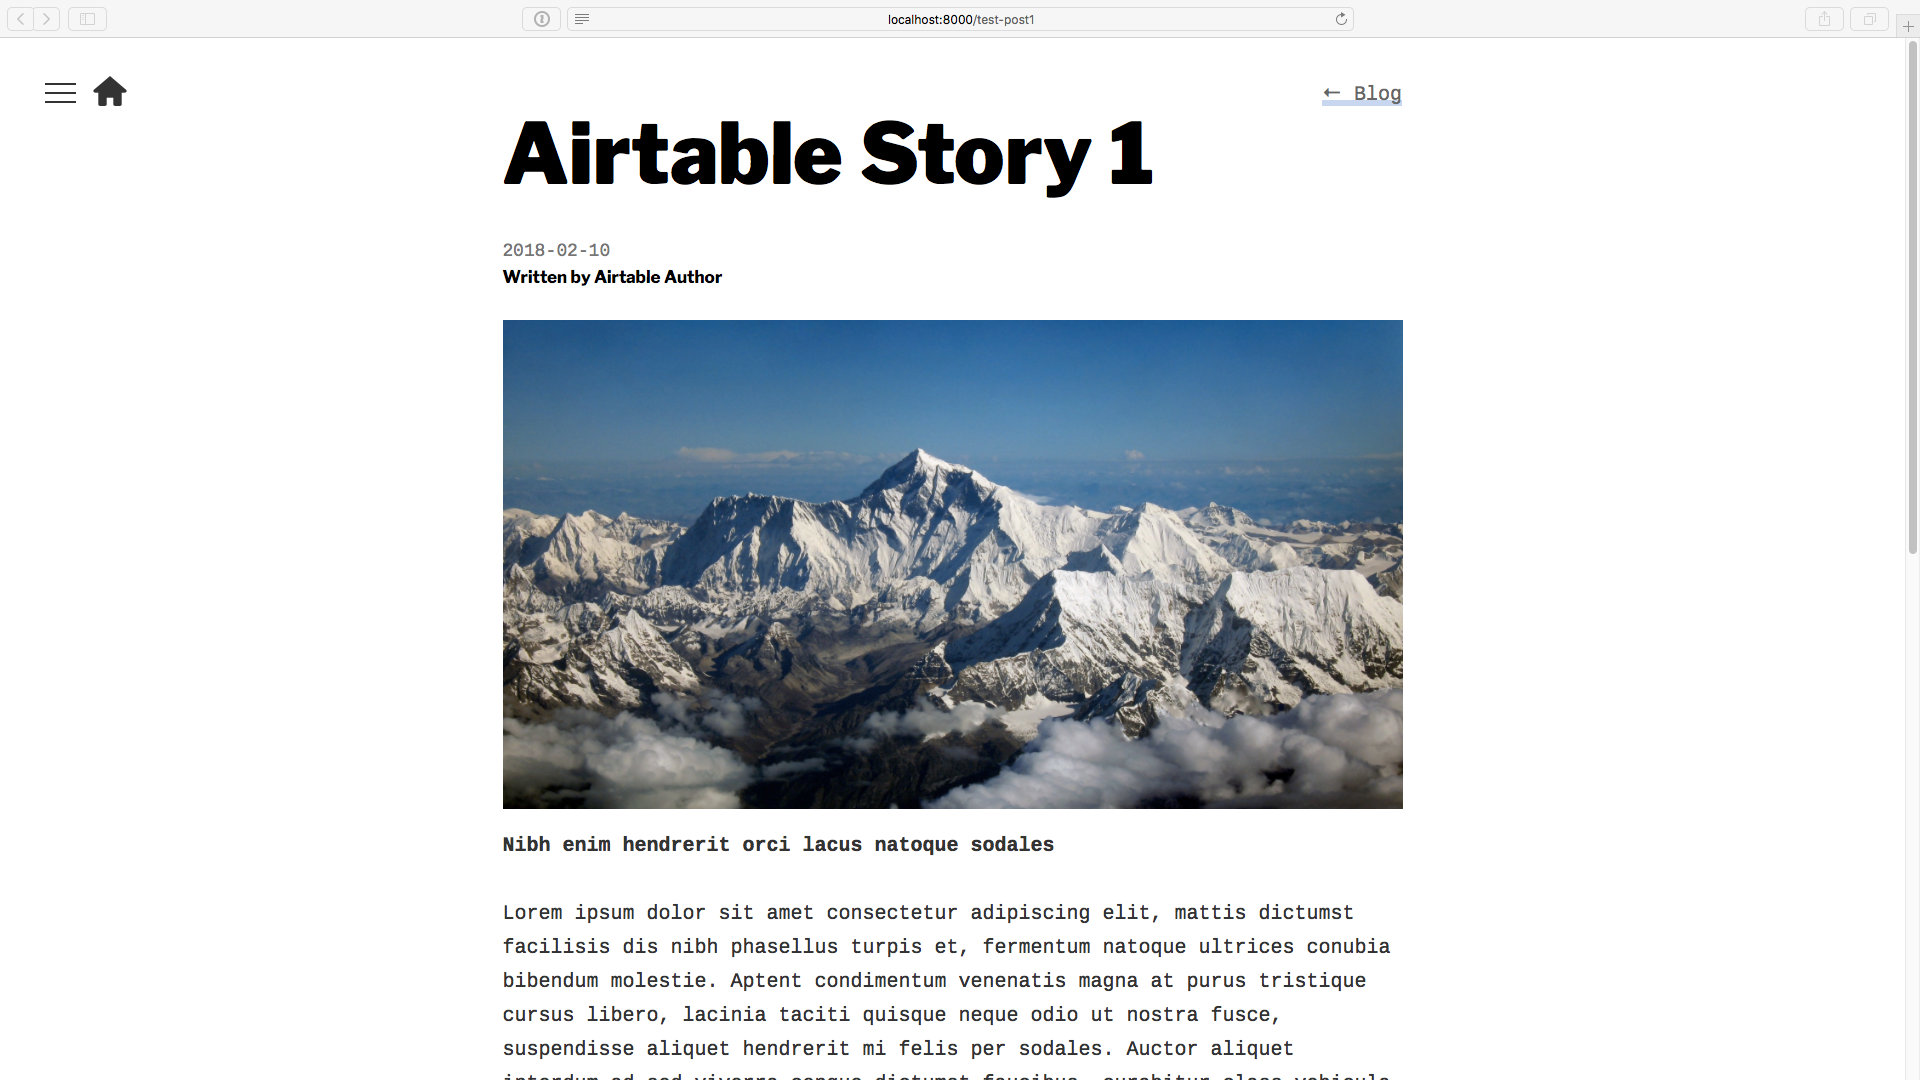
We're published!
Updating the blog feed page
The last set of modifications is to the the blog feed template at src/pages/blog/index.js.
Start by adding in the unified imports at line 2:
import unified from 'unified';
import markdown from 'remark-parse';
import html from 'remark-html';
and then once again replace the data object, though this time it is data.allMarkdownRemark at line 16 becoming data.allAirtable since we are working with all Airtable nodes, not individual posts.
The GraphQL query for the page at line 47 needs to be changed, and our Airtable replacement is similar to the earlier post query, except now instead of selecting one node by slug, we request every node attached to allAirtable, sorted by date:
allAirtable(sort: { fields: [date], order: DESC }) {
  edges {
    node {
      slug
      title
      PostMarkdown
      image {
        url
      }
      date
    }
  }
}
In addition, we'll need to update line 15 to use this new query:
const { edges: posts } = data.allAirtable;
The field names used in the data references also need to get updated. The layout and data for each post box is handled on lines 25-39:
<Box>
  {posts
    .filter(post => post.node.frontmatter.title.length > 0)
    .map(({ node: post }, index) => {
      return (
        <Box key={post.id}>
          <Link to={post.fields.slug} className={linkStyles}>
            <Timestamp>{post.frontmatter.date}</Timestamp>
            <h3>{post.frontmatter.title}</h3>
            <p>{post.excerpt}</p>
          </Link>
        </Box>
      );
    })}
</Box>
In addition to changing field names, we can also get a bit fancier with our markdown processing function call. To automatically generate an excerpt, we can use a simple regex /\s+/ to match whitespace and pair it to .split() and .slice() to give the first 35 words of markdown for conversion to html and placement in a <div />. The header images can also get used for preview here, given a standard crop using <div /> tag background styling.
Here's what that looks like:
<Box>
  {posts
    .filter(post => post.node.title.length > 0)
    .map(({ node: post }, index) => {
      return (
        <Box key={post.id}>
          <Link to={post.slug} className={linkStyles}>
            <Timestamp>{post.date}</Timestamp>
            <h3>{post.title}</h3>
            <div
            style={{
              backgroundImage: 'url(' + post.image[0].url + ')',
              backgroundSize: '100%',
              backgroundPosition: 'center',
              width:'100%',
              height:'15rem'
              }}>
            </div>
            <p
            style={{
              marginTop: '1rem',
              marginBottom: '2rem',
            }}>
              <div
              dangerouslySetInnerHTML={{
              __html: String(unified()
              .use(markdown)
              .use(html)
              .processSync(post.PostMarkdown.split(/\s+/).slice(0,35).join(" ")))
              }} />
            </p>
        </Link>
      </Box>
    );
  })}
</Box>
That's it for modifications! Time to check out our new Airtable CMS GatsbyJS blog.
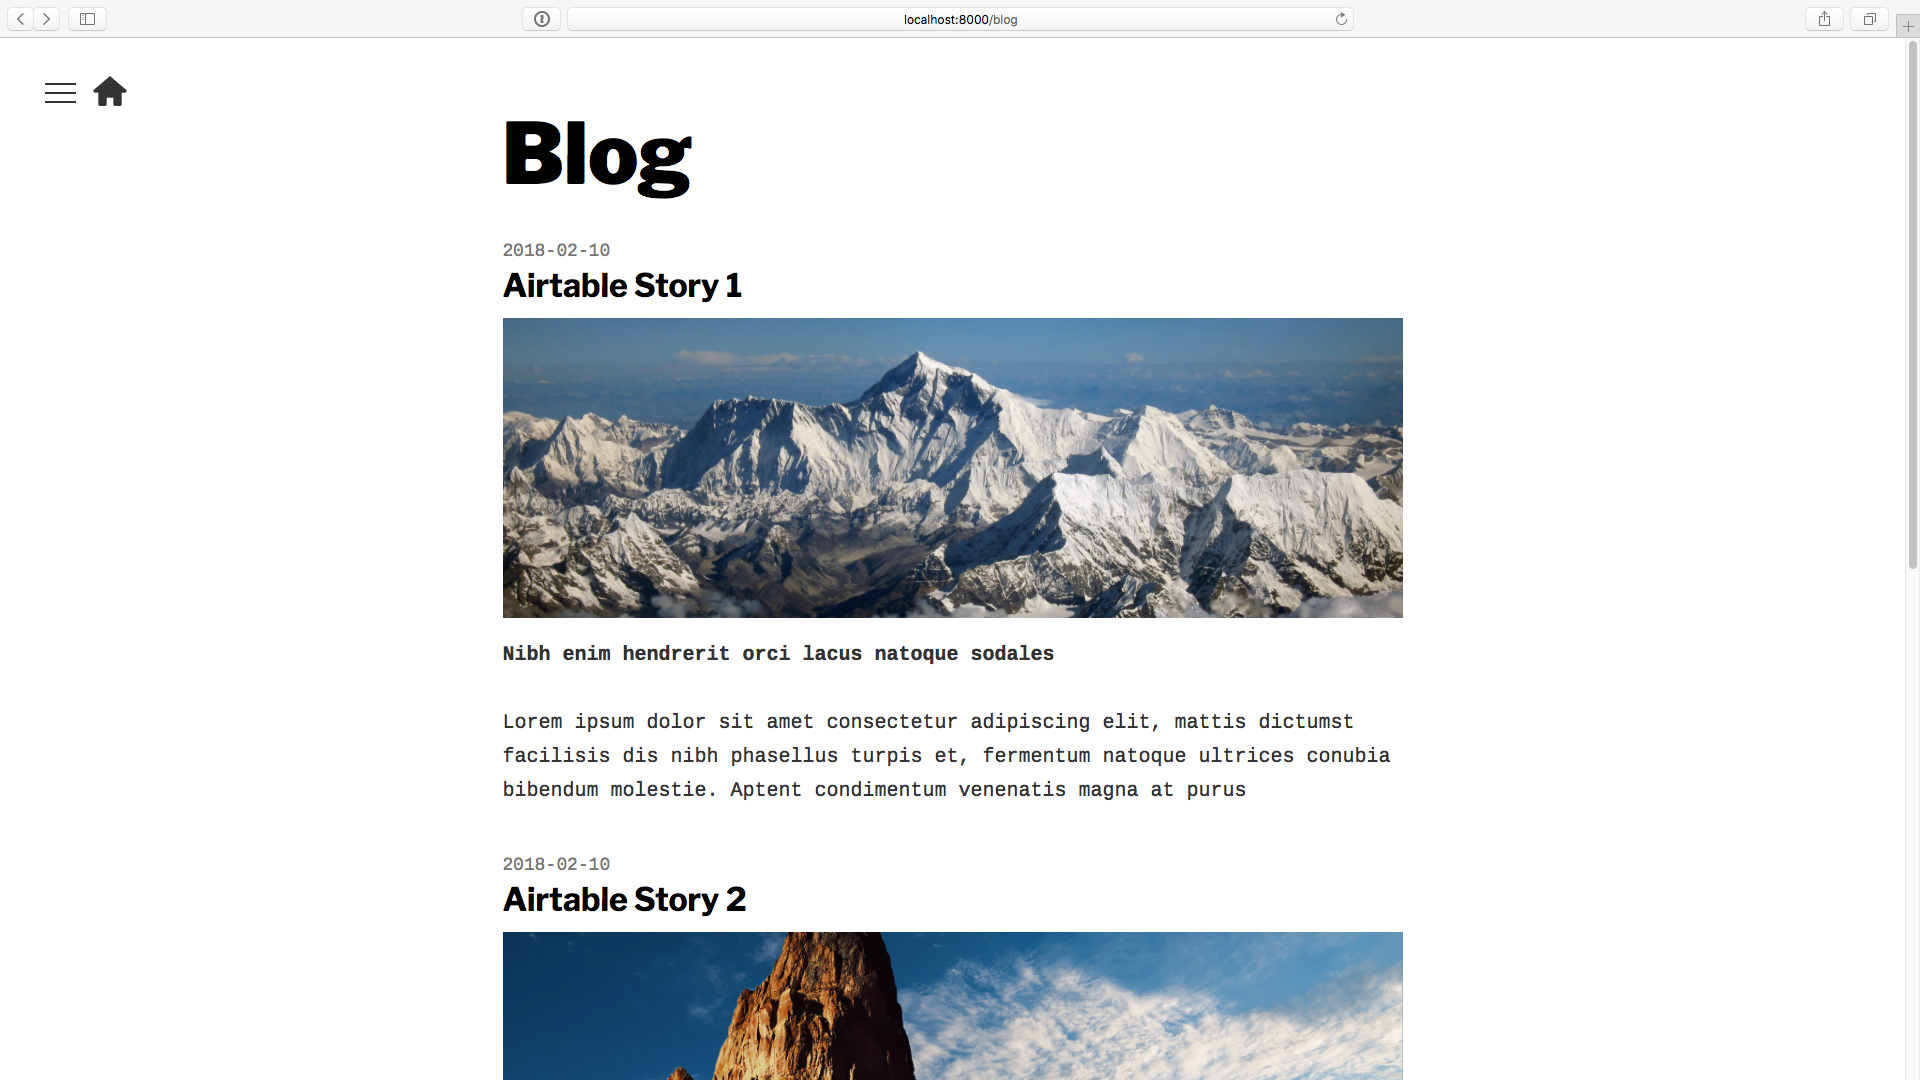
Your new GatsbyJS + Airtable CMS site
Save all your files again and start or restart a gatsby develop command in the project directory. If everything works, you should be be able to browse the feed of your stories from Airtable at localhost:8000/blog and see individual pages at localhost:8000/slug.
If you have any issues, first check gatsby's error logging in the terminal. If everything is compiling okay, try opening the GraphiQL explorer at localhost:8000/___graphql and then enter the GraphQL query from src/pages/blog/index.js above to troubleshoot the data fields coming in from Airtable.
If it's all working, then congratulations on your new blog! If you want to start customizing, take a look at the GatsbyJS docs and the React.js docs for ideas on where to head next.
Extra credit: a story submission form
With Airtable, you can easily make a frontend form out of any table. To check it out, bring up the views menu by clicking the dropdown arrow next to the current view name, and choose Form from the Add a view: strip along the bottom. This will open a new form builder with all of your fields auto-populated.
Grab the share URL from the sharing menu and you now have a super straightforward way to insert a new post in your Airtable CMS. You can use this for simplicity yourself, or distribute it to other authors in your fledgling blog empire.

Interested in seeing the final version of this CMS? You can get the repo from GitHub.