If you could magically see into your peers’ computers, you’d find some tidy desktops and plenty of chaos. 20 tabs open? 50,000 unread emails? There is no wrong way to work, as long as the work gets done.
The same is true in Airtable. Everyone has a unique approach to tackling projects and may want to see data or deadlines differently. Herein lies the beauty of the Airtable view.
With the click of a button, Airtable Views let you look at the same data in different ways. In a complex table with many layers of information, views give you ways to filter that information, whether that’s in a calendar format, or the more visual gallery or Kanban views. In a long-running project with many moving parts, Airtable can be the one source of truth for everyone involved but give each person their own unique view of the data.
Whether you're an Airtable novice or a seasoned expert, there’s always room to learn more. Here are seven tips to help you get the most out of your views.
New to Airtable? Check out our primer:
> Airtable Views - Everything you need to know
1. Keep your sidebar organized
If you’re collaborating with a team in Airtable, chances are your sidebar is full of views. And that’s a great sign. It means each person has found ways to customize the look of their data to be more intuitive. But when the list gets very long, it’s time to start organizing.
You can organize your views in sections—just like folders on your computer. Views that are relevant to different team members can be grouped into sections to make sure everyone can easily find what they need.
How to manage views in Airtable
2. Choose your favorites
Eventually, you’ll find a few views that you rely on time and time again. When one crops up, make it a Favorite.
This section is pinned to the top of the view sidebar and is unique to each individual base collaborator. This means you can pick which views are most important to you without affecting other collaborators. (Note: If you don’t currently have any favorited views, the “My favorites” section will not be visible. Favorite a view and it’ll appear.)
There are two ways to favorite a view. Right-click on the view you’d like to favorite and then choose “Add to My Favorites,” or hover over the view’s name in the view sidebar and click on the star.
You can rearrange views within the “My Favorites” section by dragging and dropping. You can remove favorited views by right-clicking and selecting “Remove from My Favorites” or unclicking the little star. “My Favorites” is only available to all Pro and Enterprise users.
3. Switch between views
Sure, you can switch to another view by clicking on the “views” button, then selecting a view with your mouse. But if you prefer a keyboard shortcut, you can switch between views with Cmd/Ctrl+Shift+K. Type a few letters of the view name, then press enter.
Learn more about navigating Airtable
4. Search views
If your base has many views, try the view search bar. When you click the dropdown arrow for the view switcher, you can enter a search term to find the view you are looking for.
Tip: You can also change the width of the sidebar by dragging the resize handle on the right border of the sidebar.
How to customize a view in Airtable
5. Duplicate views
Sometimes a view is nearly perfect, but not quite there. Instead of changing something other teammates may use, consider duplicating the view then making your own adjustments.
Click the dropdown menu next to a view in the sidebar and choose “Duplicate View.” You may also duplicate a view by clicking on the ellipsis icon next to the view’s name.
This can be especially beneficial when you’re setting up views for each of your team members—simply duplicate the view then change the “owner” field (or whatever you’ve called it in your base.)
Voila! All the items within will be catered to a specific person.
6. Use the right view type
How do you know which view is right for your project?
Quick version: Use Calendar view when you want to see key dates at a glance; Gantt view when you want to understand dependencies between projects and tasks; and Timeline view for checking team members’ capacity and workloads over time.
Calendar view
Because everyone knows how a calendar works, sharing a Calendar view is a great way to give external stakeholders a snapshot of the big picture—especially if they’re not fully integrated into your Airtable base.
In this view, you can show need-to-know information to a range of stakeholders. Let’s say you’re running a conference and your CEO wants to see a few dates and deadlines without too many other details.
Gantt view
Let’s see you want to see which tasks need to be finished before another can be started. Gantt view is perfect for this, as it lets you see how tasks flow and interact with one another.
Or perhaps you need to shift priorities to handle a last-minute project. Gantt view lets you stay agile and see where there’s wiggle room in your project timelines.
If you have multiple projects on your plate, Gantt view makes it easy to view them all at one time.
Timeline view
In this view, grouping records by assignee lets you view each team member’s workload over time. It tells you who’s busy and who has free time.
While Calendar view shows you important dates, Timeline view lets you stack records on top of one another so you can see everything coming up.
7. Access record revision history
Want to see which changes have been made in a view? Access the record revision history for a comprehensive list. First, expand your records, then look for “activity” on the right-hand side of the record. This activity tracker shows every change that’s been made, when they were made, and by whom.
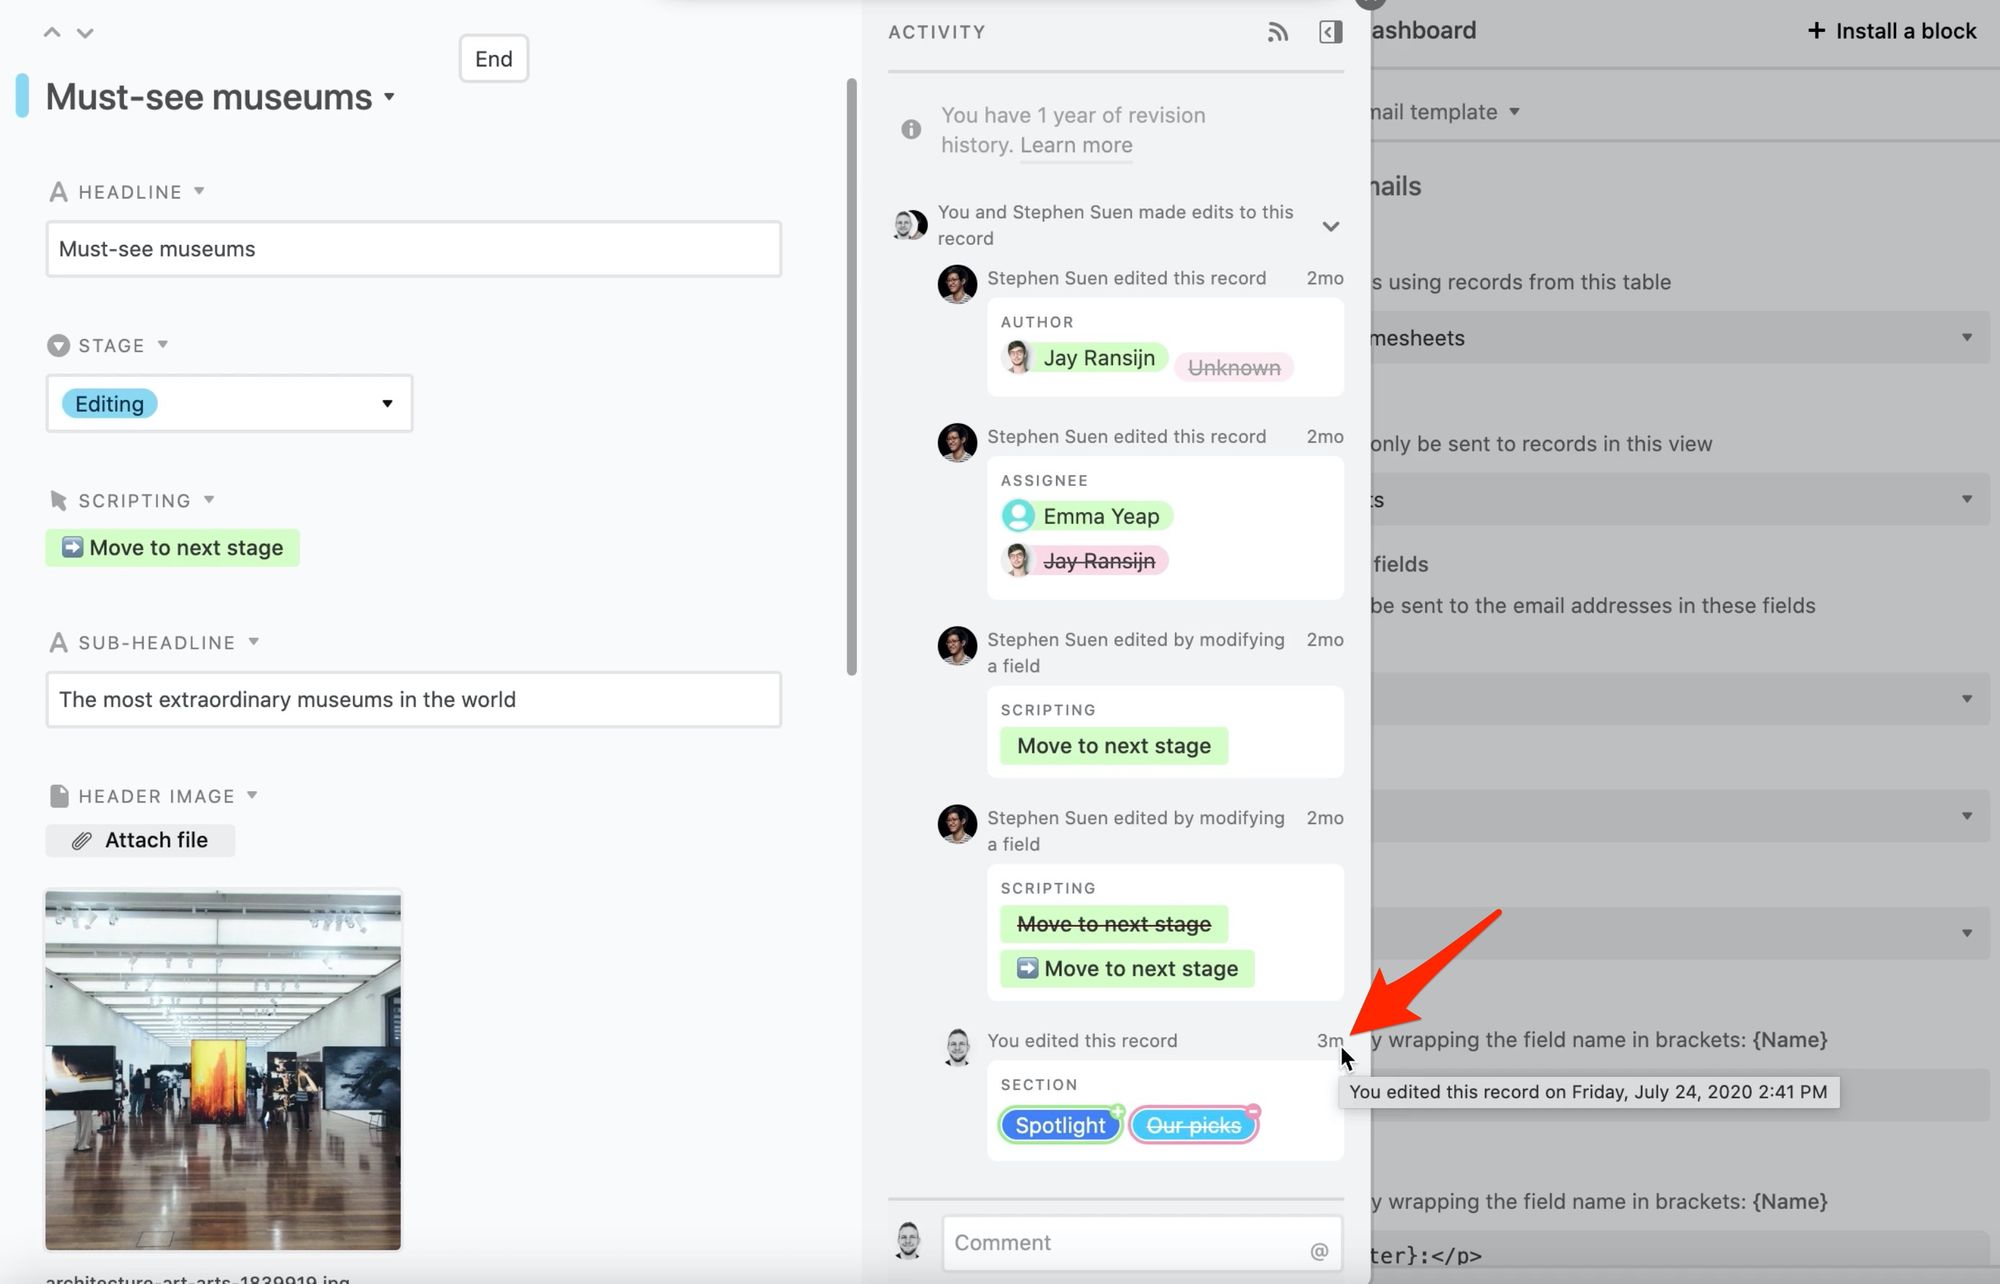
You can also use this activity pane to @mention collaborators right within the record. It’s a great way to keep relevant communication in Airtable.
If you’d like to learn more about Airtable, subscribe to our YouTube channel where you can find even more tips and tricks.