You've got a great idea for an incredible new process. You just know that it'll revolutionize the way your team works. But before you get too far ahead of yourself, you need to ask one very critical question: “How am I going to get the rest of my team on board?”
As with any change management process, it takes diligence and forethought to execute a smooth transition. Charging in as quickly as possible without taking the time to stop and think can cost you later if your teammates get confused or frustrated. Even worse, they might decide to abandon the new process altogether—ultimately wasting everyone's time and energy.
Conversely, the effort you put in at the beginning of the process will pay dividends later. By taking your teammates' needs into account and providing necessary onboarding and educational resources, you'll not only be reducing future stress, you'll also be empowering your team members to take ownership of the new process. That means it's well worth your time to consider what you're going to do to ensure that you're setting your team up for success.
Our customer success team is well-versed in guiding organizations of all shapes and sizes through process changes—here are some of their best tips.
Speak their language
Before trying to get other team members on board with a new process, it's worth taking a step back to think about their specific needs. What's important to them? What do they value? What are their working styles? What resources do they need to perform their roles effectively?
No matter what kind of workflow you're implementing, you'll get more buy-in if you consider the perspective of your audience. That can—and should—mean thinking about your teammates' needs before actually building out the tools you plan on using with them. Even then, once you've finally nailed down how the new process is going to work, there are still steps you can take that will demonstrate to your teammates that you've got their working styles and specific requirements in mind.
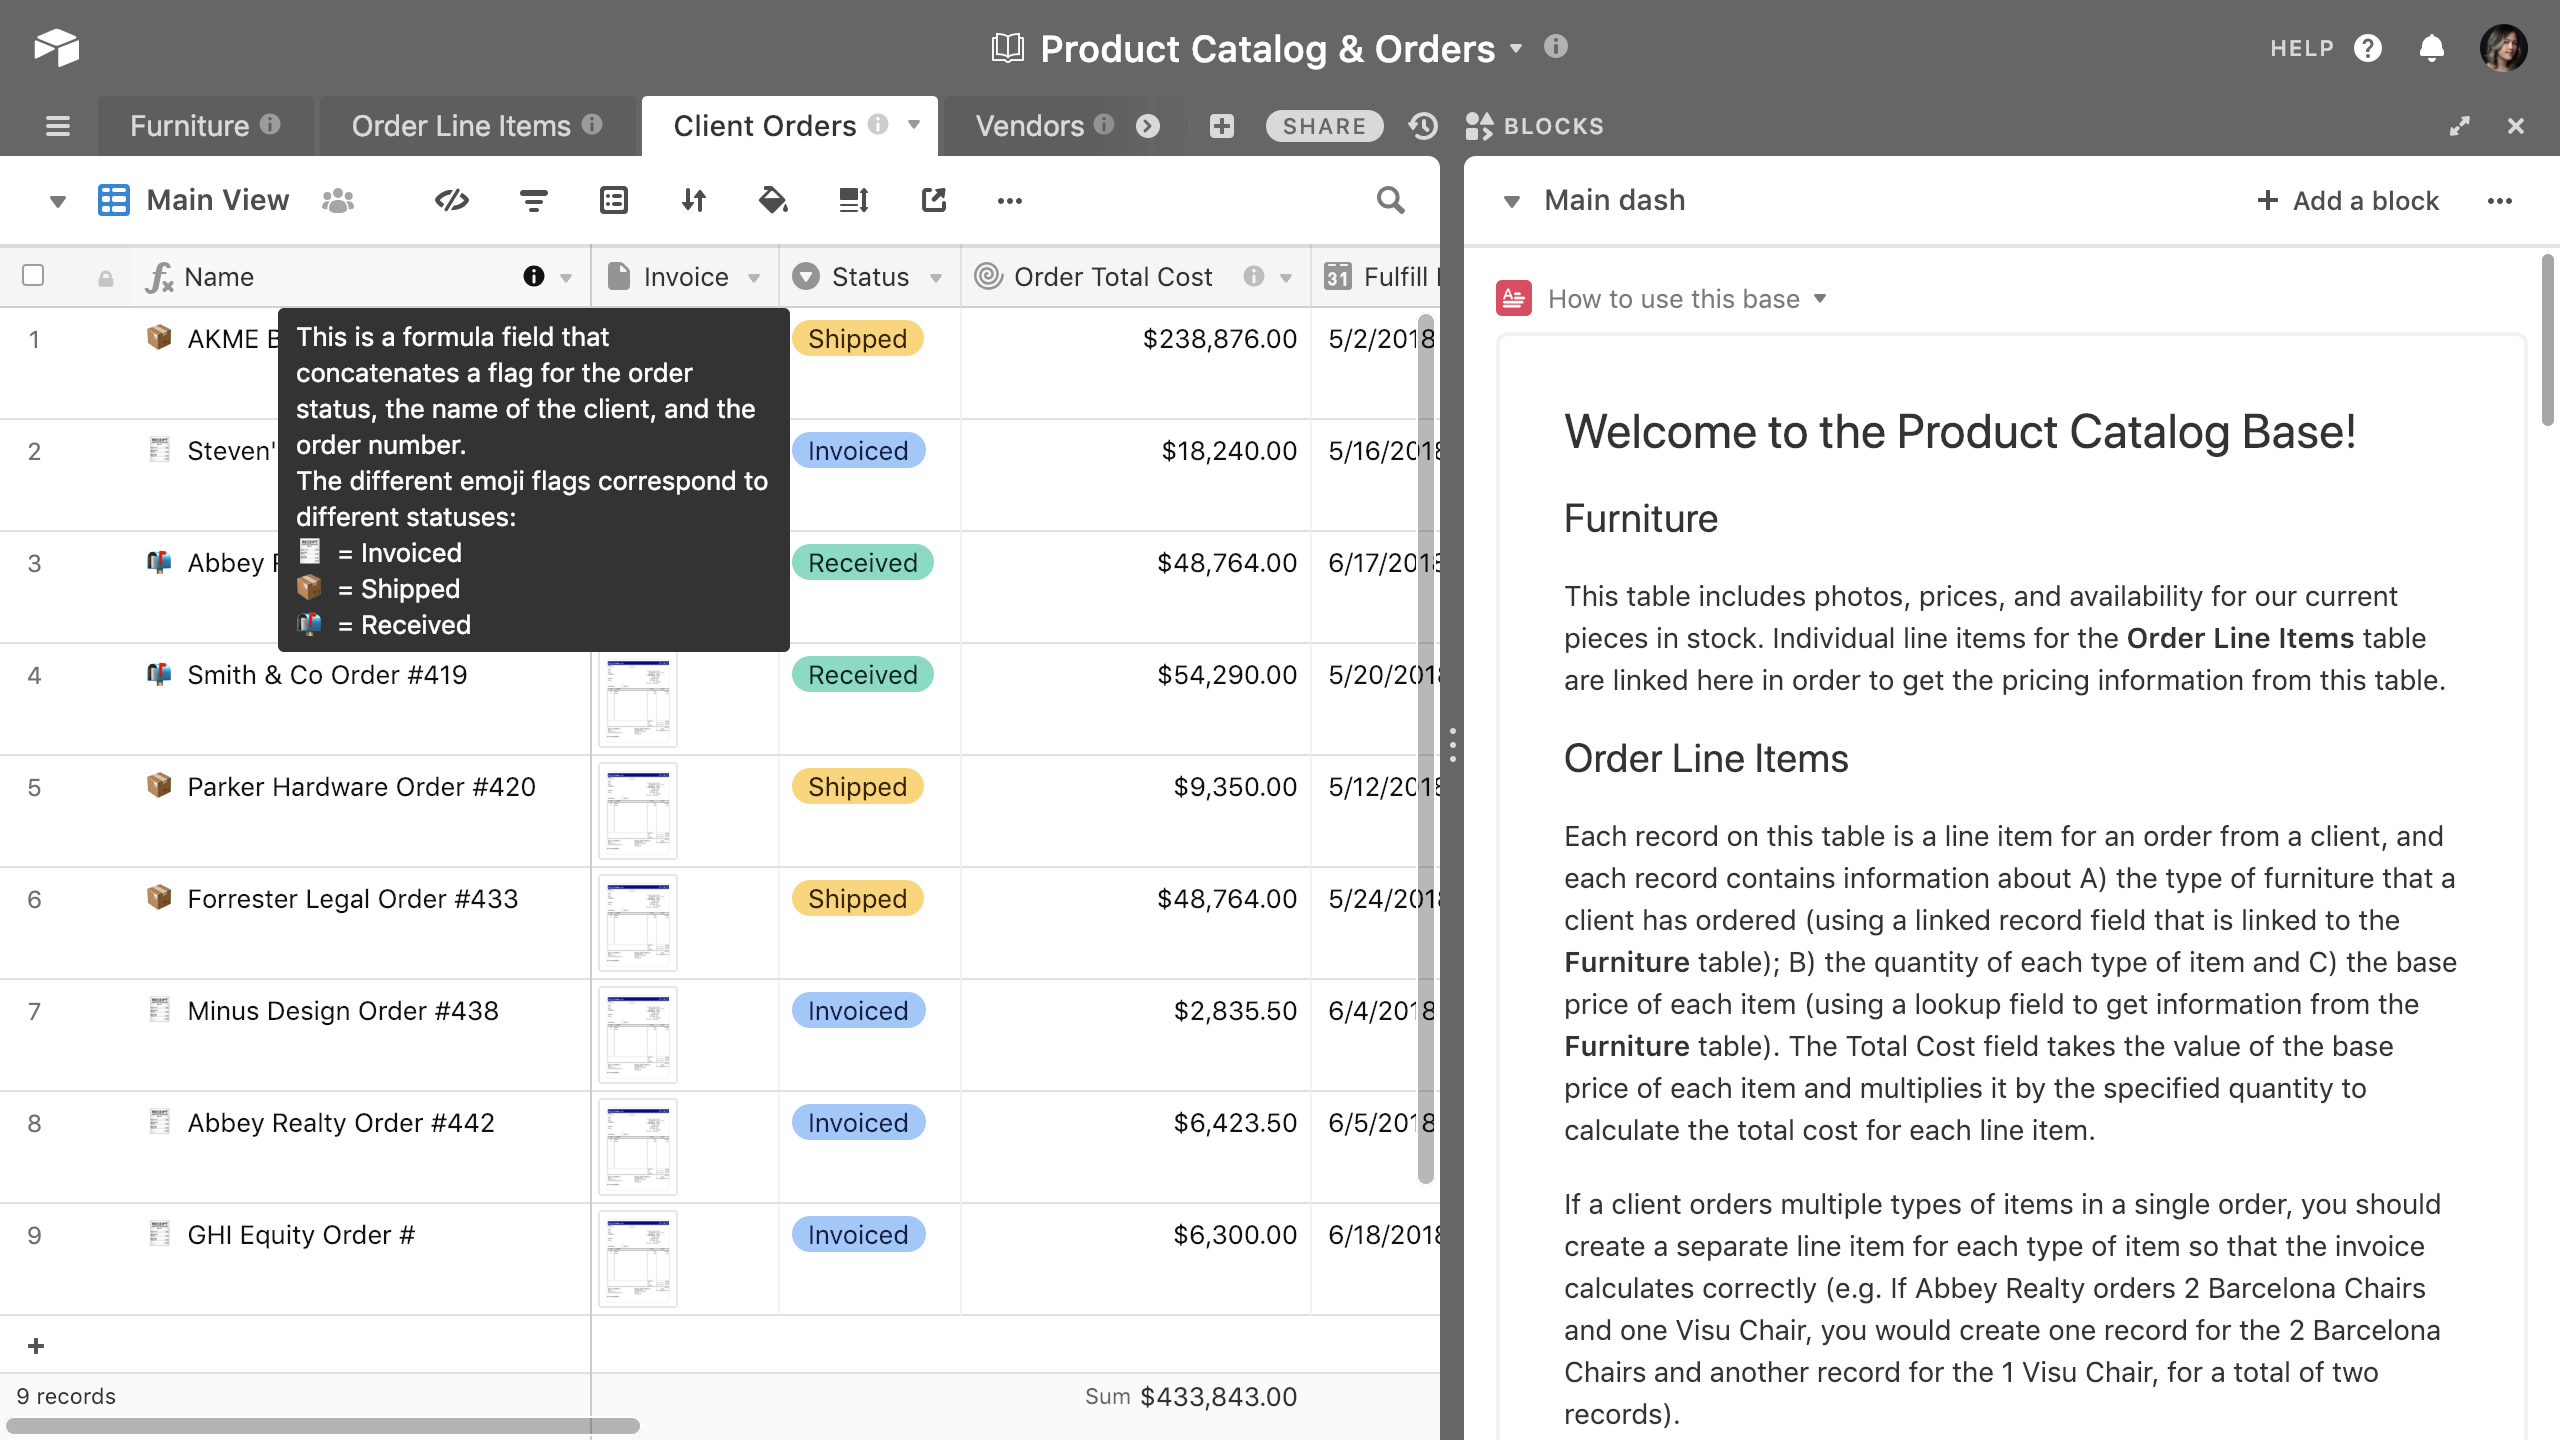
One simple way to show a teammate that you've thought about their specific needs is by pre-creating a custom view for them. Airtable's views allow each team member to see just the information that's relevant for their role, in a way that fits their work style or personal taste. A project manager could get a bird's-eye view of the status of every feature request on an intricate color-coded kanban board; a copyeditor could get a filtered list containing just the pieces that they need to review.
The view you'll make will of course be dependent on the person for whom you're creating it, but here are a couple of suggestions for ways you can customize a view for someone:
- Does this person love spreadsheets? If so, be sure to make a grid view. Will they be working with a ton of dates? Consider making a calendar view. Of course, if they're coming from kanban software, you can make a kanban view too. Whichever you choose, making a view that resembles what your teammate is most comfortable with can help ease the transition process and show that you understand their needs.
- If your teammate only cares about a particular subset of all available projects, try adding filters so that they'll only see the records that are relevant for their workflow. The most obvious example of this is applying a filter so that only records that are assigned to them with a collaborator field will appear, but you can also mix and match filters to show only records designated with a certain priority, or only records that have a deadline before a particular date.
- Relatedly, if your teammate only cares about certain fields—like a deliverable's due date, or a project's status—you can hide the other fields to minimize distractions. Hiding fields is particularly useful if you have complex formula fields that could confuse someone new to your base.
- Try adjusting the order in which fields appear so that the most important fields for your teammate will appear first.
Once you introduce a person to the new Airtable base, be sure to let them know that you've already created a view just for their needs. You can tell them to bookmark that specific view so they can return to it directly whenever they need to; you can also recommend they can turn it into a personal view so nobody else can alter its configuration.
Document your decisions
If you're the person who's set up your team's new workflow, you have a ton of context for the design decisions that you've made. However, in most cases, your teammates will not have that same context, and they won't be able to psychically intuit your intentions just by looking at the finished product. That's why it's critical to provide extensive documentation, primarily to explain how the new process works, but also, in some cases, to explain why the process was designed in a certain way.
And what better way to get your team to actually read the documentation than to build it directly into your new Airtable base?
The base description will automatically open up the first time that your teammate opens the base, so it's a good place to put a broad overview of the base and its purpose and functions. You can also put more specific details of how to use a base inside a description block on a designated blocks dashboard. This way, your teammates can read the description directly alongside the base while they're using it.
You can also put custom descriptions on each table, or take an even more granular approach to documentation by customizing each field's field description. Field descriptions, in particular, can be especially helpful if you have complex formula fields that might require some explanation or additional context.
Make a video tutorial
The more you can document your process in writing, the better—but not everyone learns best through reading. If you or your team members are visual our auditory learners, consider making a video in which you narrate yourself demonstrating the new process. This might sound like a daunting prospect (especially for those of us who cringe upon hearing our own voices), but it will save you time and energy in the long run. Think of it this way—instead of walking each individual member of your team through the new process over and over again, you can just do it once.
If you've never recorded your computer screen, never fear—it's pretty simple, and you probably won't have to download any new software to do it. Despite the name, Windows 10's built-in Game DVR feature doesn't just work for games: it'll also let you record any app window to make a screencast. If you have a Mac, you can make screen recordings easily with QuickTime Player.
You can also try out third-party software if you're looking for more features or greater control over the final product, but you don't need to stress out about production value. The main thing to remember is that it's only your other teammates who will be seeing it, and conveying the workflow accurately is vastly more important than pitch-perfect audio quality or tightly choreographed mouse movements.
Once you've made your video, you can upload it to a private YouTube or Vimeo channel and then place it in an embed block on one of your dashboards—maybe even on the same dashboard containing a description block that explains how to use the base in writing. This way, your collaborators will be able to watch the video and work in the base at the same time.